 ~4 MIN
📌 Quick Summary
| Info | Details |
|---|---|
| Boss Name | Black Cat |
| Raid Tier | The Arcadion – AAC Light-heavyweight (Savage) |
| Item Level Req | 700+ (bypassed with full premade party) |
| Location | Solution Nine (X:22.3, Y:17.1) |
| Unlock NPC | Gabbro |
| Enrage Timer | ~10:05 |
| Minimum DPS Req | 125,500 Raid DPS |
| Drops | Dark Horse Champion’s Accessory Coffers, AAC Illustrated: LHW Edition I |
Need help clearing this fight weekly? Book a Savage Raid clear or weekly farm at Onlyfarms.gg – fast, pro-level service for Gil, Gearing, and more!

1. 🔓 Unlocking AAC M1 (Savage)
To unlock Black Cat, complete the Normal difficulty version of Light-heavyweight, then speak with Gabbro in Solution Nine.
📍 Coordinates: (X:22.3, Y:17.1)
2. 🐈⬛ Raid Lore
As Gabbro listens intently to your tale of survival, a furrow crosses his brow. What did he truly see in his mind’s eye? Was your battle with Black Cat simply reality… or something far more sinister?
3. ⚙️ Pre-Raid Setup and Waymarks
Split your group into two light parties and assign clock spots:
- Supports (Tank/Healer) – Cardinals (N, E, S, W)
- DPS – Intercardinals (NE, SE, SW, NW)
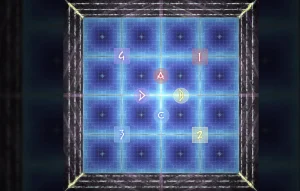 Suggested Waymarks
| Marker | Position |
|---|---|
| A | (100.0, 95.0) |
| B | (105.0, 100.0) |
| C | (100.0, 105.0) |
| D | (95.0, 100.0) |
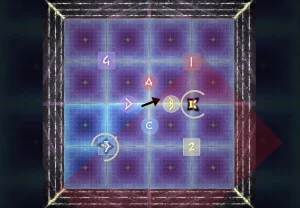
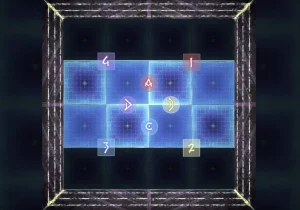
4. 🧩 Phase One – Initial Mechanics
📌 Phase 1 Key Mechanics
| Mechanic | Description |
|---|---|
| Quadruple Crossing | 2x AoE conals + repeats. Bait smart! |
| Biscuit Maker | Double tankbuster. Swap or invuln. |
| One-two Paw | Cleaves left/right – used with Soulshade. |
| Soulshade | Clone repeats stored mechanic (Nine Lives). |
| Double/Quadruple Swipe | Stack markers – support or DPS targeted. |
| Leaping Quadruple Crossing | Same as above, but on new location. |
| Bloody Scratch | Raidwide physical AoE. |
✅ Strategy Overview
- Assign Clock Positions.
- Bait Quadruple Crossing – Role 1 inside hitbox → swap → role 2 baits.
- Use tank invuln or swap for Biscuit Maker.
- Track Soulshade casts and dodge accordingly.
- Stack with light parties or pair partners as needed.
5. 🧠 Phase Two – Mouser 1
The floor is lava (literally). Black Cat breaks the arena. Here’s how to survive.
🧷 Key Mechanics
| Mechanic | Notes |
|---|---|
| Mouser | Breaks panels. Safe tiles follow a pattern. |
| Elevate & Eviscerate | Clone knocks targeted players – direction matters! |
| Shockwave | Center knockback. |
| Grimalkin Gale | AoEs on all players – magic vuln debuff. |
✅ Strategy Tips
- Watch tile breaks: Follow diagonal patterns for safety.
- Clone jumps behind target and knocks them up.
- Positioning tip: Face diagonal corners to stay put.
- Stacking logic: Tanks/Melee inside – Ranged/Healers outside.
- After knockbacks, spread for Grimalkin Gale.
6. ⚔️ Phase Three – Soulshade Encore
Time to remember… and remember some more. Double Nine Lives in play.
🧠 Mechanics Overview
| Mechanic | Description |
|---|---|
| Leaping One-two Paw | Cleave from new location. |
| Tempestuous Tear | Line stack on both healers – ~420k damage. |
| Nailchipper | Prey markers on 4 players – large AoEs. |
🗒 Strategy Checklist
- Callouts are key: Record tether clone positions (A/C), direction, safe spot.
- Stack groups: True North / South positioning for cleaves and stacks.
- Nailchipper baits: Role without marker always baits first on intercardinals.
7. 🧩 Phase Four – Mouser 2
Second Mouser – now with bonus pressure.
⚠️ New Mechanics
| Mechanic | Notes |
|---|---|
| Splintering Nails | Conal AoEs on 1 Tank, 1 Healer, 1 DPS. |
| Overshadow | Heavy stack AoE – 800k+ damage. |
✅ Quick Tips
- Handle Elevate & Eviscerate as before.
- Spread for Splintering Nails: Tanks left, Healers center, DPS right.
- Stack for Overshadow, then reposition quickly.
Need help with tight enrage timers? Buy Gil to upgrade gear at Onlyfarms.gg!
8. 🐾 Final Phase – Phase Five
If you’ve got the DPS, this phase can be skipped. If not – stay sharp!
💣 New Mechanics
| Mechanic | Description |
|---|---|
| Raining Cats | Tethers + unmarked stacks. Rotate groups to bait tethers. |
| Predaceous Pounce | Copycat dashes with large AoEs – ends with One-two Paw. |
✅ Execution Plan
- Split into Far/Near stacks: Use light parties or TMRH (Tank/Melee, Ranged/Healer).
- Rotate tether soakers: Use boss ring positioning to avoid double tethers.
- Invuln Strategy: MTTT (melee-tank-tank-tank) can skip some tethers entirely.
- Final dodge: Safe side for Pounce, then cross after AoEs.
9. 🎁 Loot Table
| Clear Count | Loot |
|---|---|
| First-time (0 clears) | 4x Dark Horse Accessory Coffers |
| 1–4 cleared | 2x Coffers |
| 5+ cleared | No coffers |
| Weekly Token | AAC Illustrated: LHW Edition I (4 = 1 guaranteed accessory) |
10. 📌 PF Notes (Party Finder Variations)
| Mechanic | PF Common Setup |
|---|---|
| Quadruple Crossing | DPS Bait → Support CCW (common strat) |
| Nailchipper w/ Crossing | Non-marked role baits True North |
| Splintering Nails | THD order (Tanks-Healers-DPS) |
| Raining Cats | Tanks may bait 3rd & 4th stacks if invulns available |
🚀 Onlyfarms.gg Services to Make Savage Easier
| Service | Description |
|---|---|
| Gil | Gear up faster, skip the grind |
| Raids | Savage clears, coaching, weekly lockouts |
| Leveling | Skip queues, hit 100 fast |
| Extreme Trials | Mount farms, weapons, and more |
| Glamour & Gearing | Look good and perform well |
| PvP & Reputation | Unlock everything effortlessly |
| Dungeons & Mounts | All old & new content covered |
🎯 Visit Onlyfarms.gg – the ultimate FFXIV boosting hub. Whether you’re gearing for Savage or chasing mount glam, we’ve got your back.