 ~26 MIN
Arc Raiders: How to Beat Every ARC Enemy
Enemies in Arc Raiders might look terrifying at first glance, but every single ARC unit has clear, exploitable weaknesses that can turn these walking death machines into scrap metal. Learning how ARC enemy behavior works, recognizing their attack patterns, and consistently aiming for weak spots will massively increase your survival rate and make each raid far more efficient.
By understanding which body parts are armored, which are vulnerable, and how sound and aggro work in Arc Raiders, you can take down even elite ARCs with far less ammo and risk.
Key Takeaways
- Every ARC unit in Arc Raiders has exploitable weaknesses.
Look for yellow weak spots on their bodies — these glowing components are critical points. Hitting them deals significantly increased damage, letting you melt even tanky ARCs much faster. - Most ARCs are nearly deaf, but one enemy breaks this rule.
Standard ARC units have poor hearing and won’t instantly detect you from far away. However, the Snitch drone can hear from long distances, quickly spot you, and call in reinforcements if left alive. Always prioritize taking it out first. - Enemy groups don’t share alerts across the entire map.
Engaging one group of ARCs will not automatically aggro every enemy on the map. You can safely clear one pack at a time, reposition, and continue your route without turning the whole area into chaos — as long as you control noise and avoid Snitches.
ARC Weaknesses in Arc Raiders
ARC weaknesses in Arc Raiders are something every player should understand as early as possible. Knowing where to shoot and what each armor type means can save you a lot of stress, ammo, and failed extractions.
The game uses a simple color-coded system to show how damage works on ARC units:
- White-colored surfaces represent soft, unarmored areas. These zones take full damage from your weapons. If you can’t reach a weak spot, aim for white areas to avoid wasting ammo on heavy plating.
- Grey plating indicates thick, reinforced armor. Shooting grey parts will result in reduced damage, especially with low-caliber weapons. To reliably break through this armor, you’ll need armor-piercing ammunition, explosives, or high-caliber weapons.
- Yellow components are the true ARC weak points. These glowing or highlighted parts mark an ARC’s critical weak spots, and hitting them can deal massive bonus damage.
Weak spots are usually located on the back side of enemies, around joint connections, or near their cores and power modules. Learning these locations and repositioning to get a clear angle is key. If you can consistently land shots on these yellow areas, you’ll be able to destroy even heavily armored ARCs in seconds instead of wasting half your magazine.
To summarize, depending on the color of the part you’re shooting, you will deal:
- White areas: full, normal damage.
- Grey areas: heavily reduced damage due to armor.
- Yellow areas: greatly increased damage to critical weak points.
Mastering this color system and always aiming for yellow whenever possible is one of the most important steps toward beating every ARC enemy in Arc Raiders.
Arc Raiders ARC Strategies
Every ARC type in Arc Raiders has its own movement pattern, attack style, and specific weak points that you can exploit. Understanding how each ARC behaves and where to hit them is crucial if you want to clear raids efficiently and avoid unnecessary deaths. Instead of spraying bullets randomly, you should focus on learning enemy animations, attack telegraphs, and exposed components so you can react faster and deal more damage with fewer shots.
Taking down ARCs isn’t just about survival either — it’s also very profitable. Destroyed ARCs drop valuable components, crafting materials, and progression items that you’ll need to upgrade your gear, unlock new blueprints, and improve your loadout. The more familiar you are with each ARC type, the easier it becomes to farm them safely and turn every encounter into an opportunity for growth rather than a risk.
| ARC | How To Defeat | Loot |
|---|---|---|
| Wasp | Destroy its thrusters. Keep moving and use cover to avoid gunfire. | ARC Alloy, ARC Powercell, Wasp Driver. |
| Hornet | Use Heavy Ammo to destroy the front thrusters or aim at the back thrusters with any weapon. | ARC Alloy, ARC Powercell, Simple Gun Parts, Hornet Driver. |
| Leaper | Avoid its jump and shockwave attacks, then attack while it recovers from a leap. | ARC Alloy, Advanced ARC Powercell, Mechanical Components, Leaper Pulse Unit. |
| Sentinel | Approach from cover and aim for its glowing yellow fuel tank. | ARC Alloy, Advanced ARC Powercell, Sentinel Firing Core. |
| Rocketeer | Target its thrusters to bring it down. Use dodge rolls or cover to evade missiles. | ARC Alloy, Advanced ARC Powercell, Rocketeer Part. |
| Pop | Destroy from range before detonation. | ARC Alloy, ARC Powercell, Crude Explosives, Pop Trigger. |
| Tick | Shoot immediately before it latches onto you. Move behind cover or away from sound cues to avoid ambushes. Unarmored and easy to kill. | ARC Alloy, ARC Thermo Lining, Tick Pod. |
| Turret | To take down a Turret, wait for its scanning beam to pause, then pop out from cover and shoot it. | ARC Alloy, ARC Powercell. |
| Fireball | Shoot the core when the front panel opens. They are weak to most weapons. | ARC Alloy, ARC Powercell, Crude Explosives, Fireball Burner. |
| ARC Surveyor | Shoot the core when it begins scanning. Heavy Ammo helps to kill it faster. Use sniper rifles. | ARC Alloy, ARC Powercell, Surveyor Vault. |
| Bastion | Target the yellow leg joints or the backside canister to stagger it. Shoot the exposed rear barrel for heavy damage. | ARC Alloy, Advanced ARC Powercell, Bastion Cell. |
| Bombardier | Shoot at the yellow kneecaps to slow it and expose weak points. Hit the rear cylinder to disable it quickly, especially right after it fires. | ARC Alloy, Advanced ARC Powercell, Bombardier Cell, Launcher Ammo. |
| Snitch | Destroy or disable thrusters quickly to prevent it from calling reinforcements. | ARC Alloy, ARC Powercell, Snitch Scanner. |
| Queen | Avoid mortars, lasers, and EMP waves, then focus fire on weak spots when they become exposed. | ARC Alloy, Advanced ARC Powercell, Advanced Mechanical Components, Advanced Electrical Components, Queen Reactor. |
| Matriarch | Take care of additional ARCs that will be spawned by the Matriarch and shoot its glowing core. | Matriarch Reactor, Magnetic Accelerator, ARC Alloy, ARC Circuitry, ARC Performance Steel, Advanced ARC Powercell, ARC Flex Rubber, ARC Synthetic Resin. |
| Shredder | We will list the Shredder strategy as soon as it becomes available. | TBA. |
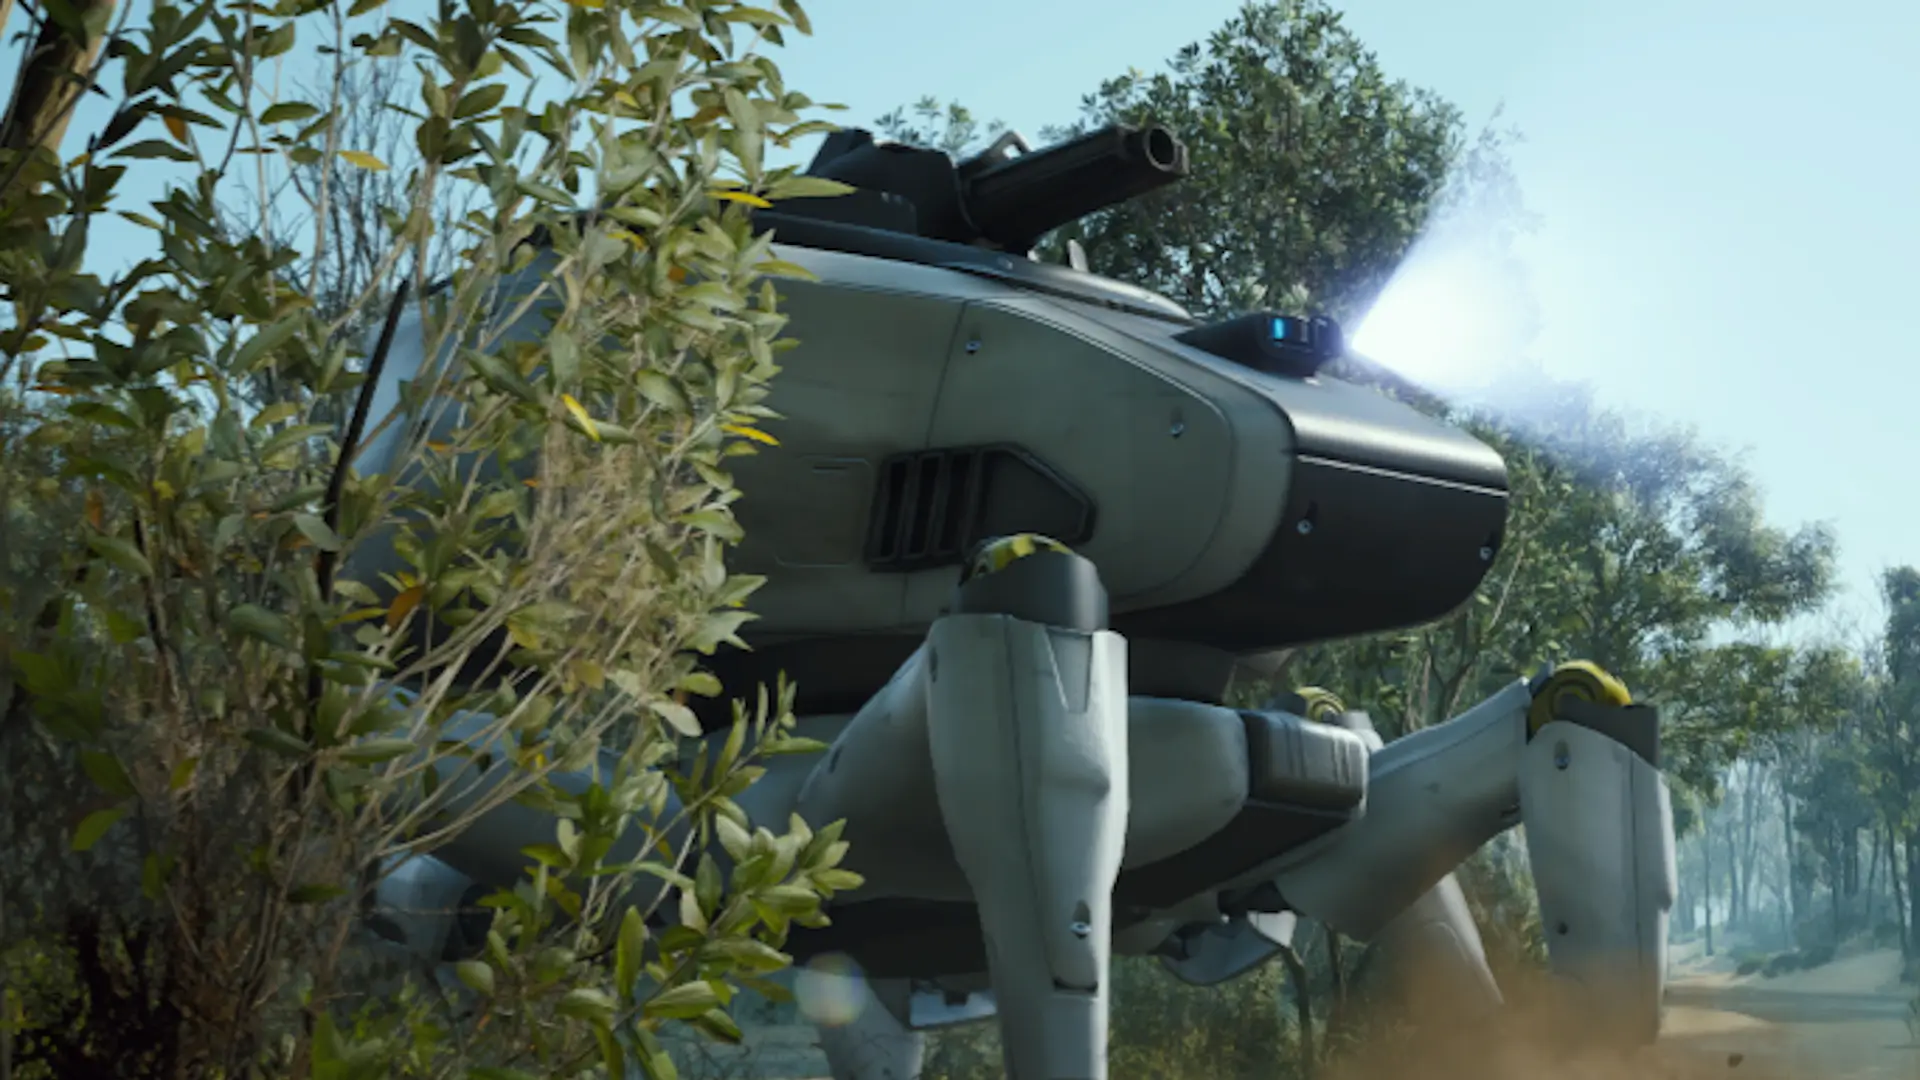
Wasp

The Wasp is the most common ARC drone in Arc Raiders and a unit you’ll encounter in almost every raid, especially in open areas and along patrol routes. These small flying robots usually move in tight groups, often accompanied or led by a stronger Hornet, which makes them dangerous when ignored.
Wasps are highly reactive to sound and movement. They will quickly drift toward your position if they hear gunfire, explosions, or other loud noises. Even sprinting too close to them can cause a patrol to break formation and investigate your location, potentially exposing you to more enemies in the area.
Fortunately, Wasps are fragile and lightly armored. Their thin hull makes them easy to destroy if you focus on their weak points. The key is to aim at their four exposed thrusters. A short, controlled burst from a rifle, SMG, or any precise weapon aimed at these engines is usually enough to bring them down instantly. When you’re dealing with multiple Wasps, try to chain quick kills by snapping from one thruster to the next before they spread out or call attention to your position.
Weak Spots: Thrusters
Hornet
The Hornet is a more dangerous variant of the Wasp and acts as a heavier combat drone in Arc Raiders. Equipped with a rapid-fire machine gun, it can shred your armor and shields in seconds if you stay in the open. Hornets are often found leading groups of Wasps or patrolling key objectives and chokepoints, making them a high-priority target in any engagement.
Unlike the basic drone, the Hornet’s front thrusters are protected by reinforced armor plating. This means that shooting it from the front and trying to bring it down through raw damage is inefficient and will waste ammo. Instead, you need to think more tactically and positionally.
The best way to deal with Hornets is to flank them or wait for them to expose their back. When a Hornet turns, retreats, or adjusts its position, its rear thrusters become visible and unarmored. These exposed engines are its main weak point. If you can maintain good cover, bait its fire, and then strafe or reposition to its side or rear, you’ll be able to quickly disable it with a few accurate shots before it can return fire effectively.
Weak Spots: Back Thrusters
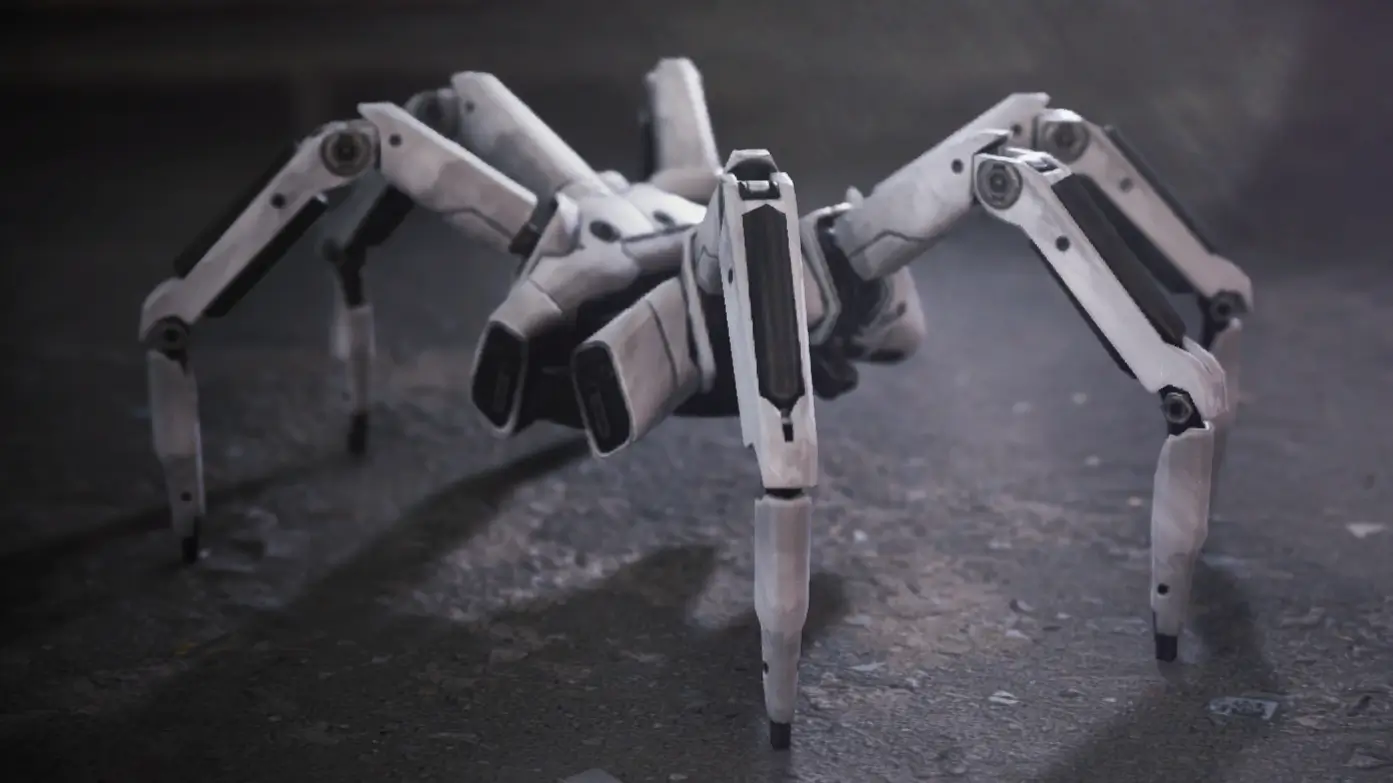
Leaper
Leapers are fast, four-legged ARC units designed to close the distance quickly and pressure you in close-quarters combat. They specialize in high-mobility melee and shockwave attacks, making them especially dangerous if you’re caught in tight spaces or backed into a corner.
Leapers will jump across cover, rooftops, and obstacles, then slam into the ground to unleash a shockwave AoE attack that can damage and stagger you. The key to fighting them is to stay calm and watch their animations. When a Leaper prepares to leap, get ready to dodge or reposition, and when it lands, that’s your best window to strike.
Right after a Leaper lands and begins to recover from its jump attack, it becomes vulnerable. Timing your shots immediately after they hit the ground can stagger or interrupt them, giving you a safe opportunity to pour in damage. Try to keep moving, avoid corners, and use vertical terrain or dodge rolls to maintain distance when they charge.
Their weak points are located on their legs and faceplate. Focusing fire on the legs can slow them down and make their movement less threatening, while shots to the faceplate can deal heavy damage and potentially stagger them faster. Combining smart positioning with accurate shots to these areas will allow you to control Leapers before they overwhelm your squad.
Weak Spots: Legs, Faceplate**
⚙️ Combine tactical mastery with structured progression using Arc Raiders Leveling — faster unlocks, better synergy, and smarter XP routes.
Sentinel
Sentinels act as stationary defense systems in Arc Raiders, guarding some of the highest-value loot locations across the map. You’ll often find them mounted on towers, rooftops, and elevated platforms, such as the top of Pilgrim’s Peak in the Blue Gate region. Because of their fixed position and high vantage points, Sentinels have exceptional visual range and can spot you from very far away, making stealthy approaches and open-field movement extremely risky.
If a Sentinel locks onto you in the open, its sustained fire can quickly shred your health and armor, especially on higher difficulties. The safest strategy is to approach using solid cover, staying behind rocks, walls, and structures to break line of sight. Get as close as possible without exposing yourself, then peek out just long enough to line up a shot on the glowing yellow fuel tank at its base.
Landing a few accurate hits on this tank will cause massive damage or trigger an explosion that disables the Sentinel almost instantly. As long as you respect its sightlines and avoid sprinting across open ground, Sentinels become manageable targets rather than raid-ending threats.
Weak Spot: Yellow Fuel Tank
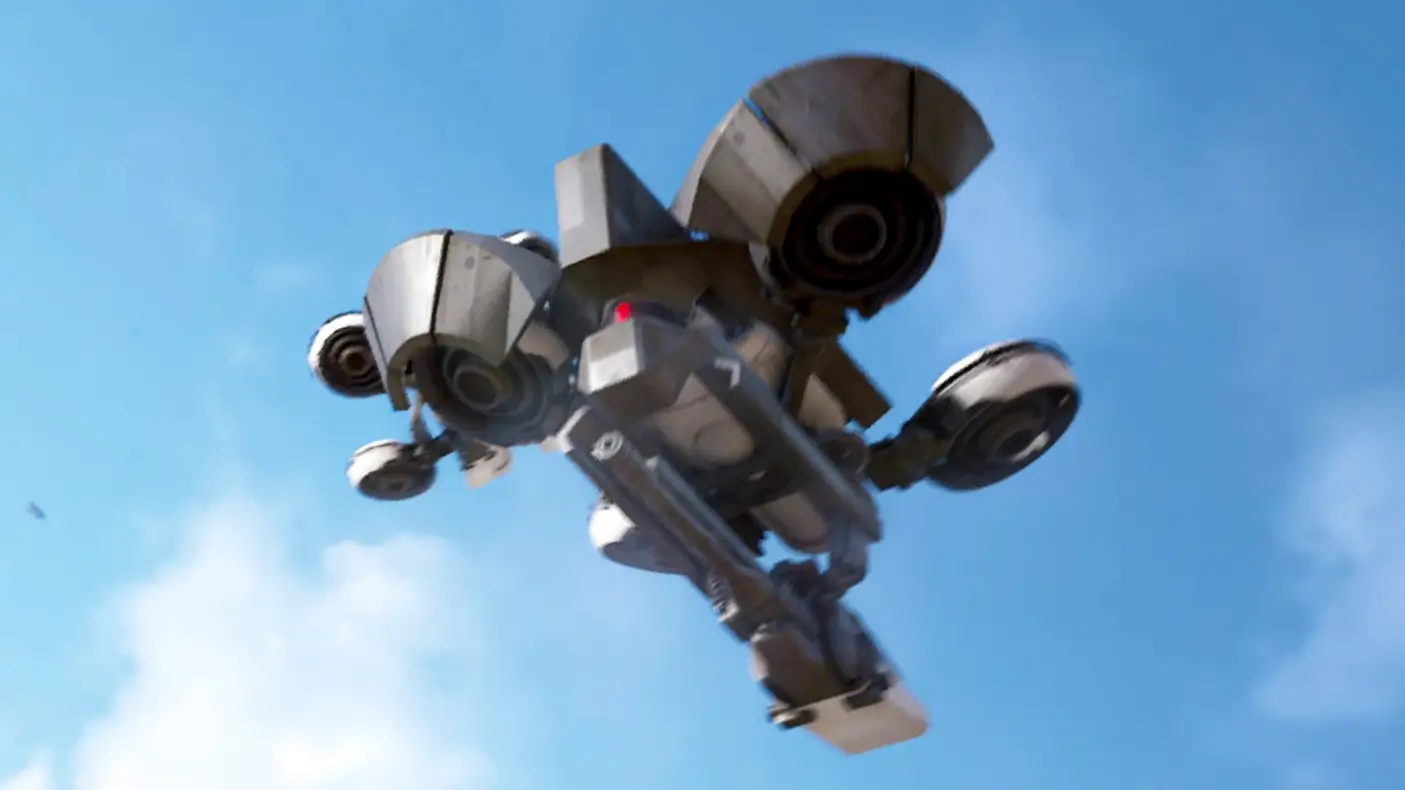
Rocketeer
The Rocketeer is one of the most dangerous standard ARC units you’ll encounter in Arc Raiders. While they are less common than Wasps or Hornets, every appearance is a serious threat, especially in higher-difficulty zones like Blue Gate, where their damage output and durability scale up significantly.
Rocketeers are heavily armored and equipped with devastating explosive weaponry that can wipe out an unprepared team in seconds. Trying to fight them with regular weapons and standard ammo will feel extremely inefficient, as normal rounds barely scratch their armor. To deal with them effectively, you’ll need to bring armor-piercing ammunition, explosives, or high-caliber weapons specifically suited for breaking through heavy plating.
The key to beating a Rocketeer is to focus your fire on its thrusters. These components are its primary weak spots. Once you destroy the thrusters, it often triggers a chain reaction of explosions that rapidly tears through the Rocketeer’s health bar and can even cause it to self-destruct. Coordinate with your team, concentrate fire on the engines, and avoid staying grouped up where you can be hit by splash damage from its rockets.
Weak Spots: Thrusters
Pop

Pops are small, rolling drones that specialize in ambush and close-range pressure. You’ll mostly encounter them inside large buildings, underground facilities, and high-value interior zones with strong loot potential. Their compact size, speed, and erratic movement make them unpredictable and easy to overlook, which is exactly what makes them so dangerous.
If you ignore a Pop or fail to notice it in time, it will rapidly roll toward you and self-destruct at close range, dealing heavy damage that can instantly down you or severely injure your entire squad if you’re clustered together. However, Pops are not durable. They have very low HP and can be destroyed in just a few well-placed shots from almost any weapon.
The most important survival tip is to use audio cues. Pops emit a distinct loud rolling noise as they move, allowing attentive players to detect them early, turn around, and eliminate them before they get too close. Always be ready to backpedal, dodge, or jump aside when you hear that rolling sound, and clear them quickly before focusing on larger ARCs.
Weak Spot: No Specific Weak Spots
Tick
Ticks are another small and sneaky enemy type in Arc Raiders, most commonly found clinging to ceilings, beams, and walls inside dark, enclosed environments. They tend to lie in wait in tight corridors, staircases, and upper floors of structures such as the Dam Control Tower, where visibility is low and players tend to drop their guard.
Their main threat comes not from raw damage or durability, but from surprise and positioning. Ticks like to ambush unsuspecting players, dropping down from above or lunging from walls when you’re focused on looting or fighting other enemies. If you’re not paying attention, they can quickly jump you at close range and add chaos to an already dangerous situation.
The good news is that Ticks are extremely fragile. A short burst or a few single shots from any firearm is enough to destroy them. To stay safe, you should constantly scan ceilings, ledges, and corners when entering new rooms, and make a habit of listening for their faint mechanical whirring sound. This audio cue often plays just before they jump at you, giving you a small but crucial window to react, aim up, and eliminate them before they connect.
Weak Spot: No Specific Weak Spots
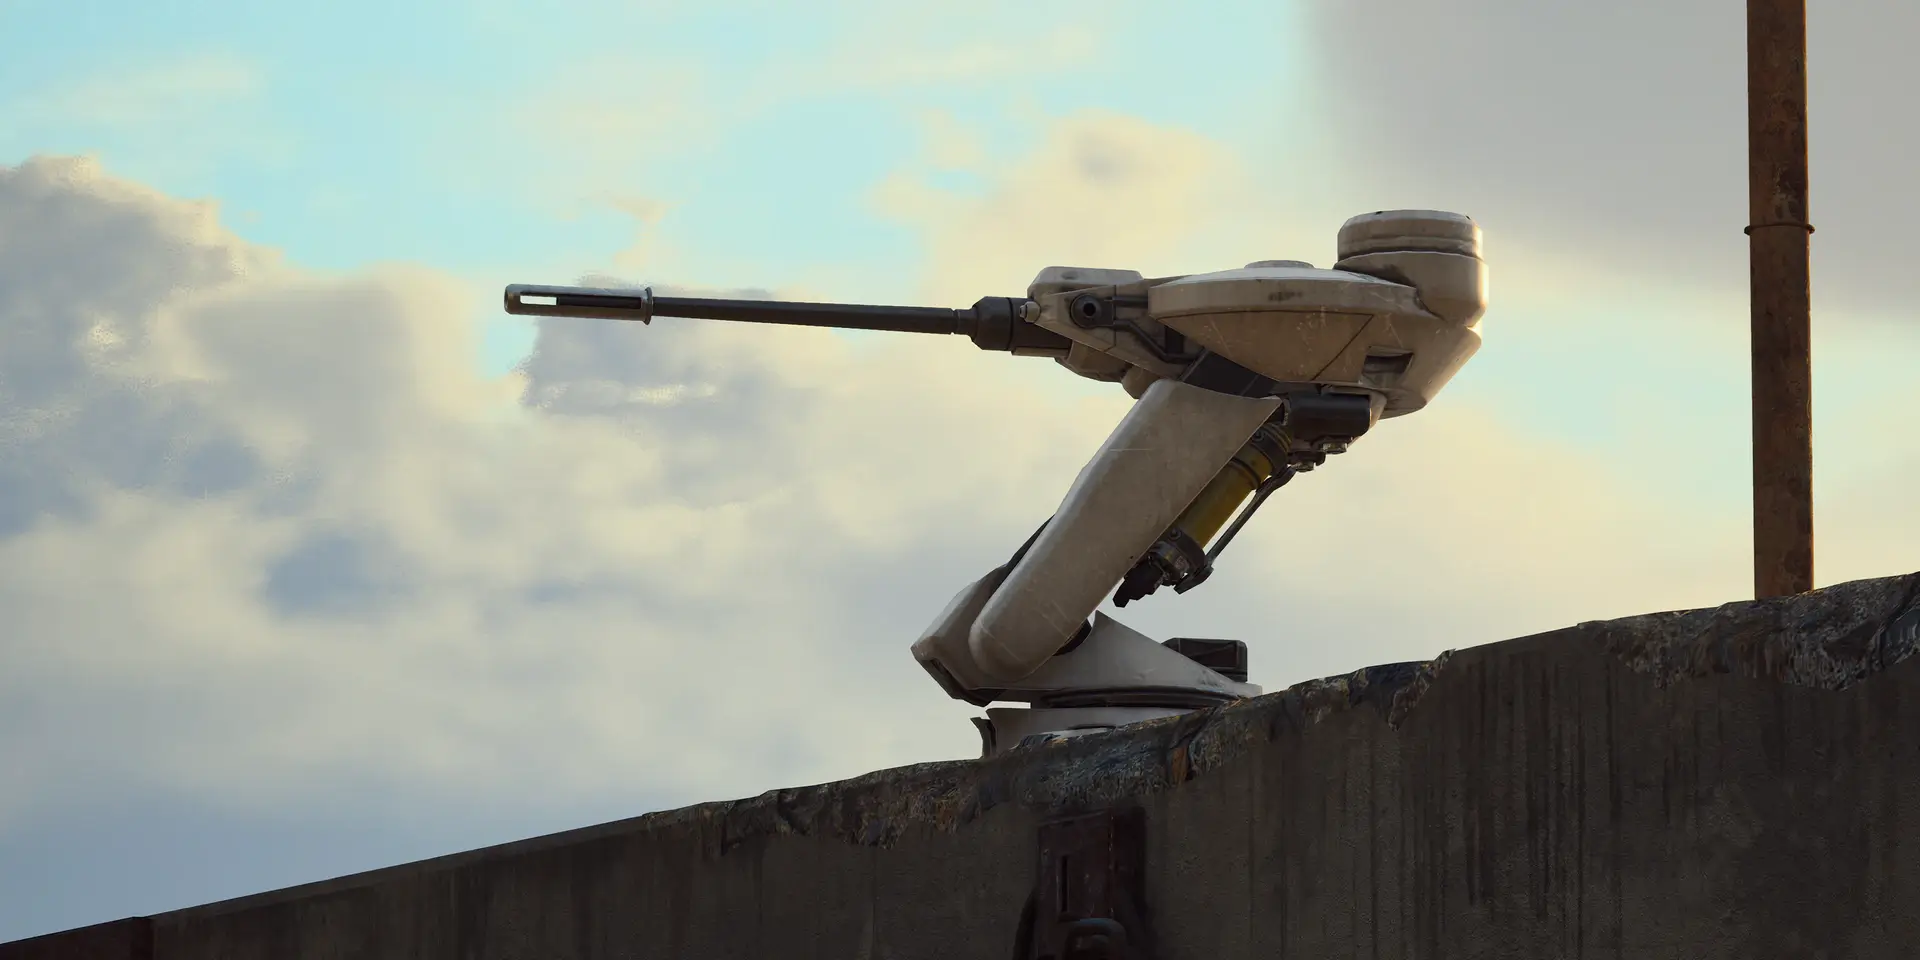
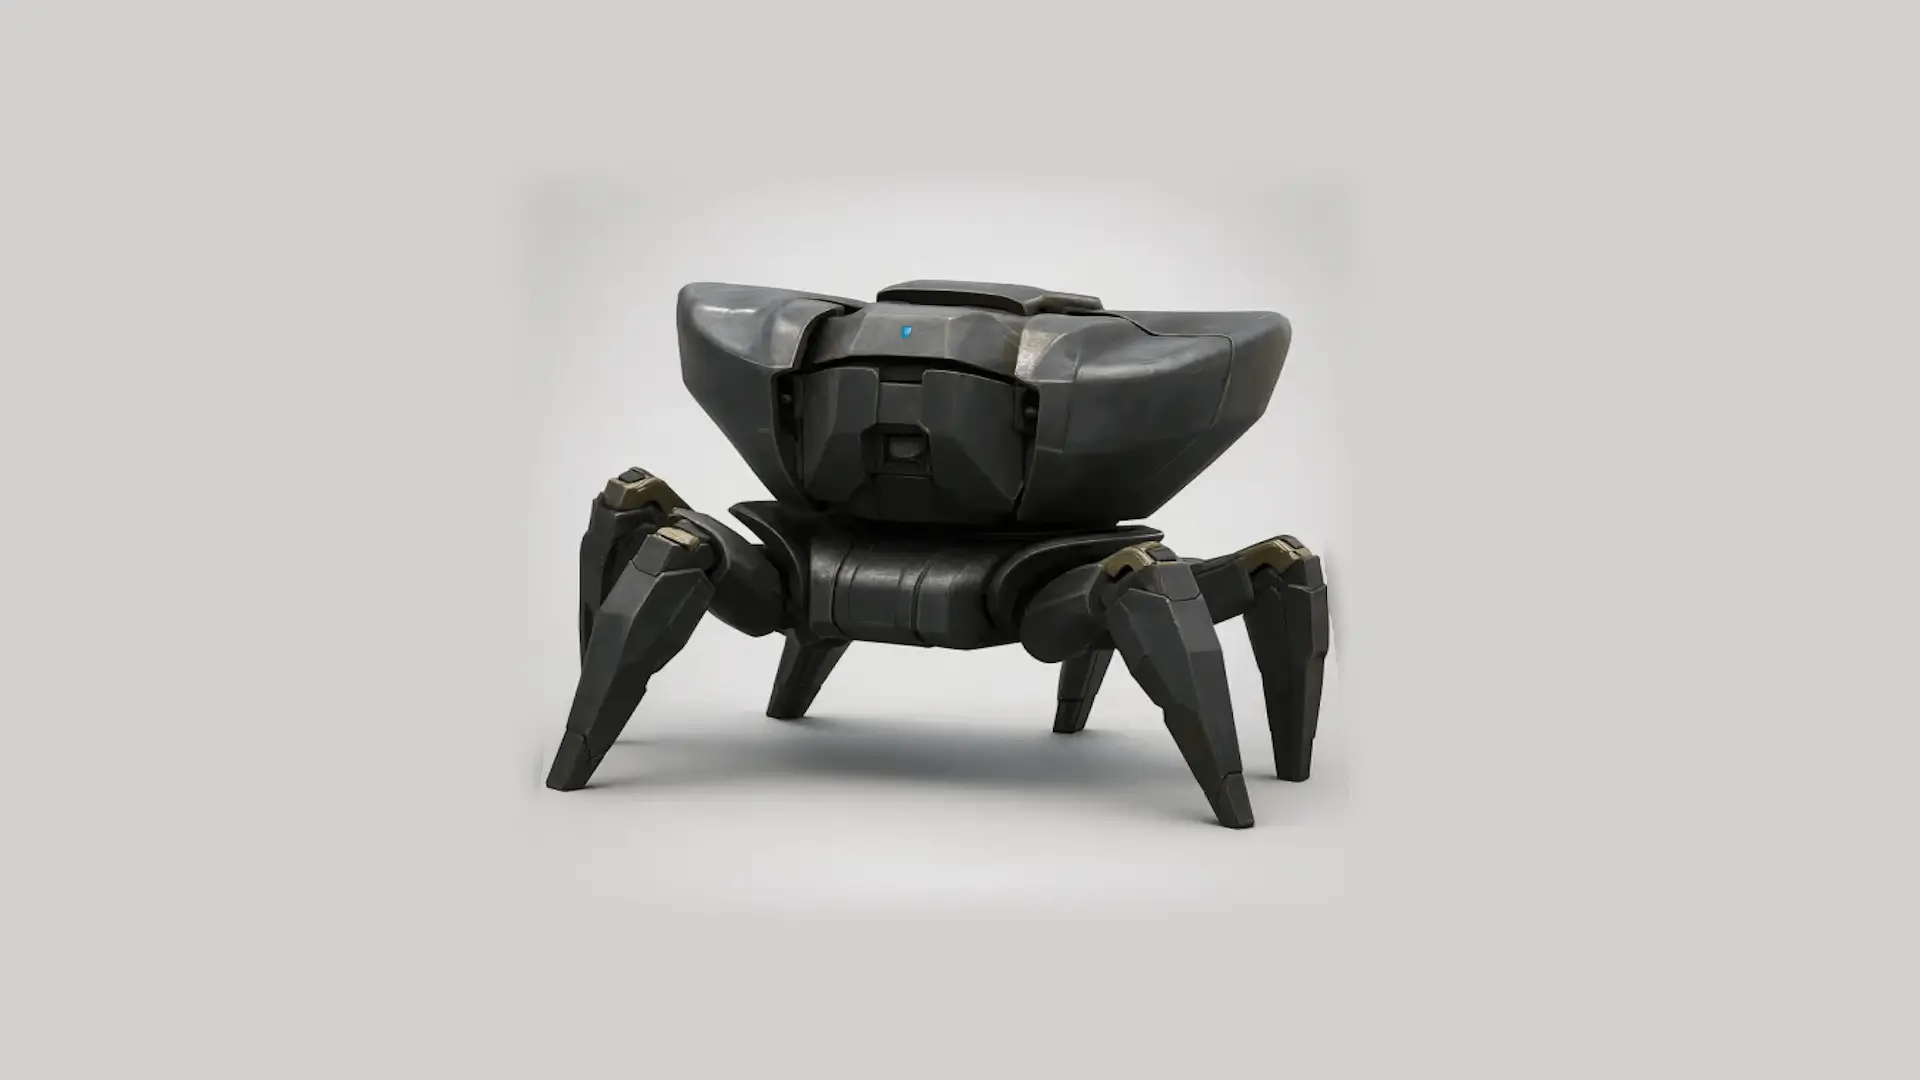
Turret
Turrets are automated defensive units scattered throughout medium and high-value loot areas on all Arc Raiders maps. You’ll usually encounter them near key chokepoints, entrances, and high-risk corridors where players are forced to pass through. Unlike Sentinels, Turrets don’t scan the entire area visually — instead, they only react when you step into their rotating scanning beam.
The good news is that Turrets are easy to spot thanks to this visible beam and their predictable rotation pattern. The bad news is that once the beam touches you, they react instantly and start firing with extremely high accuracy. Even though Turrets don’t have a lot of health, their burst damage is brutal and can kill you in seconds if you’re caught in the open or hesitate behind weak cover.
The safest way to deal with Turrets is to study their rotation, wait for them to finish a firing burst, and then quickly peek from solid cover to return fire. Use corners, crates, and walls to break line of sight and only expose yourself during the window between bursts. A few well-aimed shots from almost any weapon are usually enough to destroy them, as long as you don’t panic and trade face-to-face.
Weak Spot: No Specific Weak Spots
Fireball

The Fireball is a rolling interior ARC unit commonly found in high-loot indoor zones, similar to Pops. However, unlike Pops, Fireballs do not self-destruct on impact. Instead, they are equipped with a dangerous flamethrower system that can set you on fire, dealing continuous damage over time and forcing you out of cover.
Fireballs roll around hallways, storage rooms, and tight spaces where it’s easy for them to close the gap. If you allow them to get too close, they’ll ignite you and quickly burn through your health. The strategy to handle Fireballs is very similar to dealing with Pops: you must rely on sound awareness and early detection.
They emit a distinct rolling noise when moving, which gives you a valuable warning. As soon as you hear it, stop pushing blindly forward, turn toward the sound, and destroy them before they reach effective flamethrower range. Because Fireballs aren’t heavily armored, they go down fairly quickly if you focus fire on their exposed core, especially with mid-range rifles or shotguns in tight corridors.
Weak Spot: Exposed Core
Surveyor
Surveyors are rare but extremely valuable ARC drones that act like mobile loot piñatas for players who manage to track them down. They reward you with a wide variety of crafting materials and components, making them prime targets whenever they appear. In terms of movement, Surveyors behave similarly to Pops and Fireballs — but they are much faster and more evasive, which makes them easy to miss.
You’ll mostly find Surveyors patrolling high-value areas, moving quickly between structures or along interior paths. Spotting them can be tricky because of their speed and size, but they occasionally pause their route to emit a bright blue scanning beam into the sky. This beam acts as a visual signal:
- If you see that blue light column, it means a Surveyor is nearby.
- That’s your cue to start scanning the area, listening closely, and preparing a long-range weapon.
Because Surveyors tend to flee as soon as they feel threatened, trying to chase them down with short-range guns usually doesn’t end well. The most reliable strategy is to equip a sniper rifle or another accurate long-range weapon, line up on their exposed core, and take them out quickly before they dart behind cover or escape. A few precise shots are all you need to secure the kill and claim their valuable drops.
Weak Spot: Exposed Core
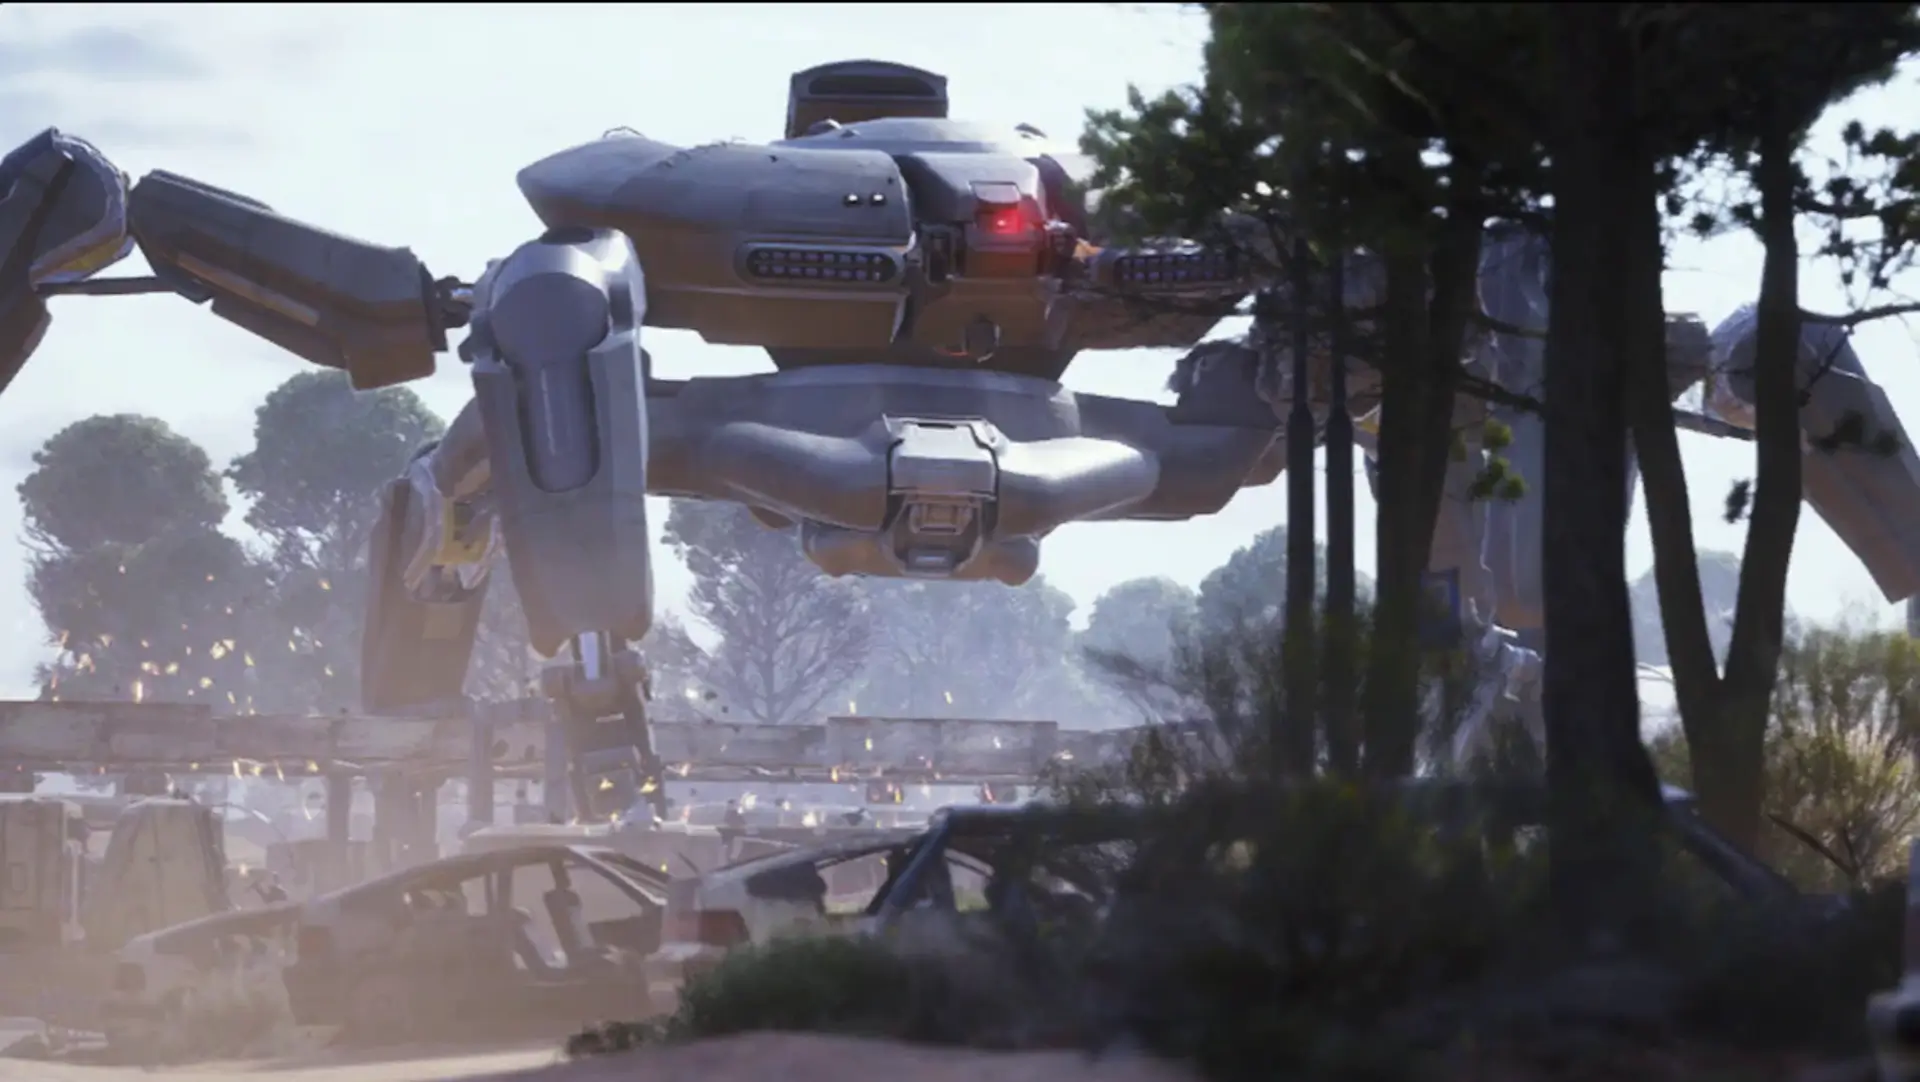
Bastion
Bastions are massive, heavily armored ARC war machines that patrol top-tier, high-value zones and act as one of the deadliest standard enemies in Arc Raiders. They usually don’t walk alone — it’s common to see them supported by flying drones or other ARC units, which makes any encounter with a Bastion a serious event that can easily wipe an unprepared squad.
Fighting a Bastion head-on in the open is basically suicide. Its armor is incredibly thick, its damage output is punishing, and its durability allows it to outlast you in a straight trade. Instead of brute forcing it, you need to play smart, methodical, and tactical.
Start by using grenades, explosives, or heavy weapons to slowly chip away at its armor and defenses. While you and your team are softening it up, constantly reposition and avoid standing in front of it for too long. Your main goal is to eventually flank behind the Bastion so you can target its weak spots.
Its rear leg joints are particularly vulnerable. Destroying these joints will limit its mobility, making it easier to keep your distance and maintain control of the fight. For maximum damage, aim for the yellow canister on its back. Once you destroy or expose this canister, you’ll reveal the barrel core underneath, which is the Bastion’s biggest weak point. Focus fire on this area to melt its remaining health and finally bring the giant down.
Weak Spots: Yellow Canister, Legs
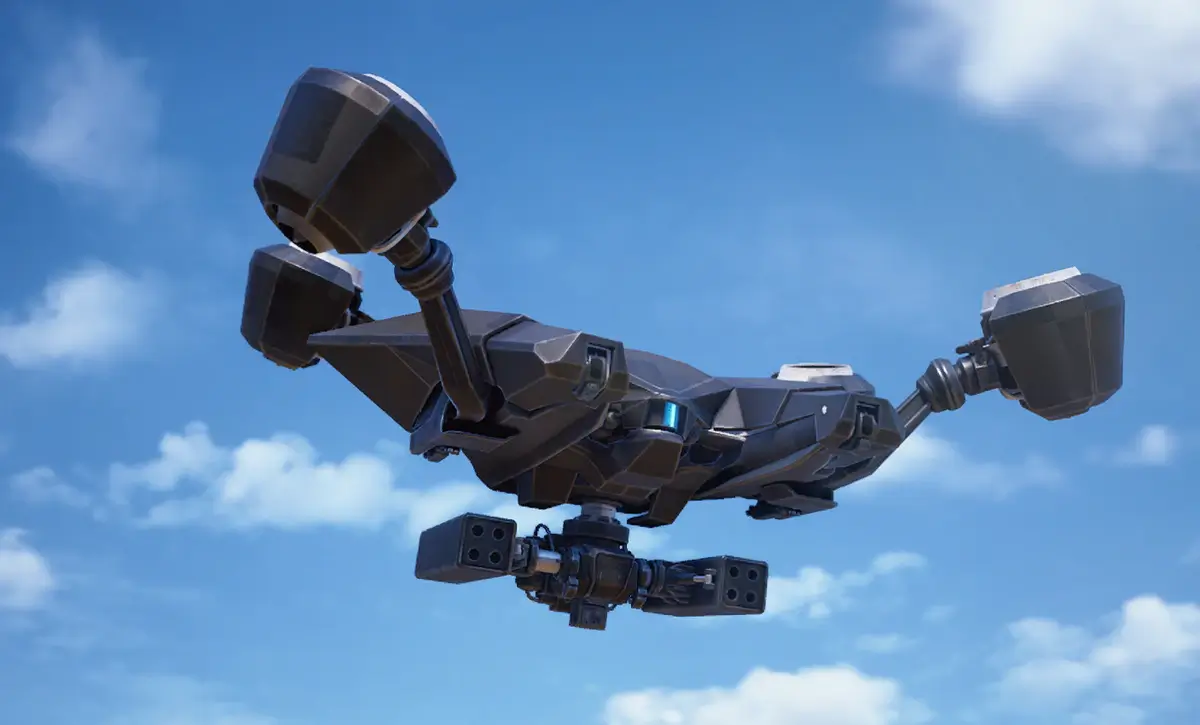
Bombardier
The Bombardier is a ranged ARC artillery unit that attacks from a distance by launching powerful mortar rounds. Its projectiles actively track your movement, making them much harder to dodge than standard grenades or rockets. If you keep running in a straight line, you’ll often get caught by the impact or splash damage.
Bombardiers rarely operate alone. They are usually accompanied by Spotter drones that scan the area and mark your position, feeding targeting information back to the Bombardier. As long as these Spotters are active, the Bombardier’s accuracy and aggression remain high.
The safest way to deal with this enemy is to take out the Spotter drones first. Once the Spotters are destroyed, the Bombardier becomes much less effective and easier to approach. From there, use cover, move unpredictably, and close the distance when its shots are mid-flight. Focus your fire on its kneecaps and yellow canister, which are its main weak points and allow you to bring it down much faster than shooting at the armor.
Weak Spots: Kneecaps, Yellow Canister
Snitch

The Snitch is an unarmed reconnaissance drone that floats high above the battlefield, constantly scanning the area for raider activity. Unlike most ARCs, it has enhanced hearing, allowing it to detect gunfire, explosives, and even movement from a distance. While it can’t damage you directly, it is one of the most dangerous enemies indirectly, because of what happens when it spots you.
Once the Snitch identifies a threat, it will immediately call in reinforcements, often triggering large-scale engagements and drawing multiple ARC groups to your location. If left unchecked, a single Snitch can turn a quiet raid into chaos.
You can sometimes avoid detection by breaking line of sight — hiding behind buildings, cliffs, or dense vegetation to stay out of its scanning cone. However, if you choose to engage it, you need to commit. Make sure you have a clear line of fire and enough DPS to destroy it quickly before it finishes signaling backup.
Its main weak point is the underside of the drone, which is more vulnerable than the armored top. Try to catch it while it drifts lower or when you have a good angle from elevated ground.
Weak Spot: Underside of the Drone
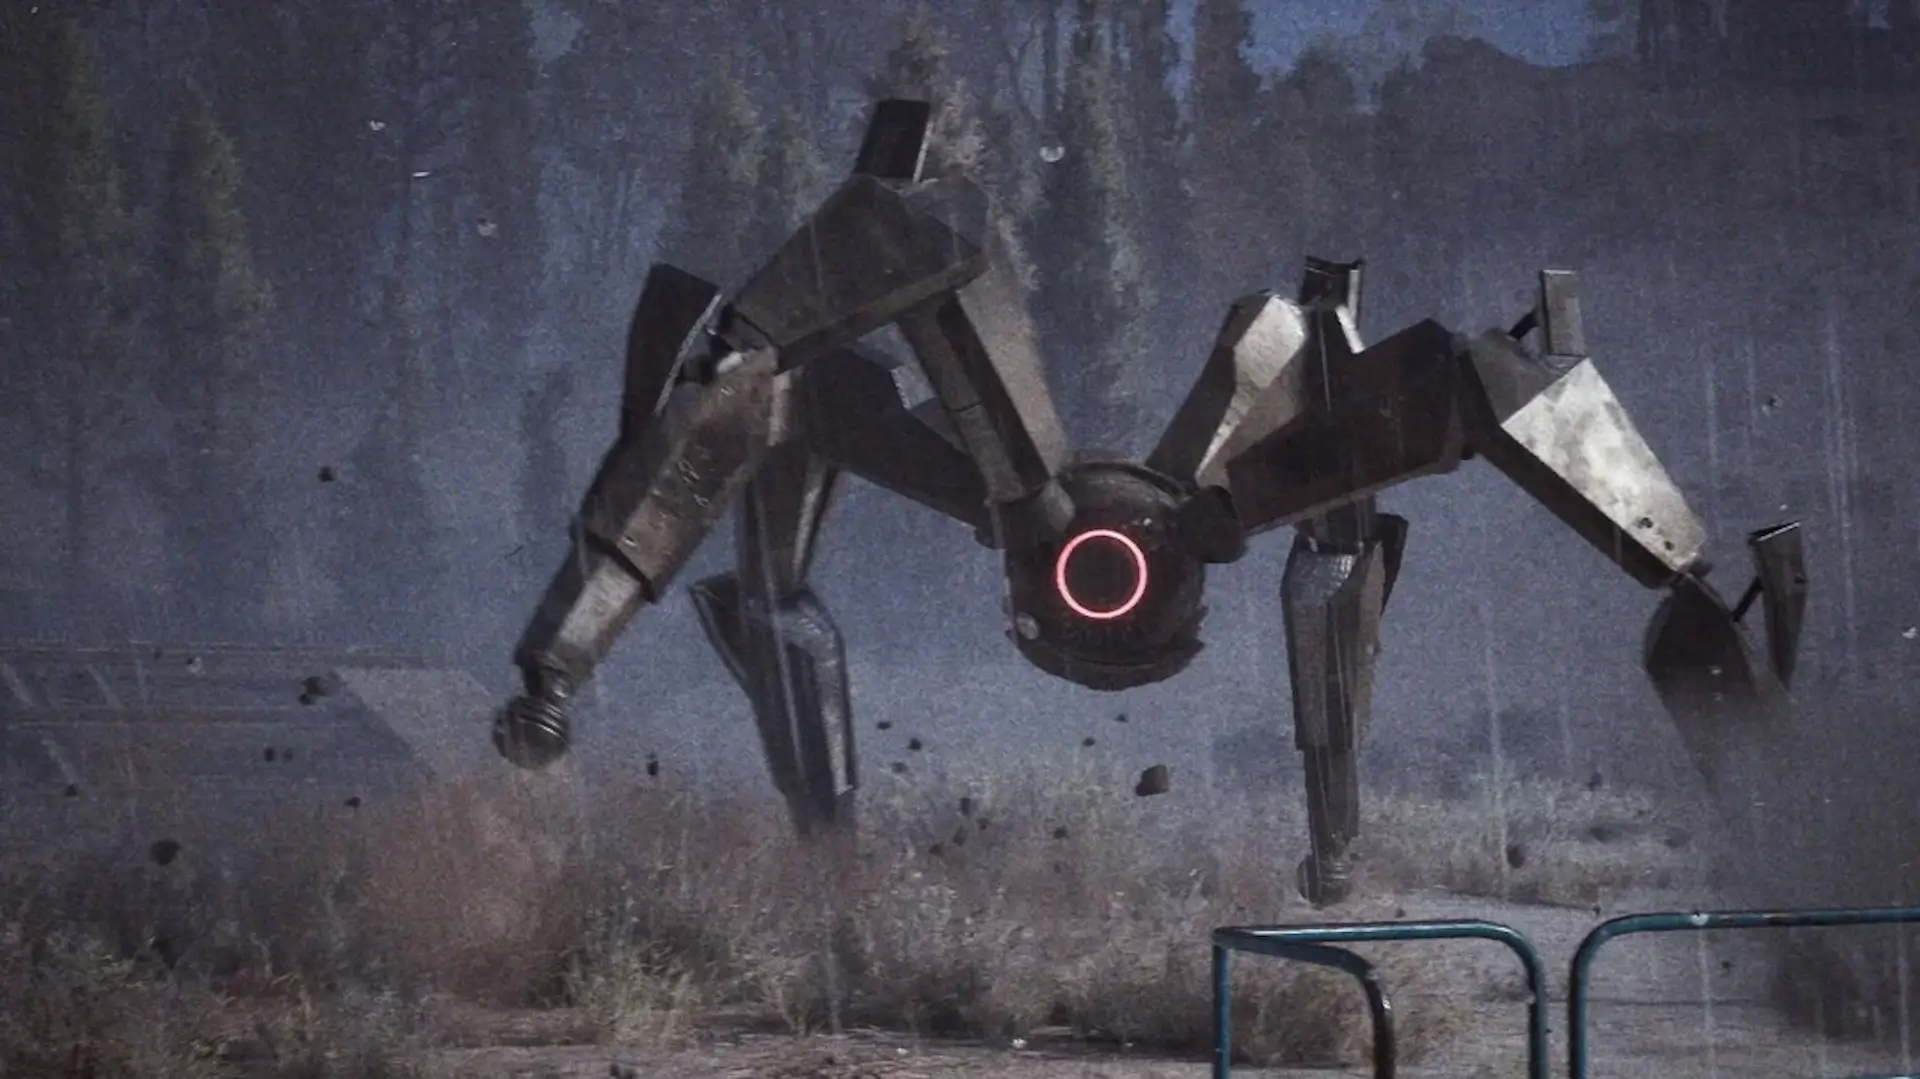
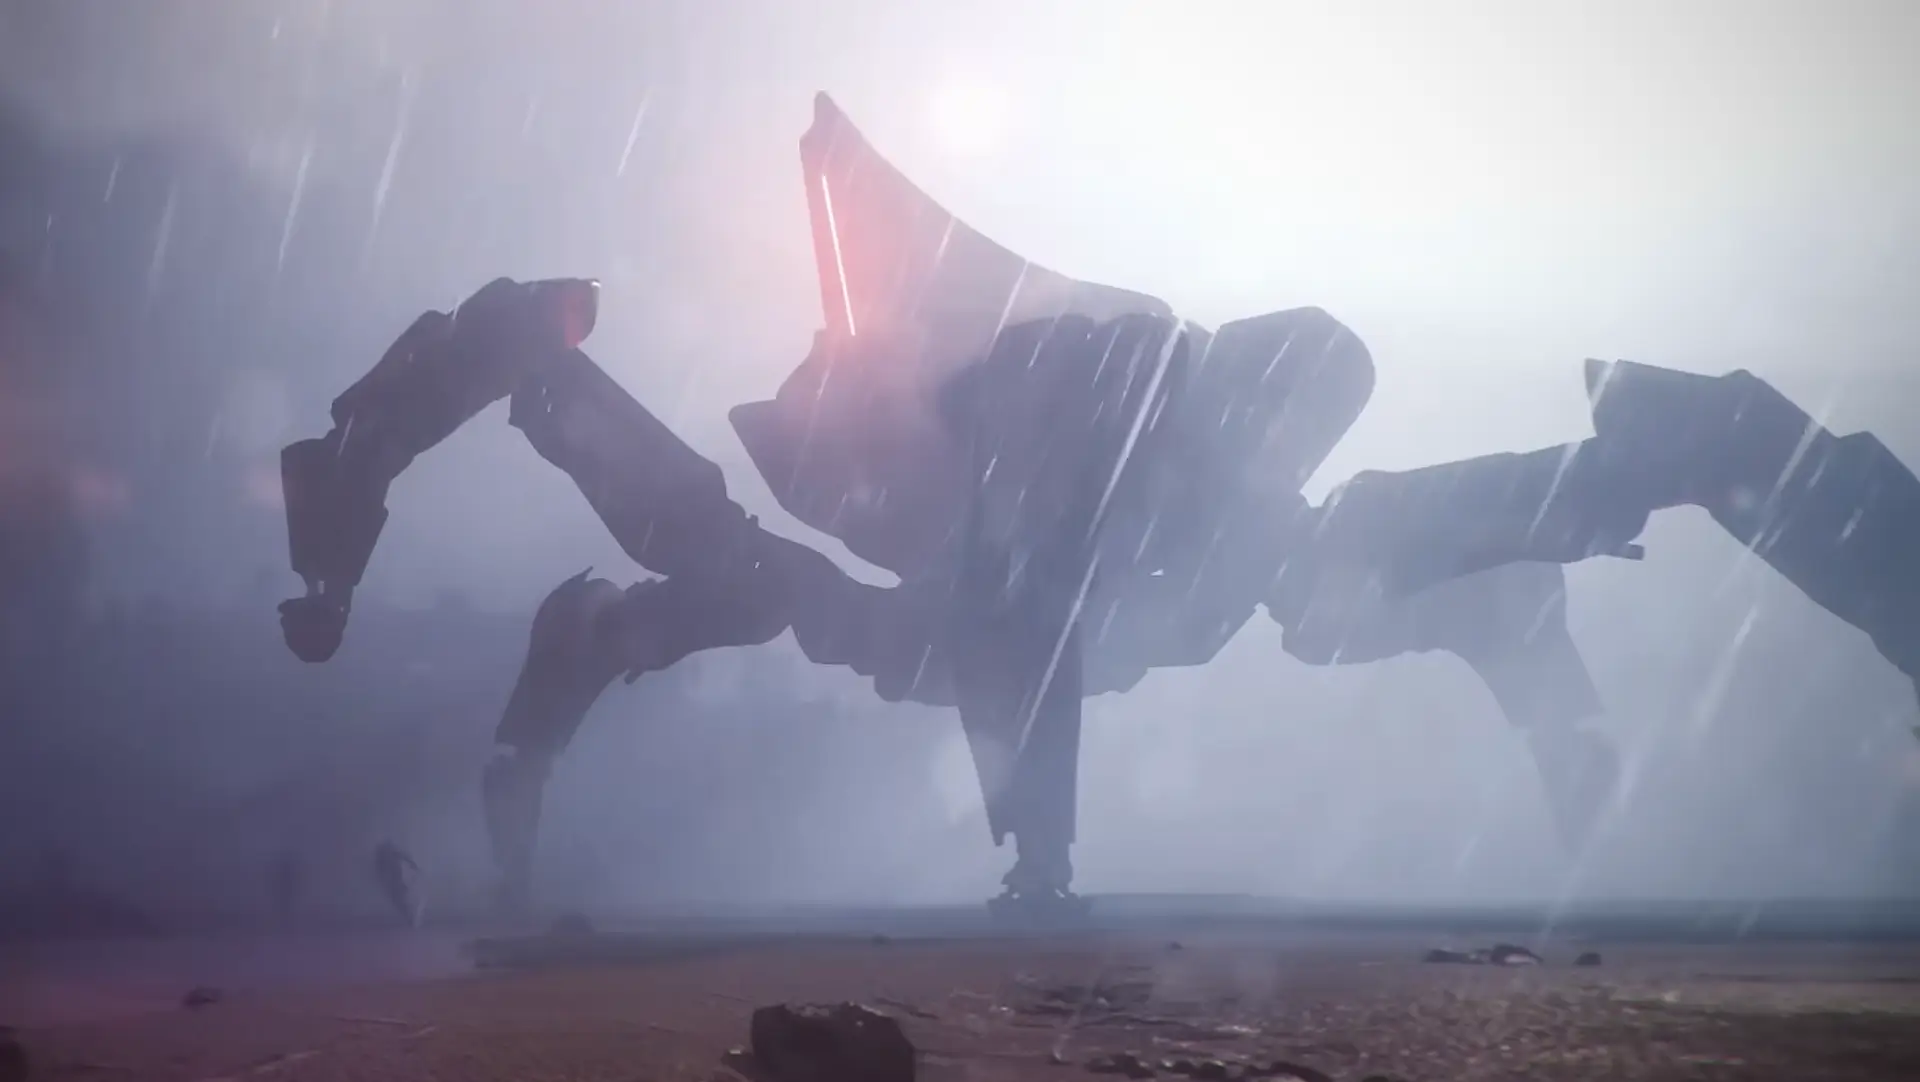
Queen
The Queen is a true endgame boss in Arc Raiders, appearing only during a Harvester event that can occur on any map. Taking her down isn’t something you do casually — it usually requires a full coordinated team, plus help from other raiders on the server. Queen is heavily armored, hits incredibly hard, and can easily wipe unorganized groups, so you’ll need a solid build and a large supply of Heavy Ammo before attempting the fight.
Her first weak points are the yellow joints on her legs. These only become visible once you’ve stripped away the leg armor, so your team should focus on breaking these protective plates early on. Damaging the leg joints helps slow her down and opens up safer damage windows.
After that, the next major weak spot is the top of her head. This vulnerable area is only exposed briefly while Queen fires her laser, and for a short moment afterward. Coordinating your entire squad to burst damage during these small openings is critical.
To defeat Queen, your team must:
- Constantly keep moving to avoid her highest-damage attacks.
- Time grenades, heavy weapons, and abilities around her weak spot exposure windows.
- Focus fire on leg joints first, then head once the pattern is clear.
Well-coordinated bursts on her exposed weak points are the key to finally bringing the Queen down and securing top-tier rewards.
Weak Spots: Yellow Leg Joints, Head
Matriarch
The Matriarch is one of the hardest enemies in Arc Raiders, appearing only for a limited time during a special map event. This encounter is designed as a high-end challenge, and most of the Matriarch’s chassis is covered in thick ARC armor plating. Standard weapons will feel underwhelming here — you’ll want to bring high-penetration guns, explosives, and strong builds that can reliably punch through heavy armor.
Most of the Matriarch’s body is tough to damage efficiently, but the fight revolves around its glowing core, which is its true weak spot. Your priority should be to create openings where the core is visible and then focus all available firepower on that point.
During the battle, smaller pieces will break off the Matriarch and fall to the ground. These fragments can be looted like normal ARC debris, providing useful resources mid-fight. However, the best and rarest rewards always come from destroying the main chassis, so don’t get too distracted by the smaller pieces.
On top of that, the Matriarch will spawn additional ARC enemies throughout the encounter. If you ignore them, they will quickly overwhelm your team while you’re focused on the boss. Make sure someone is always controlling adds — clearing out extra enemies while the rest of the squad looks for opportunities to hit the glowing core.
Weak Spot: Glowing Core
🎯 Get hands-on guidance in positioning, repair timing, and ambush setups with Arc Raiders Coaching — one-on-one sessions from top-tier tactical players.
Shredder
Shredder is one of the two new ARC units introduced in the first major Arc Raiders update on November 13, 2025, arriving alongside the Matriarch as part of the game’s expanding endgame roster. This enemy is still being analyzed by the community, and so far there is no confirmed data about its armor layout, behavior patterns, or exact weak spots.
Until more information becomes available, the safest approach is to treat Shredder like a late–game elite: keep your distance, avoid taking unnecessary risks, and test how it reacts to different weapon types and positions. Use cover, probe its defenses with long-range shots, and be ready to disengage if things get out of hand. As soon as reliable testing confirms where its critical components are located, this guide will be updated with precise weak spot locations and recommended strategies.
Weak Spot: TBA
Arc Raiders: How to Avoid Enemies
Every ARC enemy in Arc Raiders uses a narrow 45-degree vision cone, which means they only detect you if you step into the area directly in front of them. Mastering this cone system is one of the most important stealth skills in the game. Whenever you are inside that cone, the color of the detection indicator shows exactly how aware they are of your presence:
- Blue – the ARC is calmly patrolling and hasn’t noticed anything unusual.
- Yellow – the ARC has heard or seen something suspicious and is actively trying to locate you.
- Red – the ARC is entering combat mode and will commit to an attack.
Use this system to hug the edges of their vision cone, move around behind them, or flank from the sides. If you see the indicator shift from blue to yellow, slow down, crouch, or break line of sight behind cover before it turns red.
Despite their intimidating designs, most ARCs are almost deaf. You can often sprint, reposition, or fire suppressed weapons nearby without drawing attention, as long as you stay outside their vision cone. The big exception is the Snitch. This surveillance drone has enhanced audio sensors and can pick up gunfire and movement from long distances. Once it detects trouble, it immediately alerts nearby ARCs and can trigger chain engagements that snowball out of control.
Because of this, it’s often worth prioritizing the Snitch whenever you hear or see it. Take cover, line up a clean shot, and destroy it quickly before it can broadcast your position. Removing the Snitch restores the usual “half-deaf” behavior for other ARCs and makes stealth play much more forgiving.
One crucial thing to remember is that ARCs do not share a unified hive network. If you alert one patrol, only that specific group will respond to your presence. The rest of the map will usually remain unaware of the fight unless you drag enemies across the area or let a Snitch call them in. You can use this to your advantage by:
- Pulling small clusters of enemies away from their route and eliminating them quietly.
- Kiting one patrol at a time instead of waking up the entire zone.
- Clearing paths systematically, so you always have a safe retreat route.
By combining careful positioning around the 45-degree vision cones, controlling noise, and avoiding global alerts from Snitches, you can move through Arc Raiders maps methodically, picking off enemies on your own terms instead of letting the ARCs dictate the fight.
Arc Raiders Enemies FAQ
Here you can find answers to the most common questions about Arc Raiders enemies, how they behave, how weak spots work, and how to deal with them efficiently during raids.
How Do Weak Spots Work in Arc Raiders?
Weak spots in Arc Raiders are marked by yellow components on ARC units — usually on joints, cores, or fuel canisters. When you hit these yellow parts, your attacks deal significantly increased damage, allowing you to destroy even heavily armored enemies much faster than if you were shooting gray armor plates.
If you want to conserve ammo and secure quick kills, always prioritize yellow weak spots over regular body shots. Learning where each enemy’s weak points are located turns tough opponents into manageable targets and is one of the most important skills for consistent extractions.
Can You Stealth Kill Enemies in Arc Raiders?
There are no classic “stealth kill” animations or instant takedowns in Arc Raiders, but you can still play very stealthily. By staying outside of enemy vision cones, moving carefully, and using cover and elevation, you can bypass entire patrols without ever triggering combat.
Suppressors, smart positioning, and understanding how detection indicators work let you complete objectives, loot high–value areas, or reposition for better angles without having to fight every ARC you see.
Do ARCs Fight Each Other in Arc Raiders?
No. ARCs operate under the same overarching network and are fully aligned in their behavior. They never attack one another, even during chaotic fights or crossfire. Their AI is completely focused on tracking, pressuring, and eliminating raiders.
This means you can’t rely on enemies damaging each other to thin out their numbers — you’ll need to use terrain, explosives, and smart target priority to control the battlefield yourself.
Do ARCs Alert Everyone When They Spot You?
No. ARC patrols do not share alerts globally across the entire map. If one group detects you, only that specific squad or nearby cluster will engage in combat. Other patrols will usually continue their routes unless drawn in by noise, movement, or a Snitch callout.
You can use this to your advantage by isolating and clearing one group at a time, retreating after each fight, and avoiding large, uncontrolled pulls. As long as you manage vision cones and take out high-priority scouts like the Snitch, you won’t have the whole map converging on your position at once.