 ~5 MIN
Intro
A practical, low-risk combat breakdown focused on ammo-efficient and safer approaches to dealing with several tough ARCs after recent weapon changes. We’ll highlight what to bring, where to aim, and how to control each fight so you can secure cores and progress without turning every encounter into a budget disaster.
The Core Principle: Safety + Ammo Efficiency
Why some ARCs feel disproportionately punishing.
The two pillars of this approach:
- Control the ARC’s movement/attack windows
- Prioritize weak points and consistent angles
- The recommended loadouts below are chosen because they remain effective and stable in the current balance environment.
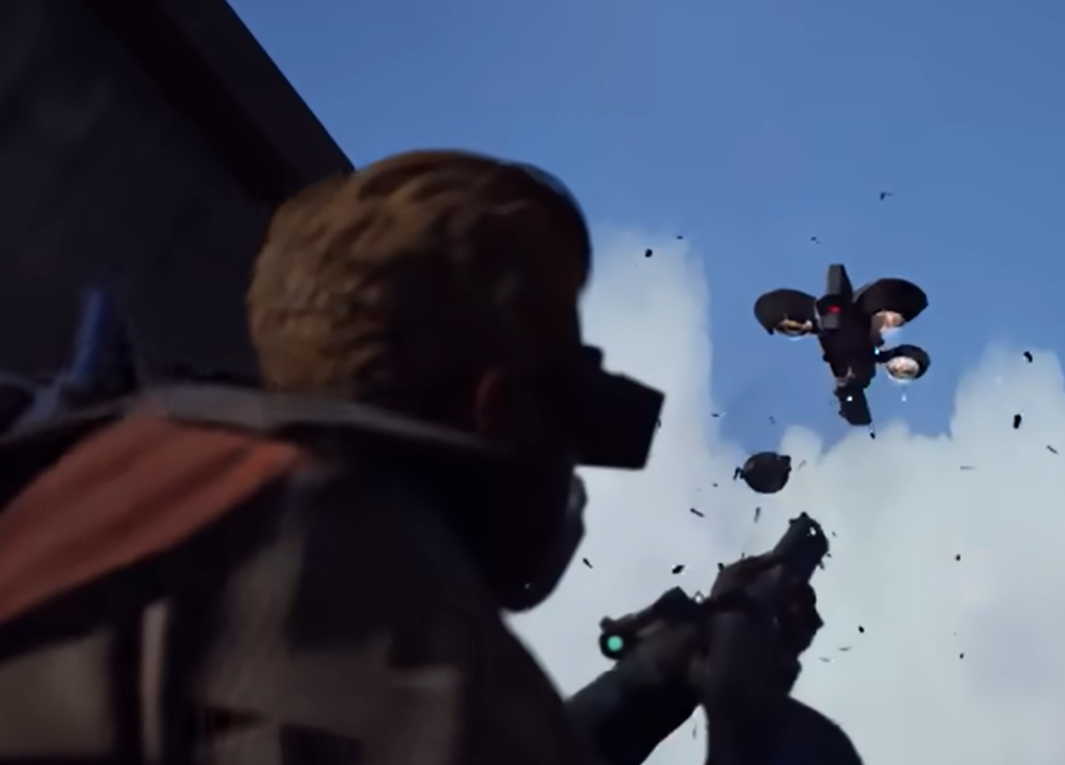
Rocketeer: The Safest Ranged Takedown
Rocketeer remains one of the most annoying threats when you let it dictate the pace of the fight. One of the strongest current answers is the Osprey, largely because it offers:
- Strong long-range performance with noticeably gentler falloff than many alternatives.
- High projectile velocity, which makes it much easier to keep pressure on fast-moving aerial units.
The key to this approach is simple: lock onto the thrusters and maintain continuous fire. When you consistently tag the thrusters, Rocketeer’s ability to close distance becomes weaker and weaker. This keeps the engagement predictable and dramatically reduces the risk of being overwhelmed before you can finish the fight.
While this method can consume a fair amount of ammo, the tradeoff is stability and safety—two things that matter most when you’re looking to farm efficiently over multiple runs.
Bombardier: A Budget-Friendly Fast Delete with Renegade 4
For Bombardier, the cleanest modern solution is still straightforward:
Renegade 4, ideally fully upgraded, paired with smart cover usage.
The fight becomes extremely manageable when you:
- anchor near a solid structure (a house works perfectly),
- commit to leg damage, prioritizing the yellow weak zones.
Renegade’s speed and efficiency here are the main reason this method feels so good right now. You break legs quickly, maintain control of the engagement, and finish the target without draining your supplies.
One behavioral note worth keeping in mind: at closer ranges, Bombardier may shift into a pulse wave pattern rather than relying on a more conventional missile-style threat. That’s another reason why good distance and smart angles around cover keep this encounter consistently safe.
<a href=”https://onlyfarms.gg/product/arc-raiders-workshop-leveling”>Arc Raiders Workshop Leveling</a>
Leaper: The Grenade Plan That Pays Off
Leaper can be a costly nuisance if you try to brute force it with the wrong tools. A more efficient current route leans into a simple resource plan:
around 15 grenades as a practical baseline.
This approach is especially attractive because the crafting requirement is reasonable, and the payoff is fast when your angles are clean.
The execution flow is consistent:
- draw Leaper’s attention,
- let it commit to a jump toward you,
- reposition into a building,
- then focus your throws into the eye.
The environment matters a lot here. Large buildings aren’t always ideal if their windows or openings create awkward throw lines. In many cases, a smaller structure with a cleaner angle lets you close the fight faster.
Even with a few missed throws, this method remains a strong, repeatable way to down Leaper without sacrificing too much ammo or taking unnecessary risk during the most dangerous phases of the encounter.
Bastion: The Clean Renegade Rotation with Proper Timing
Although Renegade 4 is excellent for Bombardier, it also offers a refined, deliberate path against Bastion.
The safe opener is built around:
- committing to the outer leg first,
- using cover to limit Bastion’s ability to punish your positioning.
One timing detail makes a real difference in consistency:
- fully reload right before the leg collapses.
This ensures you can immediately capitalize on the opening that follows a successful leg break. Once the leg goes down, you gain access to a better damage angle through the crack that leads into a more vulnerable internal zone. From there, alternate leg pressure based on cover and line of sight until Bastion reaches its final vulnerable state.
There’s also a clear feedback cue when you’re doing this correctly: a distinctive hit response—often accompanied by visible sparks—indicating you’re connecting with a more valuable damage point.
Current Takeaways
With recent balance shifts affecting older favorites, the most practical ARC-farming toolkit right now looks clean and focused:
- Osprey provides safe and stable control against Rocketeer by enabling consistent thruster pressure from range.
- Renegade 4 offers fast, efficient takedowns of Bombardier and a structured, low-cost approach to Bastion.
- Grenades remain one of the most efficient dedicated solutions for Leaper as long as you manage angles properly.
Taken together, these options help keep your raids profitable and your combat pacing predictable—exactly what you want when you’re farming targets repeatedly rather than gambling on high-risk damage races.
Want Faster, Smoother Progress?
If you’d prefer to accelerate your upgrades, streamline your grind, or get expert support for the content you’re targeting, these options can help you stay efficient:
With a more stable approach to ARC combat and a clear focus on efficiency, you can build smarter routes, secure the resources you’re actually chasing, and keep your progression moving without the constant pressure of draining supplies run after run.