 ~5 MIN
Intro
Death’s Oath has always been one of those “cool but flawed” Path of Exile builds — stylish, thematic, satisfying, but notoriously hard to scale into meaningful single-target damage. In 3.27, however, a series of new uniques has completely changed that. Death’s Aura can finally deliver real DPS, real bossing, and smooth T17 mapping without feeling like you’re dragging a legacy meme build across the finish line.
This guide breaks down why Death’s Oath suddenly works, how the new uniques create a powerful synergy package, and how you can build it yourself. If you’re looking for a durable, smooth mapper that melts everything within a screen-wide radius, this may be one of the most enjoyable reroll options in the entire patch.

What Makes Death’s Oath Tick?
Death’s Oath grants Death’s Aura, a chaos-damage pulse that behaves similarly to Righteous Fire. It deals continuous AoE damage in a radius around your character while inflicting a small self-hit that’s trivial to sustain.
Traditionally, Death’s Oath struggles because:
- Chaos damage scaling options are limited
- Aura effect is hard to stack
- Single-target output falls off dramatically
- You quickly hit a ceiling on multipliers and gem scaling
But in 3.27, new uniques completely remove these bottlenecks.
The Item That Changed Everything: Sundered Will
The new unique ring Sundered Will is the core of the 3.27 Death’s Oath version. It changes the rules for how chaos damage affects auras:
“Increases and reductions to chaos damage apply to chaos skill auras at 15% of their value, up to a max of 150%.”
By wearing two of these rings, you dramatically reduce the chaos damage needed to hit the 150% cap, enabling:
- 2.5× more Death’s Aura DPS
- Massive aura area-of-effect increases
- Stronger Blasphemy-based despair
- Strong synergy with chaos DoT stacking
Two rings, fully capped, give you a huge leap in performance with surprisingly smooth gearing.
✔ Attributes
✔ Chaos res
✔ Bonus aura effect
✔ Max chaos res
Unlike many league-defining uniques, these rings are actually usable while gearing.
How the Build Reaches Huge Chaos Damage
To reach the required 500% increased chaos damage, the build uses:
- Large cluster jewels with 160% inc. chaos damage each
- Chaos DoT multi on wand
- Tree nodes + tattoos
- The scaling provided by Foulborn uniques
- Generic “damage over time” multipliers
This all stacks together naturally, with a clear and achievable progression.
Adding Real Single-Target: Foulborn Duedry’s Scorn + Impending Doom
Death’s Aura alone is great for mapping, but still struggles on bosses — that’s where the new Foulborn items come in.
Foulborn Duedry’s Scorn Helmet
- Supports socketed gems with Level 30 Impending Doom
- Adds massive flat chaos damage
- Provides attribute rolls you need anyway
- Enables heavy overlap scaling with increased AoE
The Impending Doom explosions are where most of your 25M+ single-target DPS comes from.
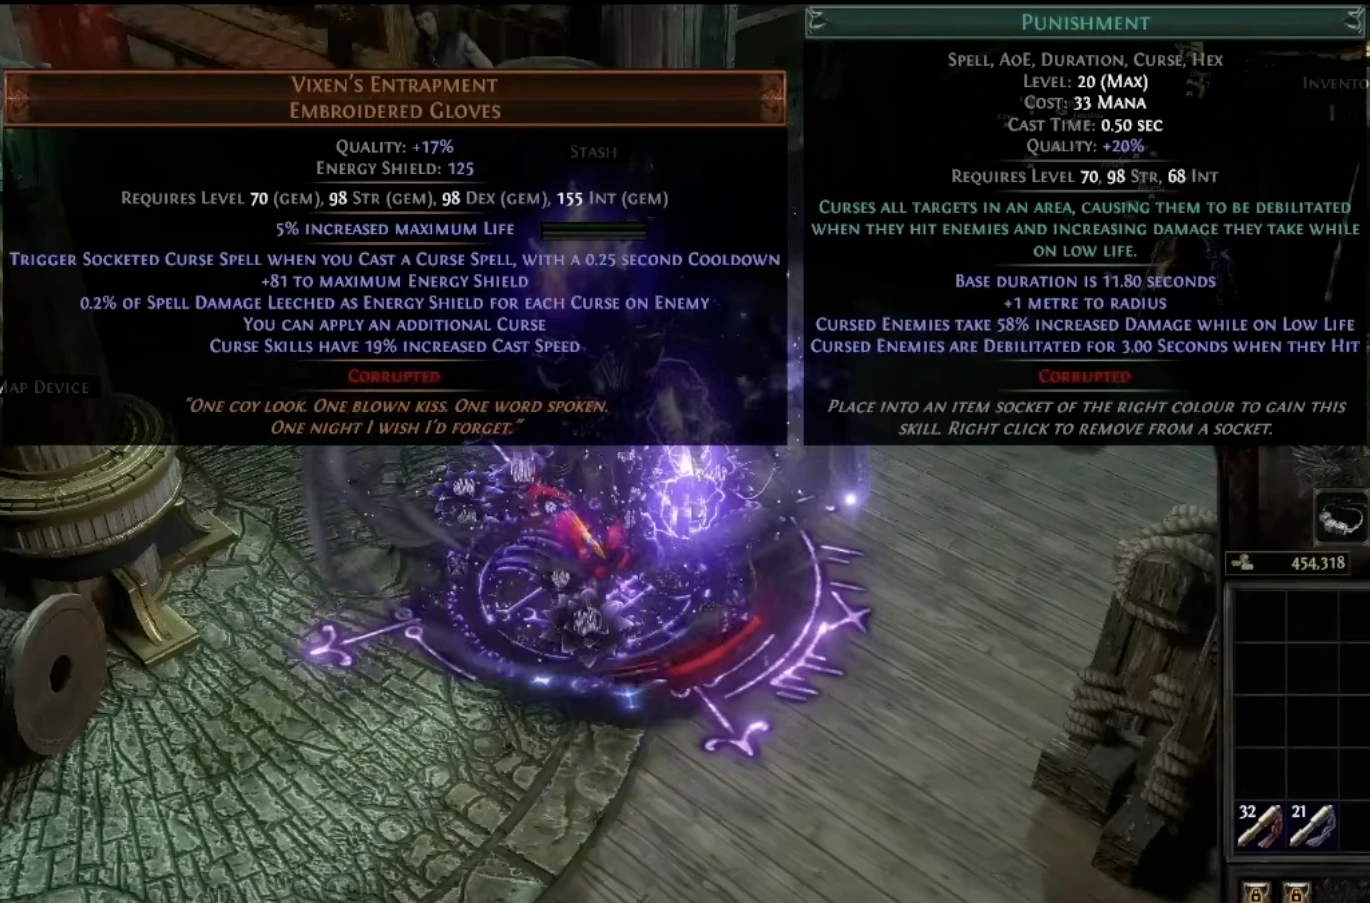
Vixen’s Entrapment Gloves
These gloves automatically trigger all your curse gems when you cast one curse:
- You manually cast Conductivity (the throwaway curse)
- This triggers Punishment, Temp Chains, Enfeeble, and your always-on Despair aura
- Overwriting curses procs huge Impending Doom detonations
Mapping becomes nearly passive; bossing becomes explosive.
A Defensive Layer Cake
Despite looking squishy on paper, the build is surprisingly tanky once everything is layered together:
- 78/78 block with ES gain on block
- Mind Over Matter + Eldritch Battery split
- High regen + ES recharge
- 85% max elemental res
- 80% max chaos res
- Molten Zoff Graft “shield” always active (32–40% of your life as a defensive shield)
- Enfeeble + Sapped enemies
- Avoid ailments via Stormshroud + boots
This is one of the rare builds that feels tanky while still moving quickly.
Molten Zoff: The Unsung MVP
If you want to understand why the build feels so comfortable, Molten Zoff Graft is a huge reason.
- Provides a massive life-shielding effect
- Can be kept at near-permanent uptime
- Makes your EHP significantly higher than PoB shows
- Absorbs burst hits that would normally kill chaos builds
If you’ve never used this Graft before — this build will make you a believer.
Gear Overview
A quick high-level checklist:
Absolutely Required
- 2× Sundered Will (perfect rolls preferred)
- Foulborn Duedry’s Scorn (Impending Doom support)
- Vixen’s Entrapment
- Death’s Oath (of course)
Strongly Recommended
- High chaos multi wand (crafted or trigger wand variant)
- Reservation-efficient shield with ES on block
- Large cluster jewels with chaos scaling
- Stormshroud
Optional Luxury
- Mageblood (not required at all!)
- Progenesis flask
- Perfect Watcher’s Eye (Malevolence multi + Spell Block)
The build functions extremely well at mid-budget, and scales hard with investment.
Playstyle and Tips
- Keep Withering Step on cooldown
- Tap Flame Dash occasionally to maintain Life Tap uptime
- Position Impending Doom overlaps by aiming slightly behind bosses
- Let Death’s Aura clear naturally; save detonations for rares/bosses
- Enable Molten Zoff shield uptime by staying slightly below full life
It’s simple once you learn the rhythm — and extremely satisfying.
Should You Play Death’s Oath in 3.27?
If you want a build that:
✔ Clears fast
✔ Has real boss damage
✔ Tanks extremely well
✔ Works on medium budget
✔ Feels different from the usual projectile spam
…then yes — Death’s Oath has finally become a top-tier reroll option.
Though not as meta as Mana Stackers or Autobombers, this build strikes a rare balance: comfort, power, and playstyle uniqueness.
If you’re starting PoE 2 or rerolling into endgame builds, these resources can speed up your progression:
- Boost your fresh reroll with high-value leveling gear, from early campaign to red maps:
👉 PoE Leveling Gear - Need help tuning or polishing complex builds like Death’s Oath?
👉 PoE Build Improvement Service - Farming chaos/Divine conversions for cluster jewels?
👉 PoE Exalted Orb
👉 PoE Divine Orbs