 ~48 MIN
Karazhan Guide
In this TBC Anniversary Karazhan guide, we cover one of the most iconic raids in World of Warcraft: The Burning Crusade and a core part of early endgame progression on the WoW Classic 20th Anniversary realms. You will find everything you need in one place, including the Karazhan release schedule, raid location, shortcuts, key loot and Tier 4 tokens, mounts, vendors, The Violet Eye reputation rewards, and (later in the guide) detailed boss strategies and mechanics.
Before you can even step inside the tower, you will also need to complete the Karazhan attunement chain, so plan that early if you want to raid on unlock week. Blizzard has also confirmed that raids are not available during the pre patch, giving players time to prepare.

TBC Anniversary Karazhan Key Takeaways
- Karazhan unlock date: Karazhan (along with Gruul’s Lair and Magtheridon’s Lair) unlocks on February 19, 2026 at 3:00 PM PST. The TBC Anniversary launch itself is February 5, 2026, and raids are not accessible during the January 13, 2026 pre patch window.
- Loot item levels: Trash and bosses drop item level 115 Bind on Pickup epics, while Tier 4 tokens are typically item level 120 to 125, making Karazhan a major power spike right as Phase 1 raiding begins.
- Tier tokens in Phase 1: Karazhan provides TBC Anniversary Tier 4 tokens for gloves and helmets in Phase 1, helping you start assembling your first raid set quickly.
- The Violet Eye reputation: The Violet Eye is the signature Karazhan reputation and is worth farming for powerful rings, in raid repair access, and select profession patterns, especially if you plan to raid weekly.
TBC Anniversary Karazhan Release Date
The TBC Anniversary Karazhan release date is February 5, 2026. Keep in mind that Karazhan will not be accessible during the pre patch on January 13. The pre patch is mainly focused on quality of life improvements, class and character tuning, and system or mechanic updates, but raid content like Karazhan only becomes available once the full expansion launches.
If you are planning your Week 1 progression, use the pre patch window to finish key prep steps like leveling, gearing, consumables, and (most importantly) your Karazhan attunement, so you are ready to enter the raid as soon as it opens.
⚙️ Want to help your guild deal with the boss for gearing, but still haven’t leveled your character to 70 yet? Our TBC Leveling — can help you hit the max level as quickly as possible!
The Burning Crusade Anniversary Karazhan Loot
Karazhan loot in TBC Anniversary offers a strong mix of early raid upgrades for every role. In addition to boss drops, you can also find item level 115 Bind on Pickup epics from many trash mobs, which makes Karazhan valuable even beyond strict boss progression.
Because trash can drop meaningful upgrades, a full clear is not just about finishing the final encounter, it is also one of the most reliable gearing paths early in TBC Anniversary, especially for fresh level cap characters, alts, and players still filling key slots before stepping into other Phase 1 raids.
TBC Anniversary Karazhan Tier Sets
Karazhan is one of the main sources of the first tier sets in The Burning Crusade Classic Anniversary, delivering powerful class set bonuses for DPS, tanks, and healers. These bonuses are often a major spike in performance and can noticeably improve your raid consistency, especially in early progression.
While standard boss and trash epics sit at item level 115, Karazhan’s tier progression goes higher:
- Tier 4 tokens: item level 120
- Prince Malchezaar tokens: item level 125
This makes Prince Malchezaar a key target if you are optimizing gearing speed and trying to secure best possible upgrades early.
Tier Token Classes
| Token Type | Classes |
|---|---|
| Hero | Hunter, Mage, Warlock |
| Champion | Paladin, Rogue, Shaman |
| Defender | Warrior, Priest, Druid |
📌 Important: Karazhan Tier tokens can be exchanged only for Gloves and Helmets.
Where to Exchange Karazhan Tier Tokens
You can trade these tokens for your set pieces in Shattrath City at the appropriate vendor based on your faction alignment:
- Asuur for Aldor members
- Arodis Sunblade for Scryers
If you are still deciding between Aldor and Scryers, remember that your choice can affect convenience and certain rewards, so it is worth planning ahead before you start turning in tokens.
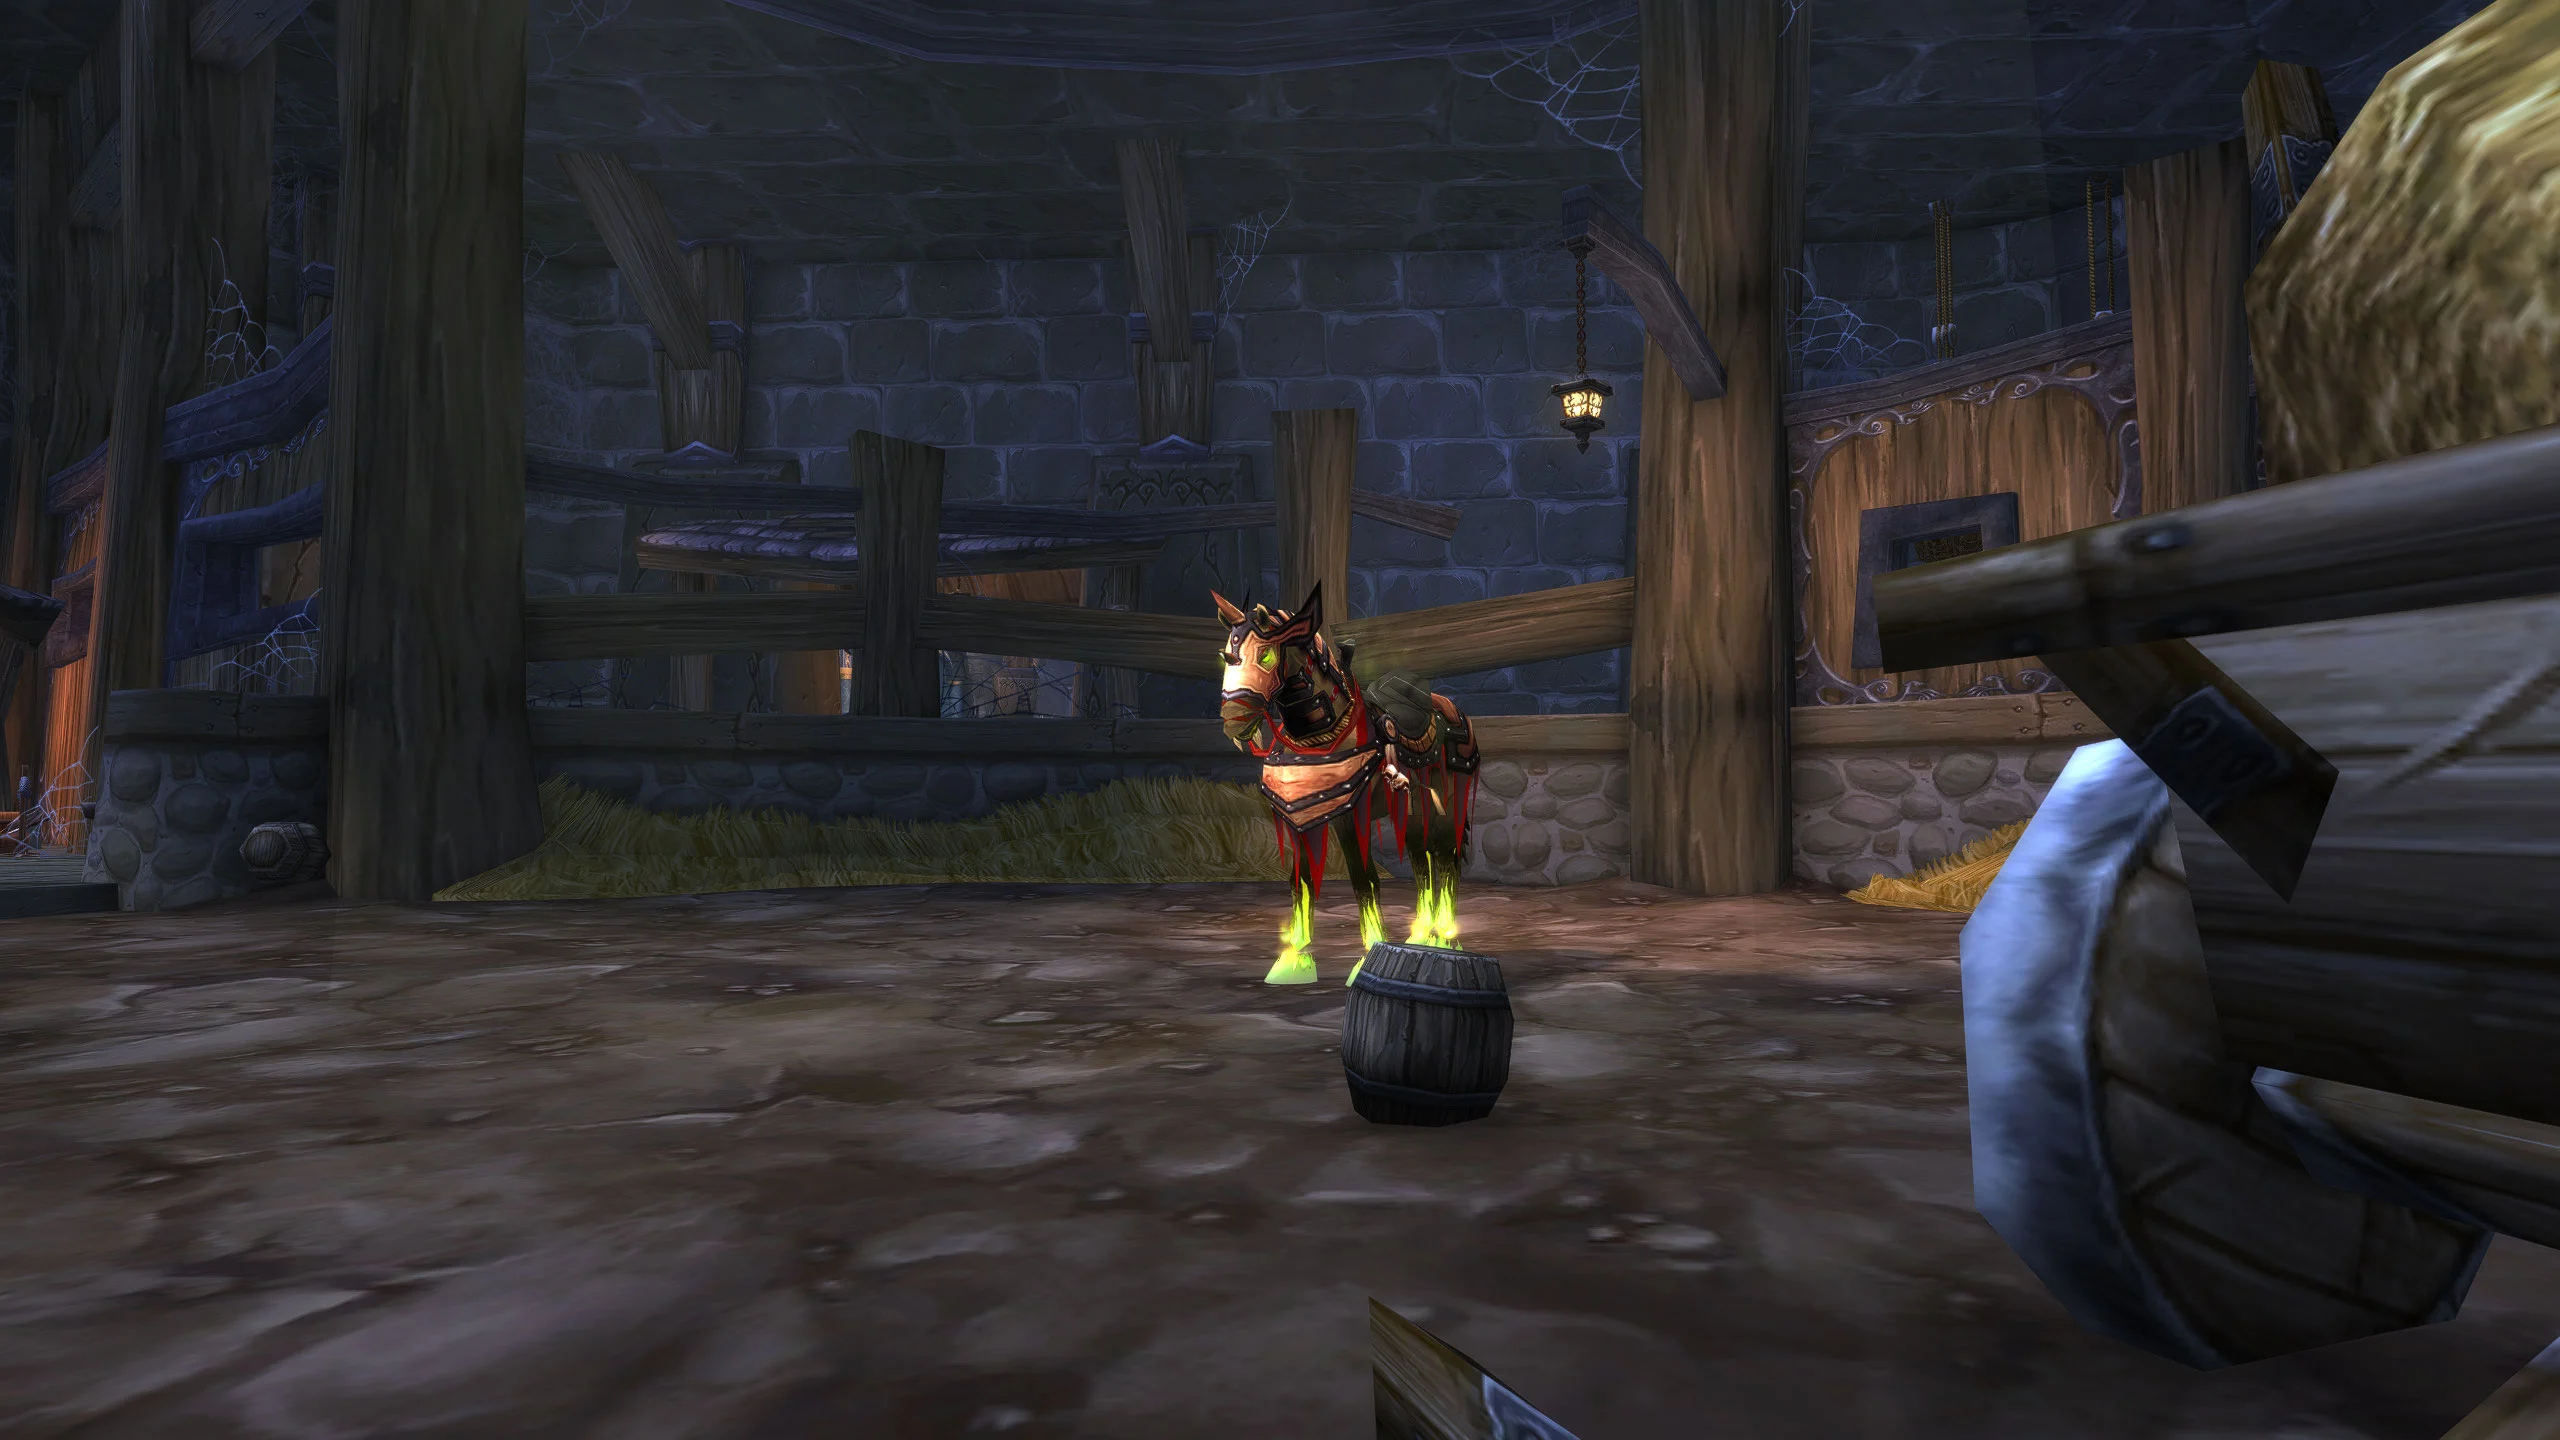
TBC Anniversary Karazhan Mount
In Karazhan during The Burning Crusade Classic Anniversary, there is a chance to obtain the Fiery Warhorse’s Reins mount, which drops from Attumen the Huntsman, the first boss in the raid. This ground mount has a very low drop rate of just 1%, so many players run Karazhan repeatedly on multiple characters to maximize their chances.
The Burning Crusade Anniversary Karazhan Location
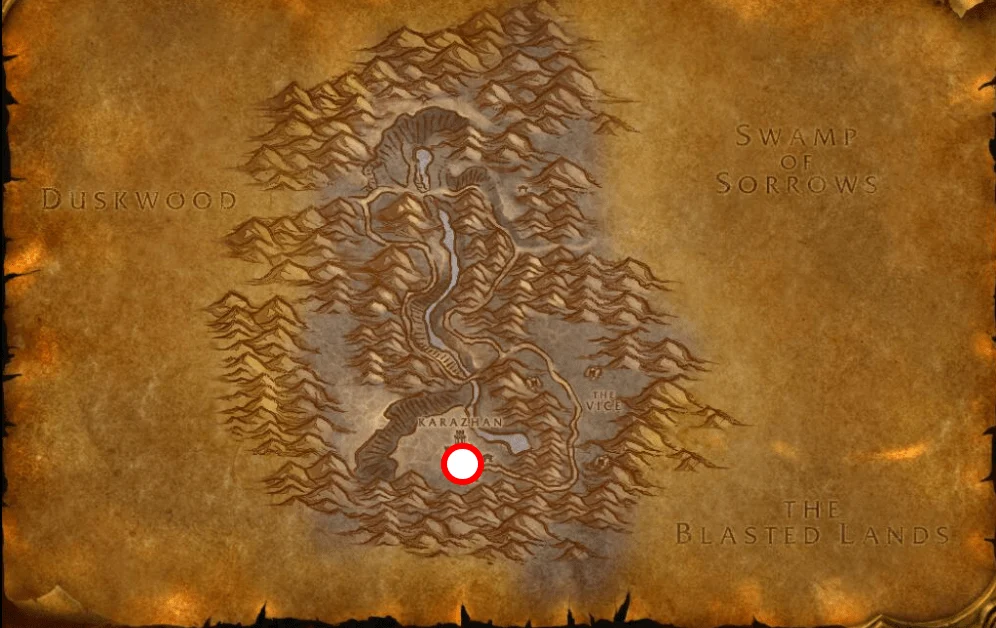
Karazhan’s location in TBC Anniversary is at the southern edge of Deadwind Pass, the eerie zone that sits between Duskwood (north) and the Swamp of Sorrows (south). The raid entrance is found at coordinates 47.1, 72.4, and since Deadwind Pass has no direct flight paths, most players will need to ride in on ground mounts (or coordinate a summon) to reach the front gate.
How to Get to Karazhan as Alliance
If you are playing Alliance, the most convenient route starts in Darkshire (Duskwood). From there, head northeast and follow the main road into Deadwind Pass, then continue south toward the tower entrance. This path is usually the smoothest option for Alliance groups forming up before the raid.
How to Get to Karazhan as Horde
If you are Horde, a common starting point is Stonard (Swamp of Sorrows). Travel northwest, then take the western route up through the hills into Deadwind Pass, continuing toward Karazhan’s gate. This approach is typically faster for Horde players already positioned in the Swamp of Sorrows area.
The Burning Crusade Anniversary Karazhan Map
The Karazhan map in TBC Anniversary is massive and can feel confusing on your first few runs. The raid is divided into 17 separate map sections, with multiple wings, boss rooms, scripted events, and several shortcuts that can save a lot of time once you know the layout. Because of that, having a route plan before you pull the first pack is one of the easiest ways to improve clear speed, reduce wipes, and keep your group organized.
Below are two optimized routes for TBC Classic Anniversary Karazhan depending on your goal: a quick clear for weekly farming or a full clear for maximum progression and loot.
Quick Clear Route
If you want a faster weekly run, focus on the most efficient sequence of core encounters:
Moroes ➡️ Opera Event ➡️ The Curator ➡️ Chess Event ➡️ Prince Malchezaar
This route is ideal for:
- Repeat clears when your raid time is limited
- Loot farming and targeting key upgrades early in Phase 1
- Mount attempts such as the Fiery Warhorse
- Securing strong rewards while skipping optional bosses that slow down the run
Even with a shortened path, you still walk away with valuable epics and important Tier 4 token opportunities, which is why this route is popular for consistent weekly clears.
Full Clear Progression Route
If your goal is full progression, reputation gains, maximum drops, or simply clearing everything for your team, follow a complete path that includes all major bosses and key events:
Attumen the Huntsman ➡️ Moroes ➡️ Maiden of Virtue ➡️ Opera Event ➡️ The Curator ➡️ Terestian Illhoof ➡️ Shade of Aran ➡️ Netherspite ➡️ Chess Event ➡️ Prince Malchezaar ➡️ Nightbane
A full clear is best for:
- Groups still learning the raid and improving consistency
- Players chasing upgrades from specific boss tables
- Completing your weekly objectives with full coverage
- Maximizing chances at drops, badges, and overall raid value
Tip: Once your group is geared and comfortable, many teams swap between these routes, using quick clears for farming and full clears for progression weeks or when specific boss loot is needed.
Karazhan Shortcuts
Using the best Karazhan shortcuts in TBC Anniversary can shave a huge amount of time off your weekly clear, especially if your group is farming specific bosses or trying to keep the run under a tight schedule. Karazhan is a long raid with multiple wings and plenty of backtracking, so knowing the fastest routes makes a noticeable difference.
Opera Event Side Entrance Shortcut
After you clear the Opera Event, you can take a side entrance that moves you deeper into the raid and skips unnecessary travel from the main path.
From the main entrance, do the following:
- Head right outside the front gate area
- Cross the creek
- Follow the stairs upward
- Cross the bridge
- Enter the door that leads further into Karazhan
This is one of the most reliable time savers for both quick clears and full clears once your raid is comfortable with the route.
Servant Entrance Above the Ballroom
Another useful shortcut is the servant entrance above the ballroom mezzanine, which can function as a faster route through certain sections of the instance. It is especially handy when your raid needs to regroup, recover after wipes, or simply move between wings with less downtime.
Shade of Aran Teleport
After you defeat Shade of Aran, you gain access to one of the best quality of life shortcuts in the raid. Speak to Berthold, who stands near the stairs in the area, to teleport directly to Aran’s room. This helps your group return quickly after deaths and reduces the time spent running back through trash.
Karazhan Vendors
The Karazhan vendors in Burning Crusade Classic are placed inside the instance to keep your raid supplied, repaired, and ready to keep pulling. These NPCs are particularly valuable during early progression when durability loss, reagent needs, and long clears can otherwise force you to leave the raid.
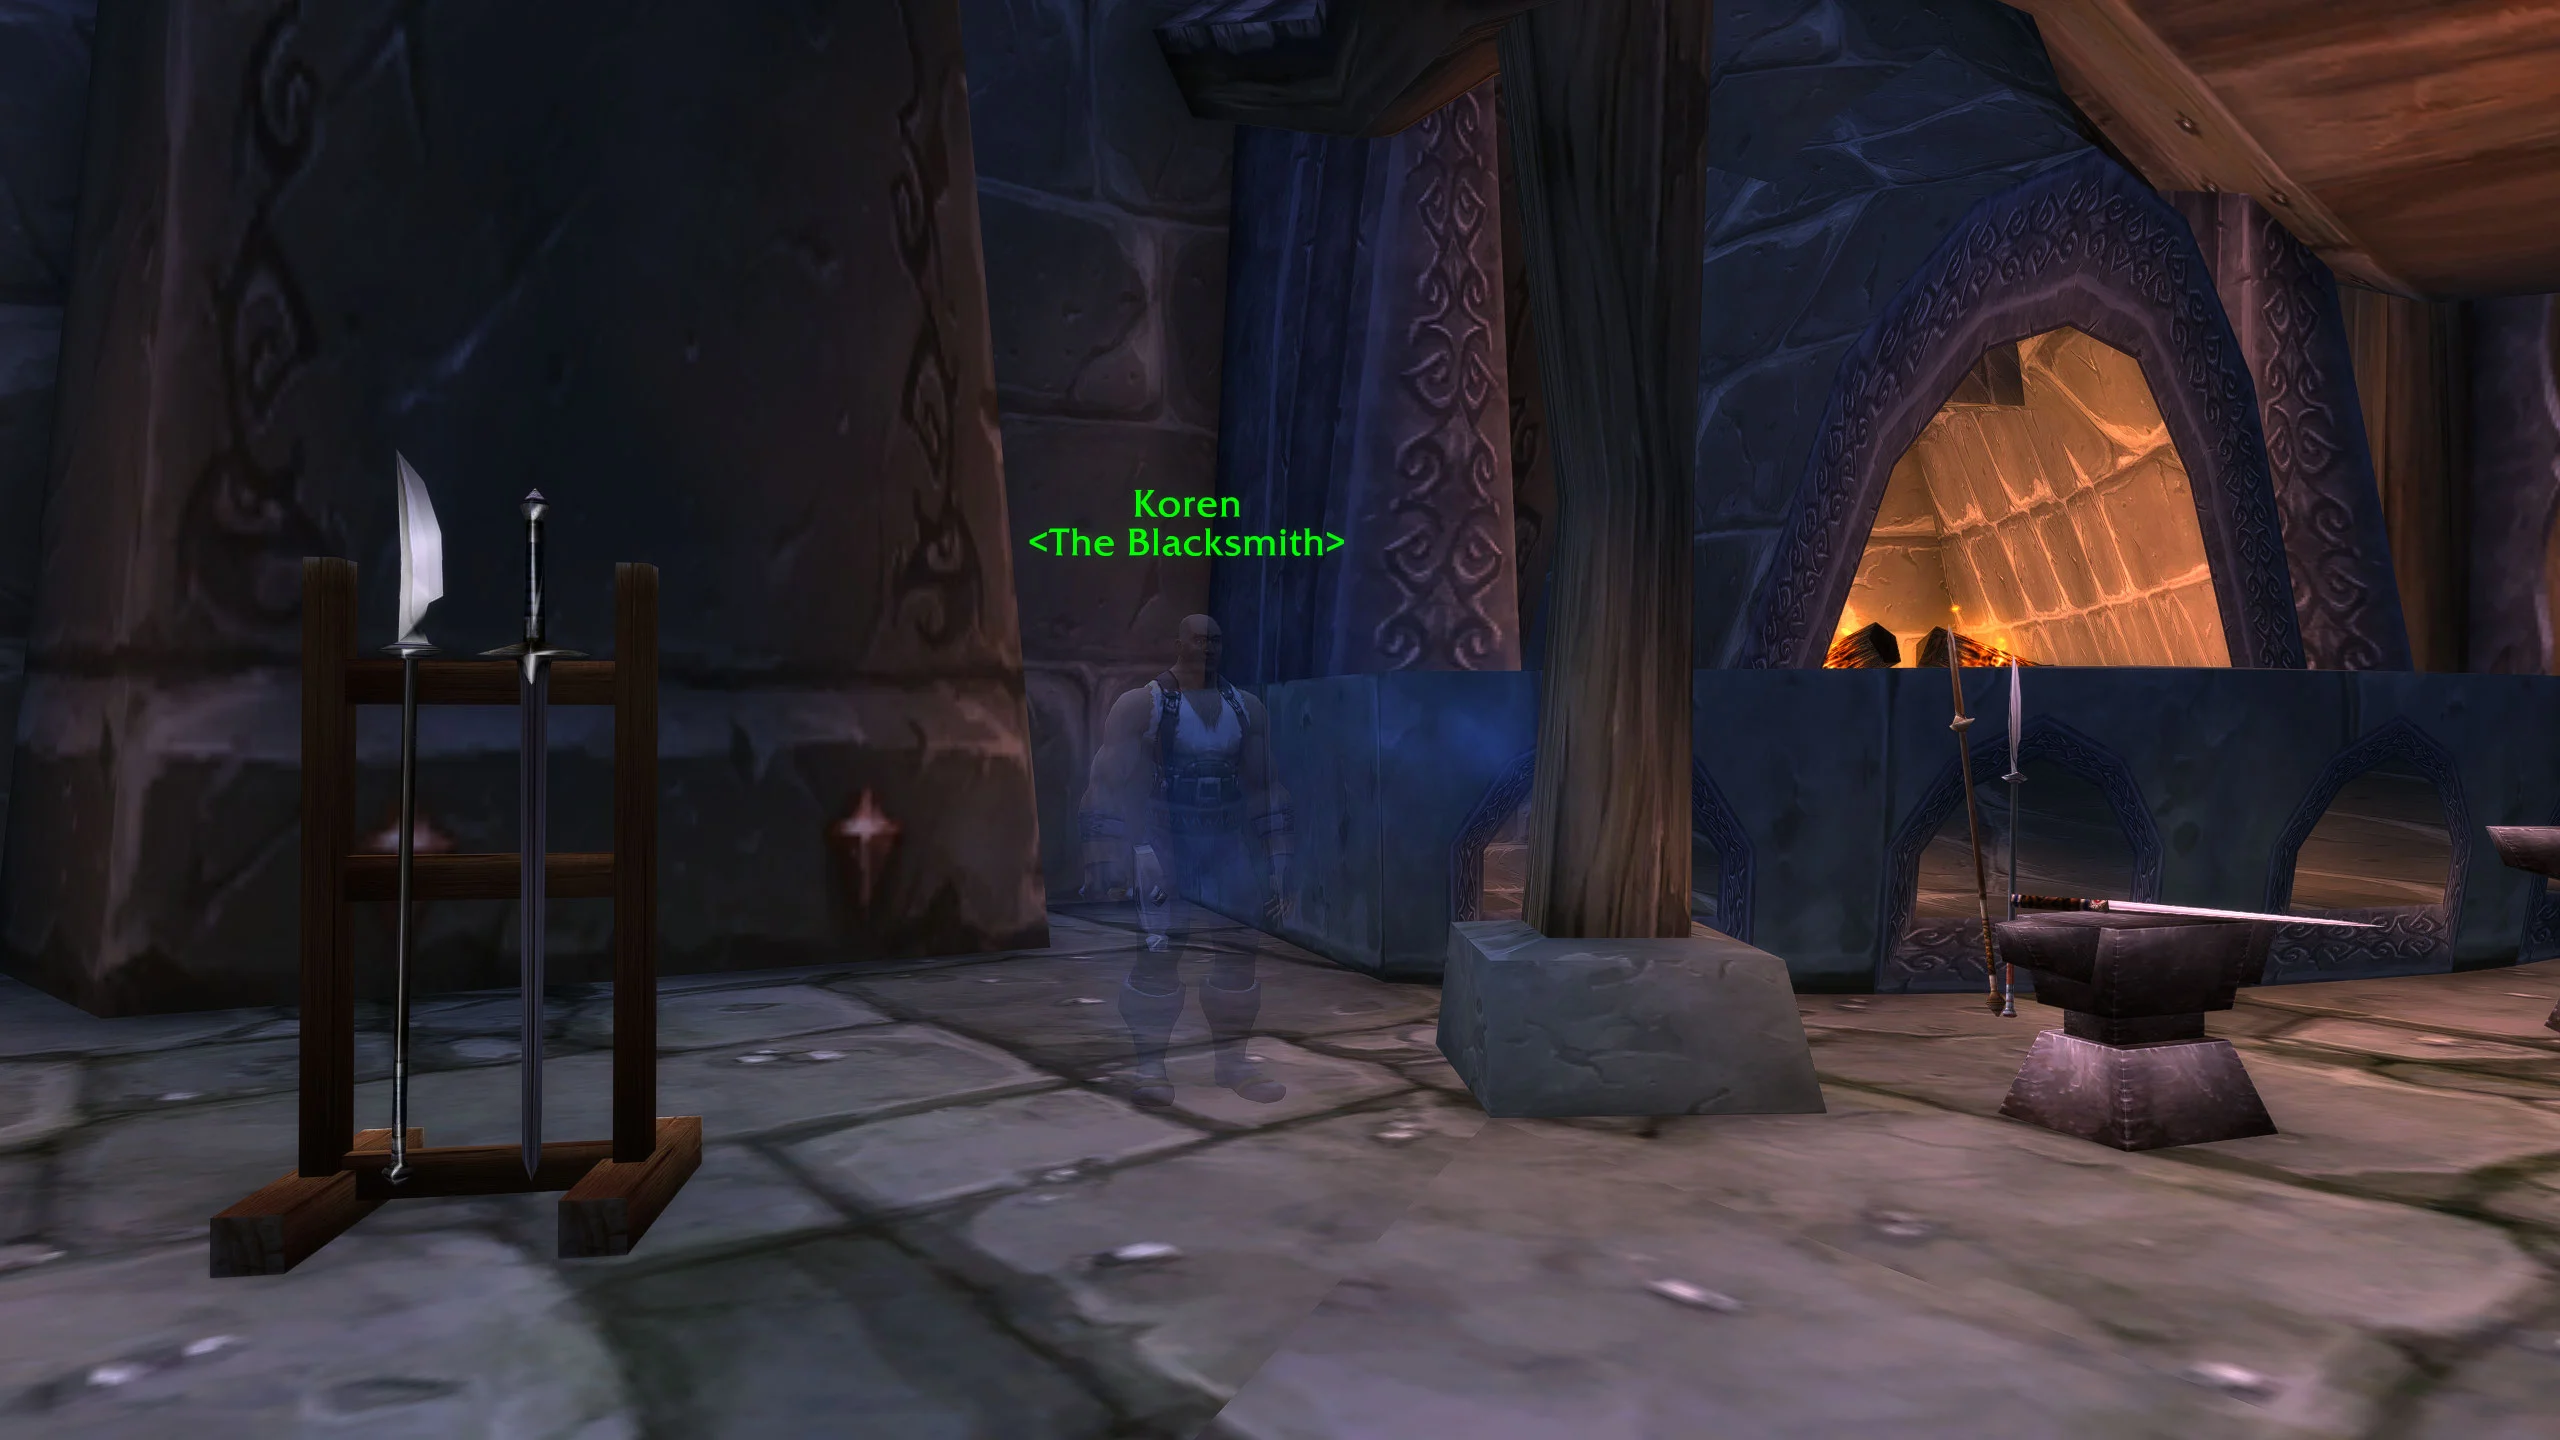
Koren
Koren is located near Attumen the Huntsman and becomes especially important if you are working on The Violet Eye reputation.
- Offers gear repairs if you are Honored with The Violet Eye
- Sells select epic Blacksmithing recipes
- Great stop for players focused on crafting upgrades and profession progression
If your group is pushing deeper into Karazhan, unlocking repair access through reputation can save a lot of time and frustration.
Ythyar
Another vendor, Ythyar, is found outside the Gamesman’s Hall, in the room just before the Chess Event.
- Provides common reagents so casters and healers can restock
- Offers The Consortium reputation rewards
- Provides gear repairs, letting your raid stay inside the instance and continue the run smoothly
Because Ythyar is placed close to a major event, many groups use this room as a quick reset point before the Chess encounter, especially on learning runs.
The Burning Crusade Anniversary Karazhan Reputation
The main Karazhan reputation in TBC Anniversary is The Violet Eye, a raid focused faction tied directly to your progress inside the instance. You earn reputation primarily by killing enemies and completing select Karazhan quests, progressing from Neutral to Exalted over repeated clears. Investing time into this reputation is highly worthwhile because it unlocks practical raid benefits and long term character power.
As you climb standings with The Violet Eye, you gain access to:
- Role specific rings that upgrade as your reputation increases
- A valuable in raid repair vendor (huge quality of life for progression nights)
- Several profession patterns that can be profitable or best in slot early in the expansion
Because reputation is earned through consistent Karazhan clears, it naturally rewards guilds and groups that run the raid weekly.
Ythyar and The Consortium Rewards
While The Violet Eye is the signature Karazhan faction, the raid also includes vendor support tied to other reputations. Ythyar, located outside the Chess Event, represents The Consortium and offers reputation based rewards that can be useful for crafters and raiders alike.
Ythyar can sell items such as:
- Jewelcrafting patterns tied to The Consortium reputation
- An enchanting recipe among the available rep rewards
- Additional convenience supplies that help raids stay prepared without leaving the instance
Earning reputation with these factions encourages repeat runs, but it also pays off in a very practical way: you unlock gear, recipes, and raid convenience features that remain relevant throughout early TBC Anniversary and into Outland progression.
TBC Anniversary Karazhan Bosses
The TBC Anniversary Karazhan bosses are packed with memorable mechanics, multi phase fights, and event style encounters that make the raid feel more like a dungeon on a grand scale than a standard raid instance. Each boss also plays a clear role in your early gearing path, offering upgrades, tier token progression, and key items your group will want as soon as Phase 1 opens.
In this section, we break down every major encounter, from Attumen the Huntsman all the way to Nightbane, so you know exactly what to expect before your first raid night. You will find Karazhan strategies for tanks, DPS, and healers, including:
- Recommended positioning for each fight
- When to use interrupts and priority targets
- How to handle crowd control and dangerous adds
- Tips for managing special abilities, debuffs, and threat spikes
- Common wipe causes and how to avoid them for smoother clears
Whether you are aiming for a quick weekly farm run or full progression clears, understanding these mechanics ahead of time will make Karazhan significantly easier and help your team loot faster with fewer resets.
Attumen the Huntsman
The Attumen the Huntsman strategy in TBC Anniversary is one of the most straightforward boss fights in Karazhan, but it still punishes messy positioning and slow dispels. The encounter starts with Midnight alone, then transitions into a two target phase, and finally ends with a mounted merge and a clean burn to finish the fight.
Phase 1: Midnight (Start of the Fight)
The pull begins with Midnight by herself, and the goal is simply to keep the start calm and controlled.
- Tank: One tank picks up Midnight and holds her steady
- DPS: Begin damage immediately, but avoid blowing every cooldown early
- Healers: Keep the tank stable and conserve mana for later phases
There is nothing complicated here. The main objective is to build a clean rhythm and prepare for the moment Attumen joins.
Phase 2: Attumen Joins at 95 Percent
When Midnight reaches 95 percent health, Attumen the Huntsman leaps into the fight. This is the first point where raids often lose control if tanks are not ready.
- Bring in a second tank as Attumen appears
- Each tank should grab one target, then stack Midnight and Attumen together
- Keep both targets faced away from the raid to prevent Shadow Cleave from clipping players
Raid positioning
- Everyone should stack directly behind the bosses in melee range
- Hunters should sit at minimum range (close enough to avoid getting punished by movement, far enough to stay stable)
- Prioritize damage on Midnight, while cleave naturally hits Attumen for free value
Key mechanic: Intangible Presence
This is the main danger in the encounter because it can cripple tanks and break healing.
- Mages and Druids should dispel Intangible Presence from tanks immediately
- If dispels are clean and you have extra globals, remove it from DPS next
- If the debuff stays on tanks too long, incoming damage spikes and healers can fall behind fast
Phase 3: Mounted Merge at 25 Percent
When either Attumen or Midnight reaches 25 percent health, they merge into a single mounted boss, using whichever of the two has the higher remaining HP. Treat this as the final burn phase where execution matters more than mechanics.
- The main tank stays planted in front and keeps the boss steady
- The raid stacks tight behind the boss to reduce the risk from Berserker Charge
- Hunters should again maintain minimum range so they are not caught out by charge targeting or spacing issues
Dispels still decide the fight
- Intangible Presence must always be removed from tanks first
- If tanks keep the debuff, healing will collapse quickly, especially during the final burn when damage ramps up
If your tanks keep the boss faced away, your raid stays stacked correctly, and dispels are fast, Attumen is a clean early Karazhan kill and a great warm up for the more chaotic encounters later in the raid.
Attumen the Huntsman Loot
| Item | Type | Slot |
|---|---|---|
| Spectral Band of Innervation | Ring | Finger |
| Worgen Claw Necklace | Amulet | Neck |
| Gloves of Saintly Blessings | Cloth Armor | Hands |
| Handwraps of Flowing Thought | Cloth Armor | Hands |
| Harbinger Bands | Cloth Armor | Wrist |
| Gloves of Dexterous Manipulation | Leather Armor | Hands |
| Bracers of the White Stag | Leather Armor | Wrist |
| Whirlwind Bracers | Mail Armor | Wrist |
| Stalker’s War Bands | Mail Armor | Wrist |
| Gauntlets of Renewed Hope | Plate Armor | Hands |
| Vambraces of Courage | Plate Armor | Wrist |
| Steelhawk Crossbow | Crossbow | Ranged |
| Schematic: Stabilized Eternium Scope | Engineering Schematic | – |
| Fiery Warhorse’s Reins | Mount | – |
Moroes
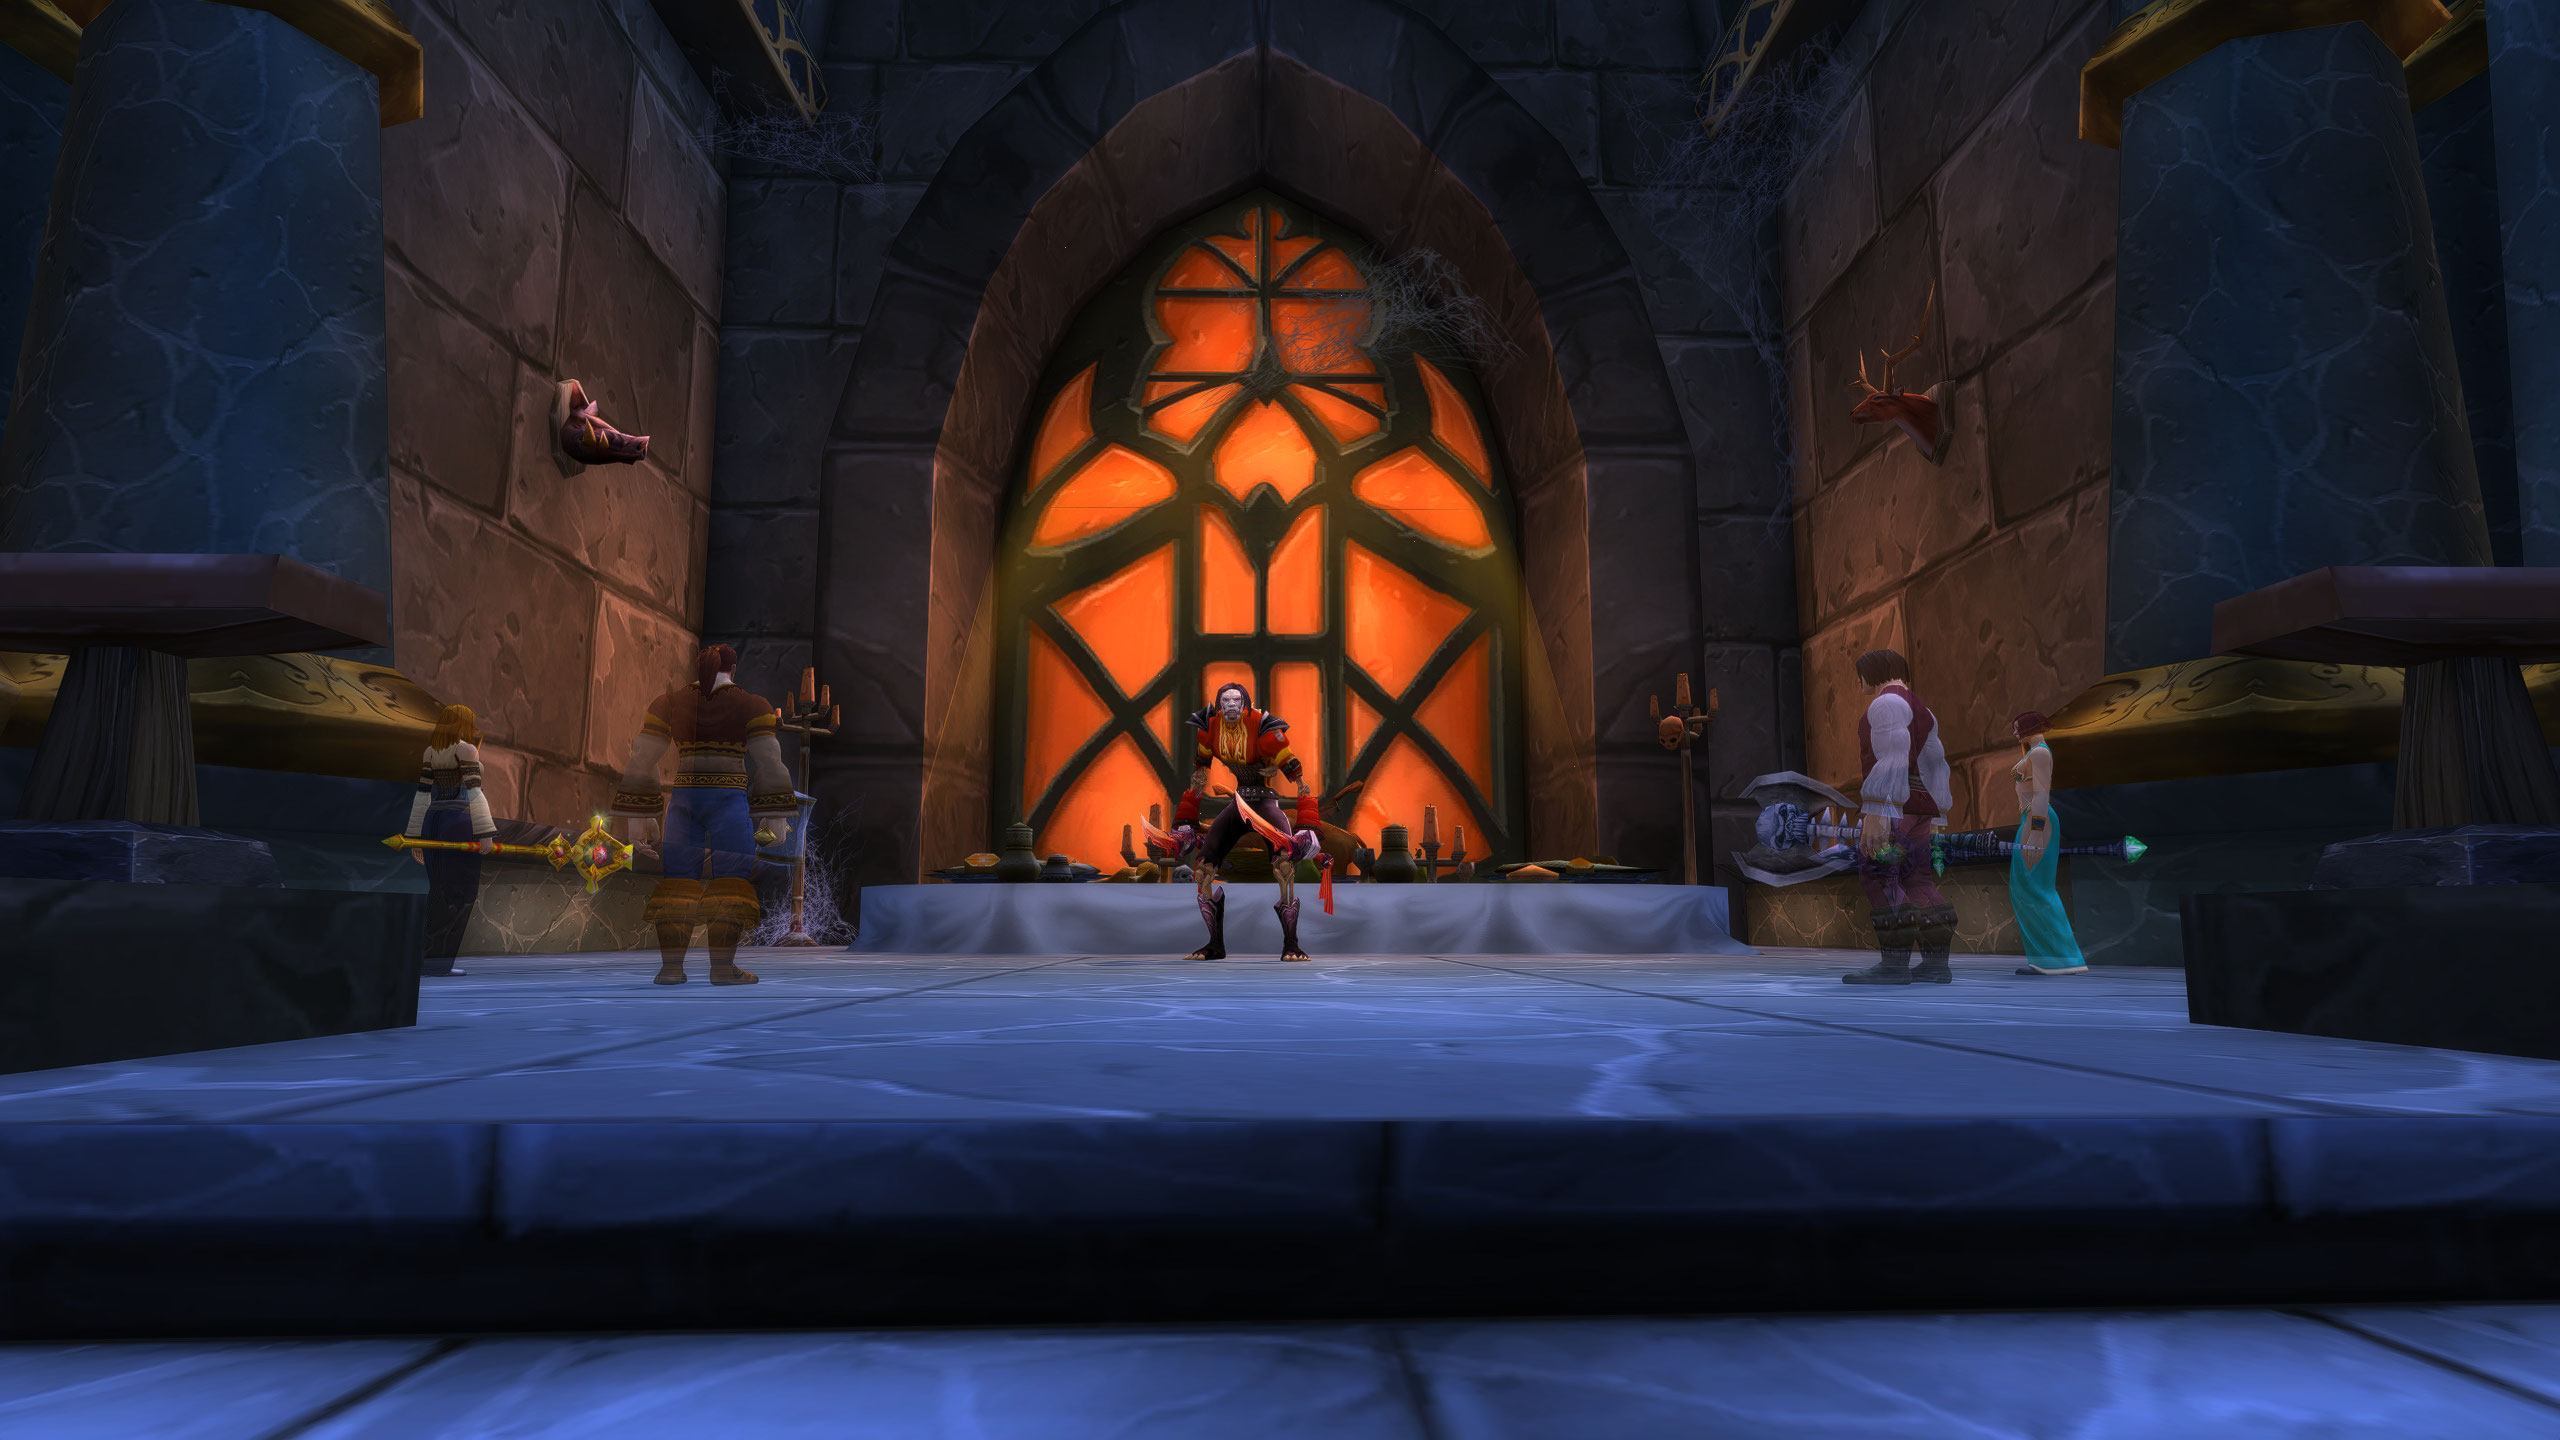
To beat Moroes in TBC Anniversary, your raid needs a bit of setup before the pull. This fight is all about crowd control discipline, a clean kill order, and handling Moroes mechanics (especially Gouge, Blind, and Garrote) without letting the room spiral out of control.
Pre Pull Setup: Kill Order and Crowd Control
Before anyone touches the boss, decide your kill order and assign crowd control targets. Moroes always spawns with multiple adds, and the pull becomes dramatically harder if the wrong targets are left free.
Highest priority kills
- Lady Catriona Von’Indi
- Lady Keira Berrybuck
Both are top priority because they bring healing and can extend the fight endlessly if they are not removed early. - Next targets
3. Baroness Dorothea Millstipe (dangerous due to Mana Burn)
4. Baron Rafe Dreuger (threatening because of stuns) - Finish the remaining order
5. Lord Robin Daris
6. Moroes
7. Lord Crispin Ference
📌 Important: Assign CC targets in advance (who is sheeping, trapping, sapping, banishing, fearing, etc.). Everyone should know their job and where they are positioning before the pull starts.
Pull and Positioning: Control the Room Immediately
On the pull, the key is to separate kill targets from crowd controlled adds right away. Do not let loose adds drift into your DPS stack or healer line.
- The main tank picks up Moroes
- The off tank should stay second on threat on Moroes at all times
- This matters because Moroes uses Gouge, temporarily disabling the main tank and dropping their threat
- If the off tank is not second on threat, Moroes can instantly turn and delete a healer or DPS during Gouge windows
DPS Priorities: Cleave Smart and Interrupt Constantly
DPS should focus on the current kill target while using cleave damage where it is safe. The fight is won by keeping the kill order moving while preventing dangerous casts.
- Interrupt priorities
- Stop Mana Burn
- Stop Greater Heal
- Avoid breaking CC early unless it is planned
- If your group has strong cleave, it can speed up the fight, but only if crowd control remains stable
Healer Responsibilities: Blind, Garrote, and Enrage
Healers need to track three things constantly: Blind, Garrote, and the 30% enrage.
- Blind should be dispelled quickly to keep healing coverage stable
- Be ready for Garrote
- Garrote is a heavy damage over time effect and cannot be removed by normal dispels
- Players with Garrote may need focused healing, especially if multiple targets get it at once
- At 30% health, Moroes enrages, increasing his damage
- This is where tanks and Garrote targets can suddenly become unhealable if cooldowns and dispels are late
If your raid keeps CC clean, maintains an off tank second on threat, and interrupts consistently, Moroes becomes a controlled fight instead of a chaotic wipe festival.
Moroes Loot
| Item | Type | Slot |
|---|---|---|
| Moroes’ Lucky Pocket Watch | Trinket | Trinket |
| Brooch of Unquenchable Fury | Amulet | Neck |
| Signet of Unshakable Faith | Off-hand Frill | Held In Off-hand |
| Royal Cloak of Arathi Kings | Cloak | Back |
| Shadow-Cloak of Dalaran | Cloak | Back |
| Nethershard Girdle | Cloth Armor | Waist |
| Edgewalker Longboots | Leather Armor | Feet |
| Belt of Gale Force | Mail Armor | Waist |
| Boots of Valiance | Plate Armor | Feet |
| Crimson Girdle of the Indomitable | Plate Armor | Waist |
| Emerald Ripper | Dagger | One-Hand |
| Idol of the Avian Heart | Idol | Relic |
| Formula: Enchant Weapon – Mongoose | Enchanting Formula | – |
Maiden of Virtue
The Maiden of Virtue strategy in TBC Anniversary is mostly a positioning and dispel check. The fight is very consistent when your raid spreads correctly, handles Holy Fire instantly, and prepares for Repentance without panic. Your goal is to keep the room organized so incoming damage stays predictable from start to finish.
Tank Positioning
Start the fight by having the main tank hold Maiden in the center of the room, right where she stands when the encounter begins. Keeping her planted in the middle makes it easier for everyone to spread around the edges while staying in line of sight and within healing range.
- Tank stays centered and keeps the boss stable
- Do not drag her around unless your raid is mispositioned
- Face her away from the raid as a general habit to reduce accidental cleave issues
Ranged and Healer Spread
Healers and ranged DPS should spread evenly around the room, leaving space between players. This is critical because Holy Wrath can punish clumped groups and quickly snowball into unnecessary deaths when multiple players are chained too close together.
- Spread in a wide circle
- Keep enough distance so Holy Wrath does not heavily chain
- Maintain line of sight to the center at all times
Dispel Priority: Holy Fire
Holy Fire is the most important thing to manage during normal gameplay.
- Healers should dispel Holy Fire immediately whenever it is applied
- Any class with a self removal tool should use it to reduce healer pressure
- If Holy Fire sits on targets too long, it creates avoidable burst damage and forces inefficient healing
Repentance Counterplay
Maiden periodically casts Repentance, which stuns the entire raid except the tank. If you handle this correctly, Repentance becomes a minor disruption instead of a wipe condition.
To counter it cleanly:
- Ranged DPS and healers should step into Holy Ground a few seconds before Repentance
- The periodic damage from Holy Ground will break the stun almost instantly
- After it breaks, re spread quickly and stabilize the raid
This timing is the difference between a smooth kill and a messy recovery where people sit stunned while damage ramps up.
Defensive Timing After Repentance
After each Repentance, there is a short window where healing can lag while the raid breaks out and repositions. During this moment, the tank is still taking full melee damage.
- The main tank should use defensives right after Repentance
- This reduces the chance of a tank death while healers regain control
- Healers should prioritize tank stabilization first, then top the raid
Paladin utility
- Paladins can use Blessing of Sacrifice or Divine Shield to break free from Repentance early
- This allows them to assist with emergency healing or quick stabilization during the most dangerous recovery window
If your raid spreads properly, dispels Holy Fire instantly, and steps into Holy Ground before Repentance, Maiden of Virtue becomes a reliable early Karazhan boss that many groups one shot on farm weeks.
🎯 Phase 1 gear primarily comes from Karazhan, Gruul’s Lair, Magtheridon’s Lair, crafted items, reputation rewards, and PvP. Want to prepare to get all this gear and attune to the raids? Check out our Phase 1 Attunement service!
Maiden of Virtue Loot
| Item | Type | Slot |
|---|---|---|
| Barbed Choker of Discipline | Amulet | Neck |
| Bands of Indwelling | Cloth Armor | Wrist |
| Bands of Nefarious Deeds | Cloth Armor | Wrist |
| Boots of Foretelling | Cloth Armor | Feet |
| Bracers of Maliciousness | Leather Armor | Wrist |
| Mitts of the Treemender | Leather Armor | Hands |
| Gloves of Centering | Mail Armor | Hands |
| Gloves of Quickening | Mail Armor | Hands |
| Bracers of Justice | Plate Armor | Wrist |
| Iron Gauntlets of the Maiden | Plate Armor | Hands |
| Shard of the Virtuous | One-Handed Mace | Main Hand |
| Totem of Healing Rains | Totem | Relic |
Opera Event
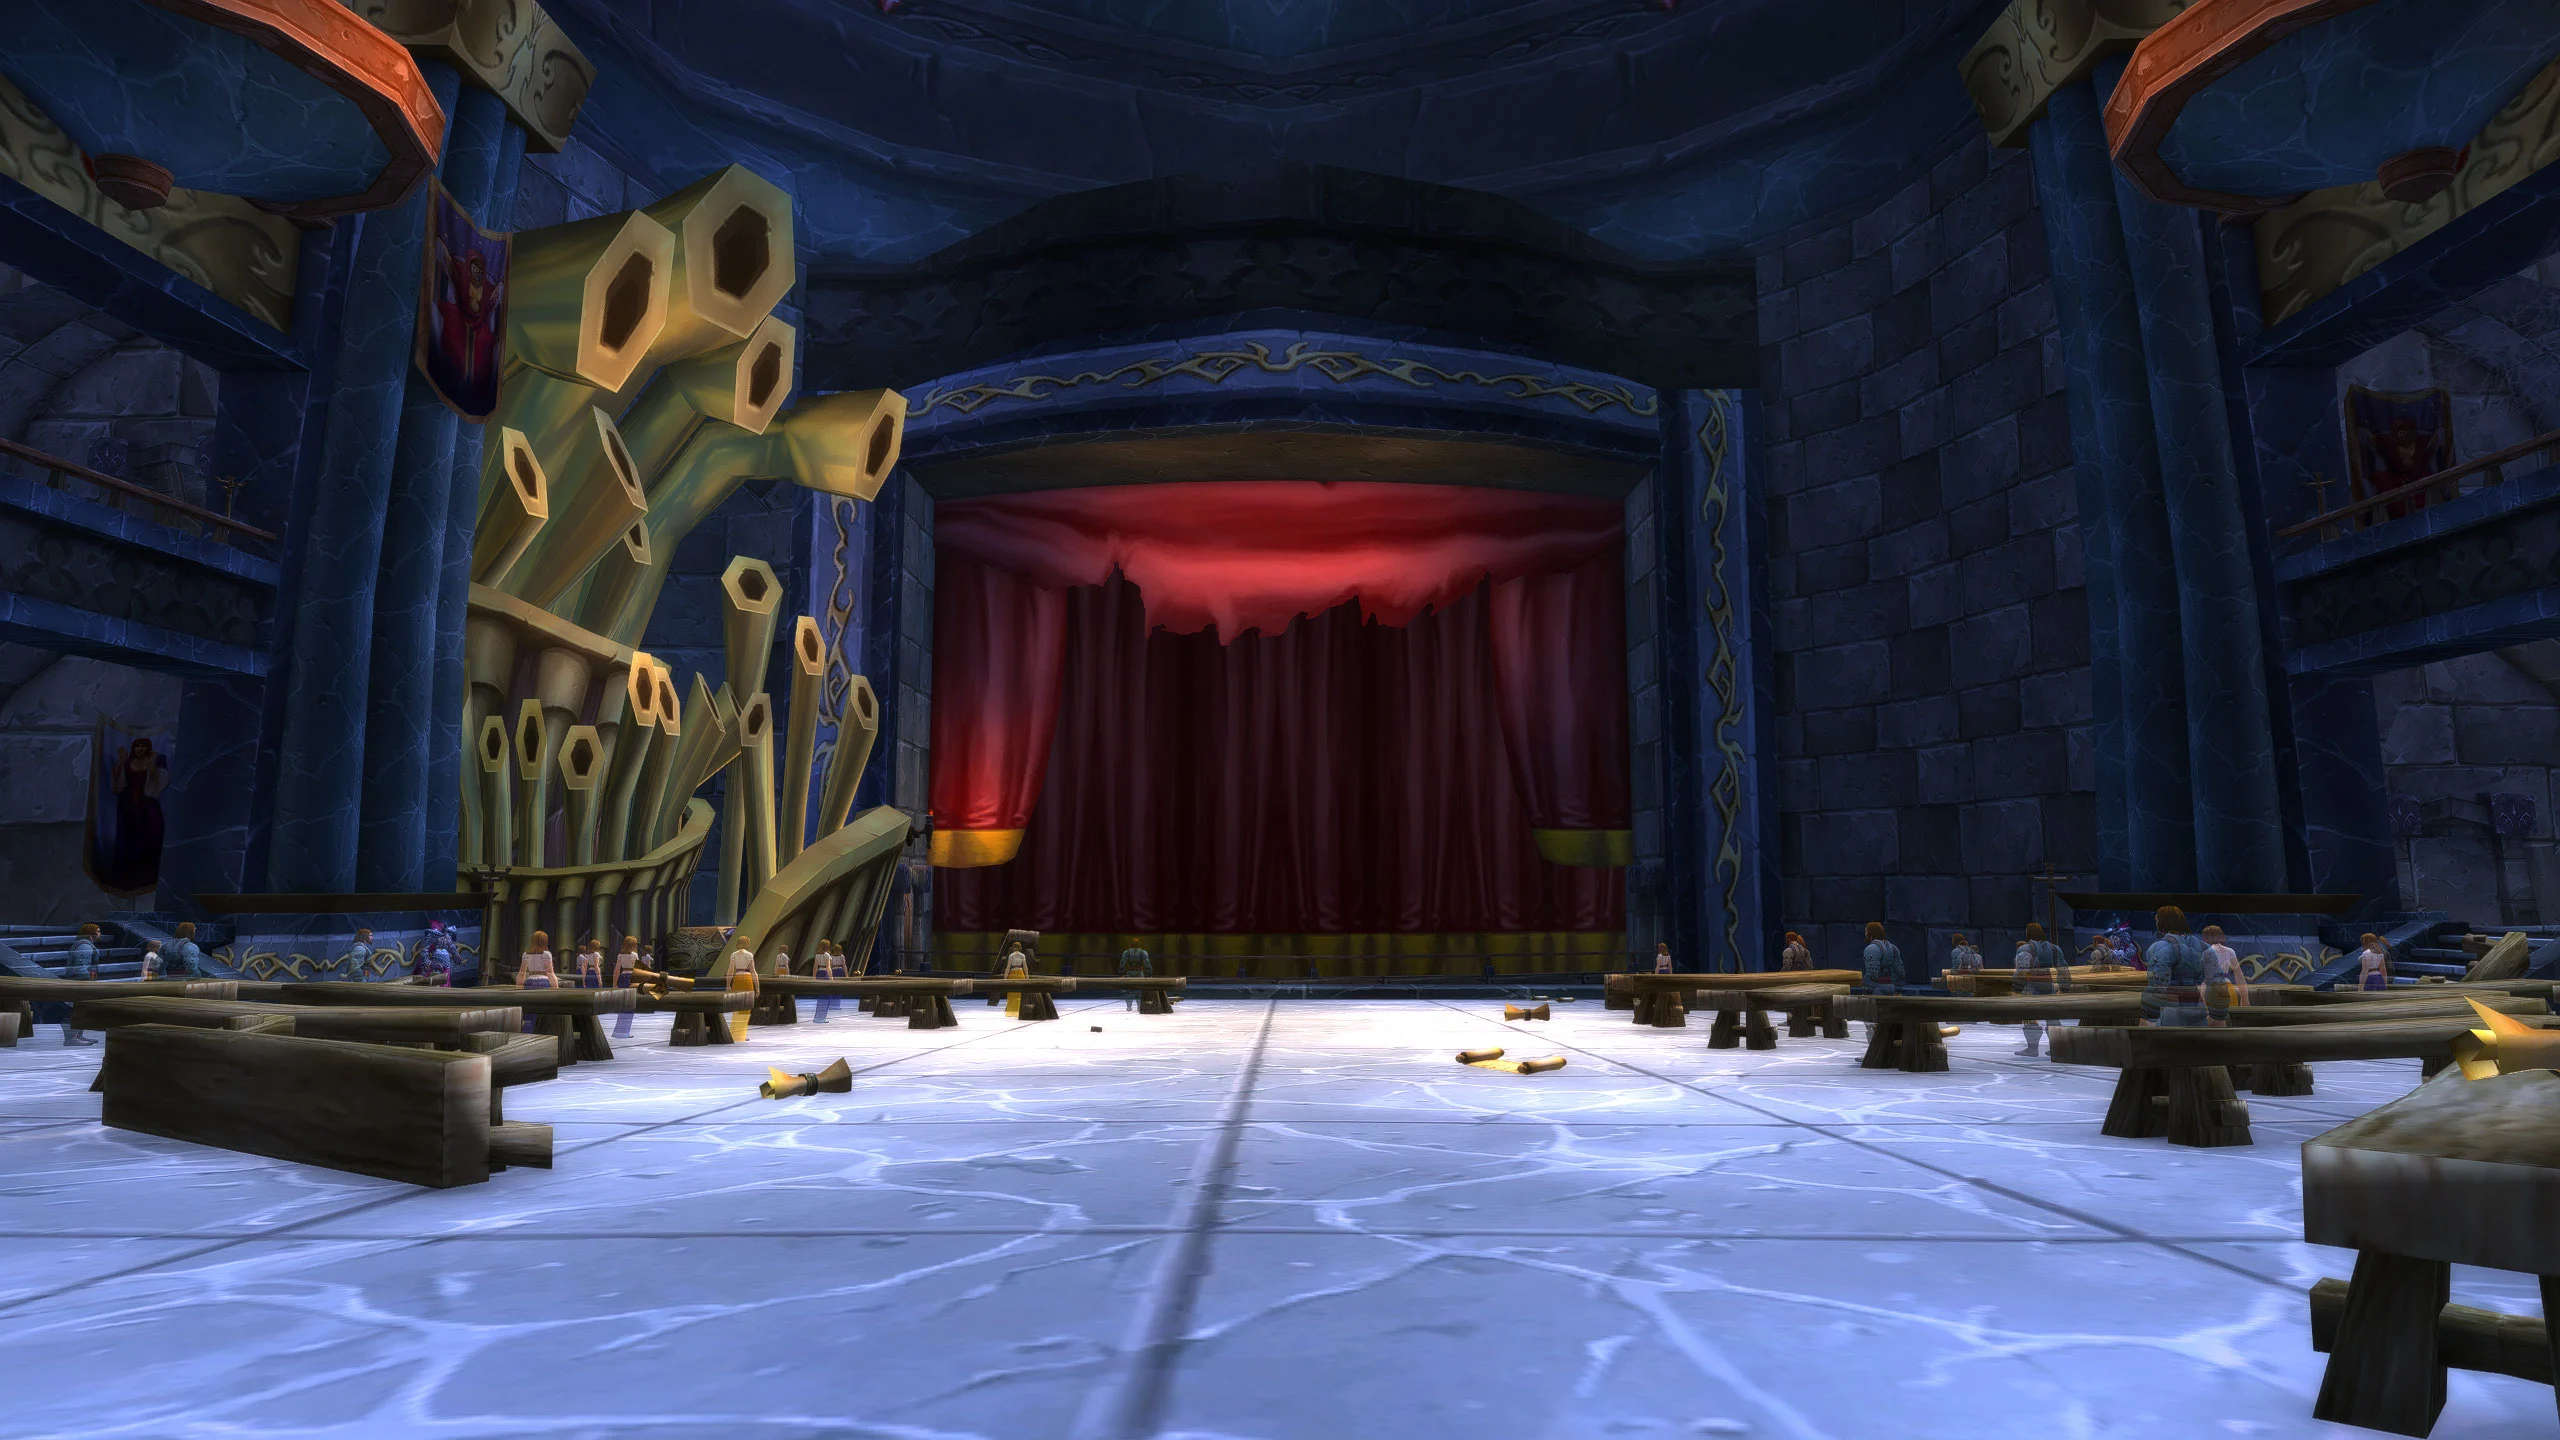
The Opera Event in TBC Classic Anniversary can appear in three different variants, and the game selects one randomly each lockout. Even though the stage and room layout stay the same, every performance has unique mechanics, target priorities, and wipe conditions. Because of that, your first job on entry is to identify which Opera Event you rolled and call the correct plan immediately, so tanks, healers, and DPS can adjust their positioning and cooldown usage.
Opera Event Variant: The Big Bad Wolf
The Big Bad Wolf is mostly a steady damage encounter, but it becomes dangerous the moment someone is targeted by Little Red Riding Hood. Think of it as a controlled fight with one high pressure mechanic that forces clean movement and fast reaction.
Core plan
- Tank the boss normally whenever no one is being chased
- Keep the raid positioned cleanly and avoid unnecessary damage
- Maintain steady DPS and do not overcomplicate the fight
Little Red Riding Hood: What to Do When You Get Targeted
When a player is hit with Little Red Riding Hood, they must react instantly.
- Start kiting immediately
- Run the boss around the outer edges of the room
- Avoid the center to prevent clipping teammates and forcing bad movement
- Do not panic sprint through the raid, keep a smooth circular path so the group can keep DPS uptime safely
If the targeted player hesitates, the boss can delete them quickly and then snowball into more deaths.
Healer Priorities and Raid Safety
Healers should treat the chased target as the top priority whenever Little Red Riding Hood is active.
- The targeted player takes constant pressure while being chased
- Keep them stabilized with fast heals and defensive support
- Other players should keep spacing so healing can stay efficient and predictable
Key Abilities to Watch
Two abilities commonly cause avoidable deaths when positioning gets sloppy:
- Terrifying Howl (fear)
- Shamans: use Tremor Totem
- Priests: apply Fear Ward
- Call out fears so the raid does not drift into bad spots
- Wide Swipe
- Punishes players who stand too close or in the wrong angle
- Stay disciplined with your spacing, especially during kite moments
Helpful Tricks and Survival Tools
Several class abilities can help players survive, reduce pressure, or negate the mechanic in key moments:
- Vanish
- Feign Death
- Blessing of Protection
Use these tools intelligently, especially if the targeted player is low, boxed in, or at risk of getting caught during a fear.
If your raid keeps the kite path wide and clean, assigns quick healer focus, and manages fears properly, Big Bad Wolf becomes one of the easier Opera variants to clear consistently each lockout.
Opera Event: The Big Bad Wolf
The Big Bad Wolf Opera Event is mostly a straightforward fight, but it can turn chaotic fast if your raid mishandles Little Red Riding Hood. Most of the encounter is steady damage with simple positioning, and the real challenge is keeping the raid stable while one player is forced to kite the boss.
Main Mechanic: Little Red Riding Hood
When a player is targeted by Little Red Riding Hood, they must react instantly.
- Start kiting immediately
- Run The Big Bad Wolf along the outer edges of the room
- Avoid the center so you do not drag the boss through your raid stack
- Keep your movement smooth and predictable so healers can keep you alive and DPS can keep hitting safely
If the targeted player hesitates or cuts through the middle, Wide Swipe and fear effects can chain into quick deaths.
Tanking and Raid Positioning
Outside of the chase mechanic, the boss should be handled like a normal tanked encounter.
- Tank the boss as usual whenever no one is being chased
- The raid should maintain clean spacing and avoid clumping
- Focus on steady damage, not risky greed positioning
Healing Priorities
Healers should immediately switch attention to the player being chased.
- The Little Red Riding Hood target takes constant damage while running
- Keep them topped and be ready for emergency heals if they get slowed or feared
- Do not overcommit to raid healing during the chase if the targeted player is in danger
Key Abilities to Watch
Two abilities punish mistakes more than anything else:
- Terrifying Howl (fear)
- Shamans: drop Tremor Totem to stabilize movement
- Priests: use Fear Ward to protect key players
- Wide Swipe
- Hits players who stand poorly or drift into the wrong area
- Stay disciplined with spacing, especially during kite windows
Useful Survival Tools
Certain abilities can help players survive, reset pressure, or potentially drop the debuff depending on timing:
- Vanish
- Feign Death
- Blessing of Protection
Used at the right moment, these tools can prevent a death during a fear, buy time for heals, or keep the boss from catching the target.
If your raid keeps the kite path on the outer ring, prioritizes the chased player for healing, and prepares for fears, Big Bad Wolf becomes a clean and repeatable Opera clear every lockout.
Opera Event: The Big Bad Wolf Loot
| Item | Type | Slot |
|---|---|---|
| Red Riding Hood’s Cloak | Cloak | Back |
| Big Bad Wolf’s Head | Mail Armor | Head |
| Big Bad Wolf’s Paw | Fist Weapon | Main Hand |
| Wolfslayer Sniper Rifle | Gun | Ranged |
Opera Event: Wizard of Oz
The Wizard of Oz Opera Event is a two phase encounter built around target priority, clean tanking, and controlled positioning. If your raid follows the correct kill order in Phase 1 and avoids common mistakes with Tito and Rust stacks, the fight becomes one of the more consistent Opera clears in TBC Classic Anniversary.
Phase 1: Kill Order and Cast Mechanics
Phase 1 is all about killing the cast in the right sequence. If you ignore the order, the fight can spiral quickly due to enrages, tank pressure, and uncontrolled damage.
1) Dorothee (must die first)
- Dorothee is the top priority and should be burned down immediately
- Do not kill Tito while Dorothee is alive
- If Tito dies before Dorothee, Dorothee will enrage, which can overwhelm tanks and healers and often forces a wipe
2) Roar (off tank)
- After Dorothee is down, kill Roar
- Roar should be picked up by an off tank and held safely away from the raid
- Keep damage controlled and avoid unnecessary cleave into other targets if your group is still stabilizing
3) Strawman (fire damage control)
- Next, kill Strawman
- Strawman can be repeatedly disoriented by fire damage, so assign a player who can apply consistent fire effects
- This reduces incoming pressure and makes the kill much smoother, especially on early progression
4) Tinhead (killed last)
- Tinhead should be killed last
- The main tank should handle Tinhead
- Watch for Rust stacks
- If Rust stacks become dangerous, use kiting to reduce pressure and buy healing time
- Coordinate movement so Tinhead does not cleave into the raid or drag through casters
Phase 2: The Crone
Once all four cast members are defeated, The Crone spawns and Phase 2 begins. This phase is simpler, but it punishes stacking and sloppy movement.
- Spread out to reduce damage from chain style attacks
- Keep positioning clean and avoid bunching in melee and ranged clumps
- Use light crowd control and disciplined movement to prevent unnecessary damage spikes
If your raid stays spread and continues steady damage, The Crone will fall quickly, ending the encounter.
Opera Event: Wizard of Oz Loot
| Item | Type | Slot |
|---|---|---|
| Ruby Slippers | Cloth Armor | Feet |
| Wicked Witch’s Hat | Cloth Armor | Head |
| Legacy | Two-Handed Axe | Two-Hand |
| Blue Diamond Witchwand | Wand | Ranged |
Opera Event: Romulo and Julianne
The Romulo and Julianne Opera Event is one of the most technical Karazhan performances in TBC Classic Anniversary because it heavily rewards interrupt discipline, clean dispels, and tight DPS control in the final phase. The encounter has three phases: Julianne first, Romulo second, then both together with a strict kill timing requirement.
Phase 1: Julianne
Phase 1 is entirely about shutting down Julianne with interrupts and dispels. If your raid misses key casts, healing quickly falls behind and the fight becomes chaotic.
Top priorities
- Interrupt Julianne aggressively
- Eternal Affection is the highest priority cast and must be stopped consistently
- Dispel her Devotion buff as soon as it appears to prevent the fight from dragging and to keep damage stable
Best practice
- Assign a clear interrupt rotation (especially for melee) so Eternal Affection never sneaks through
- Keep Julianne positioned so melee can maintain uptime without chasing her around the room
Phase 2: Romulo
Once Julianne dies, Romulo enters and Phase 2 begins. This phase is simpler mechanically, but it can punish tanks and healers if Romulo is not controlled properly.
Tank positioning
- Tank Romulo with his back near a wall
- This helps control movement and reduces the chance of bad repositioning during pressure moments
Dispels and utility
- Daring should be dispelled quickly whenever it appears
- Warriors should disarm Romulo on cooldown to reduce his threat and smooth out incoming damage
If your dispels are clean and disarms are consistent, Phase 2 becomes a stable setup for the final check.
Phase 3: Both Resurrect
In Phase 3, both bosses resurrect and must be killed within 10 seconds of each other. This is the real win condition of the fight and where most wipes happen.
Target assignments
- Melee DPS: stay on Julianne to maintain interrupt coverage and stop Eternal Affection
- Ranged DPS: focus Romulo for clean split damage and easier timing control
What makes this phase dangerous
- Both bosses continue using their earlier abilities
- Interrupt and dispel requirements remain active while you are also managing kill timing
- If your raid kills one boss too early, the other will not die in time and you risk a wipe
How to avoid wipe timing
- Call HP percentages out loud (or via markers) and slow DPS as needed
- Save burst cooldowns to correct timing if one target falls behind
- Coordinate swaps only if your group is experienced, otherwise keep roles fixed and adjust damage with controlled pacing
If your team keeps interrupts locked on Julianne, dispels Daring quickly, and carefully matches kill timing, Romulo and Julianne becomes a repeatable clear that feels much easier week after week.
Opera Event: Romulo and Julianne Loot
| Item | Type | Slot |
|---|---|---|
| Romulo’s Poison Vial | Trinket | Trinket |
| Masquerade Gown | Cloth Armor | Chest |
| Blade of the Unrequited | Dagger | Main Hand |
| Despair | Two-Handed Sword | Two-Hand |
Opera Event Shared Loot
| Item | Type | Slot |
|---|---|---|
| Ribbon of Sacrifice | Trinket | Trinket |
| Trial-Fire Trousers | Cloth Armor | Legs |
| Earthsoul Leggings | Leather Armor | Legs |
| Beastmaw Pauldrons | Mail Armor | Shoulder |
| Eternium Greathelm | Plate Armor | Head |
| Libram of Souls Redeemed | Libram | Relic |
The Curator
The Curator in The Burning Crusade Anniversary is a rhythm fight that alternates between controlled add waves and short, high impact burst windows. Your success comes down to three things: killing Astral Flares fast, keeping Hateful Bolt under control, and unloading everything during Evocation. If your raid is sloppy on adds, you get overwhelmed. If your raid is slow on Evocation, the fight drags and healer pressure spikes.
Flare Phase
During the main phase, Astral Flares spawn every 10 seconds and must be killed immediately. Treat every Flare as the highest priority target, because letting multiple Flares stack up will flood the raid with damage and quickly snowball into deaths.
Add priority and positioning
- All DPS should hard swap to Astral Flare as soon as they spawn
- Only hit The Curator when no Flare is alive
- Ranged should spread at least 10 yards apart to reduce the constant chain style damage coming from Flares
- Clean spreading also makes healing easier and prevents multiple players taking unnecessary splash damage at the same time
Key mechanic: Hateful Bolt
Throughout the encounter, Hateful Bolt targets the player with the second highest threat, which should ideally be your off tank.
- Your off tank should stay second on threat the entire fight
- Healers must be ready to top the Hateful Bolt target quickly
- Hateful Bolt hits hard and can cause sudden deaths if the target is low or healers are slow to react
A clean threat setup makes this mechanic predictable and reduces random deaths on DPS.
Evocation Phase
After the 10th Astral Flare spawns, The Curator enters Evocation for 20 seconds. This is the most important damage window of the entire encounter.
What to do
- Finish the last Astral Flare immediately
- Then swap all damage to The Curator
- During Evocation, The Curator takes triple damage, so this is where you win the fight
Cooldown usage
- Use all DPS cooldowns during Evocation to maximize burst
- Coordinate healing cooldowns as needed so DPS can stay aggressive without dying
- Plan your burn so you consistently push a large chunk of the boss health each Evocation
Warlock optimization
- Warlocks should cast Curse of Doom after the 4th Astral Flare spawns
- This timing helps ensure the Doom detonation lands during Evocation for maximum value and the best possible damage conversion
Enrage Phase
At 15% health, The Curator enters Enrage.
- Astral Flares stop spawning
- The fight becomes a pure burn phase
- Focus entirely on killing the boss as fast as possible
Important: During Enrage, Hateful Bolt happens more frequently, which increases pressure on:
- The off tank holding second threat
- The healers who must keep that target high health at all times
If your raid survives the final Hateful Bolt pressure and commits to a clean burn, The Curator becomes a consistent kill that also teaches great fundamentals for later Karazhan bosses: add priority, threat control, and timed burst windows.
The Curator Loot
| Item | Type | Slot |
|---|---|---|
| Gloves of the Fallen Hero | Tier Token | Hands |
| Gloves of the Fallen Champion | Tier Token | Hands |
| Gloves of the Fallen Defender | Tier Token | Hands |
| Garona’s Signet Ring | Ring | Finger |
| Pauldrons of the Solace-Giver | Cloth Armor | Shoulder |
| Forest Wind Shoulderpads | Leather Armor | Shoulder |
| Dragon-Quake Shoulderguards | Mail Armor | Shoulder |
| Wrynn Dynasty Greaves | Plate Armor | Legs |
| Staff of Infinite Mysteries | Staff | Two-Hand |
Chess Event
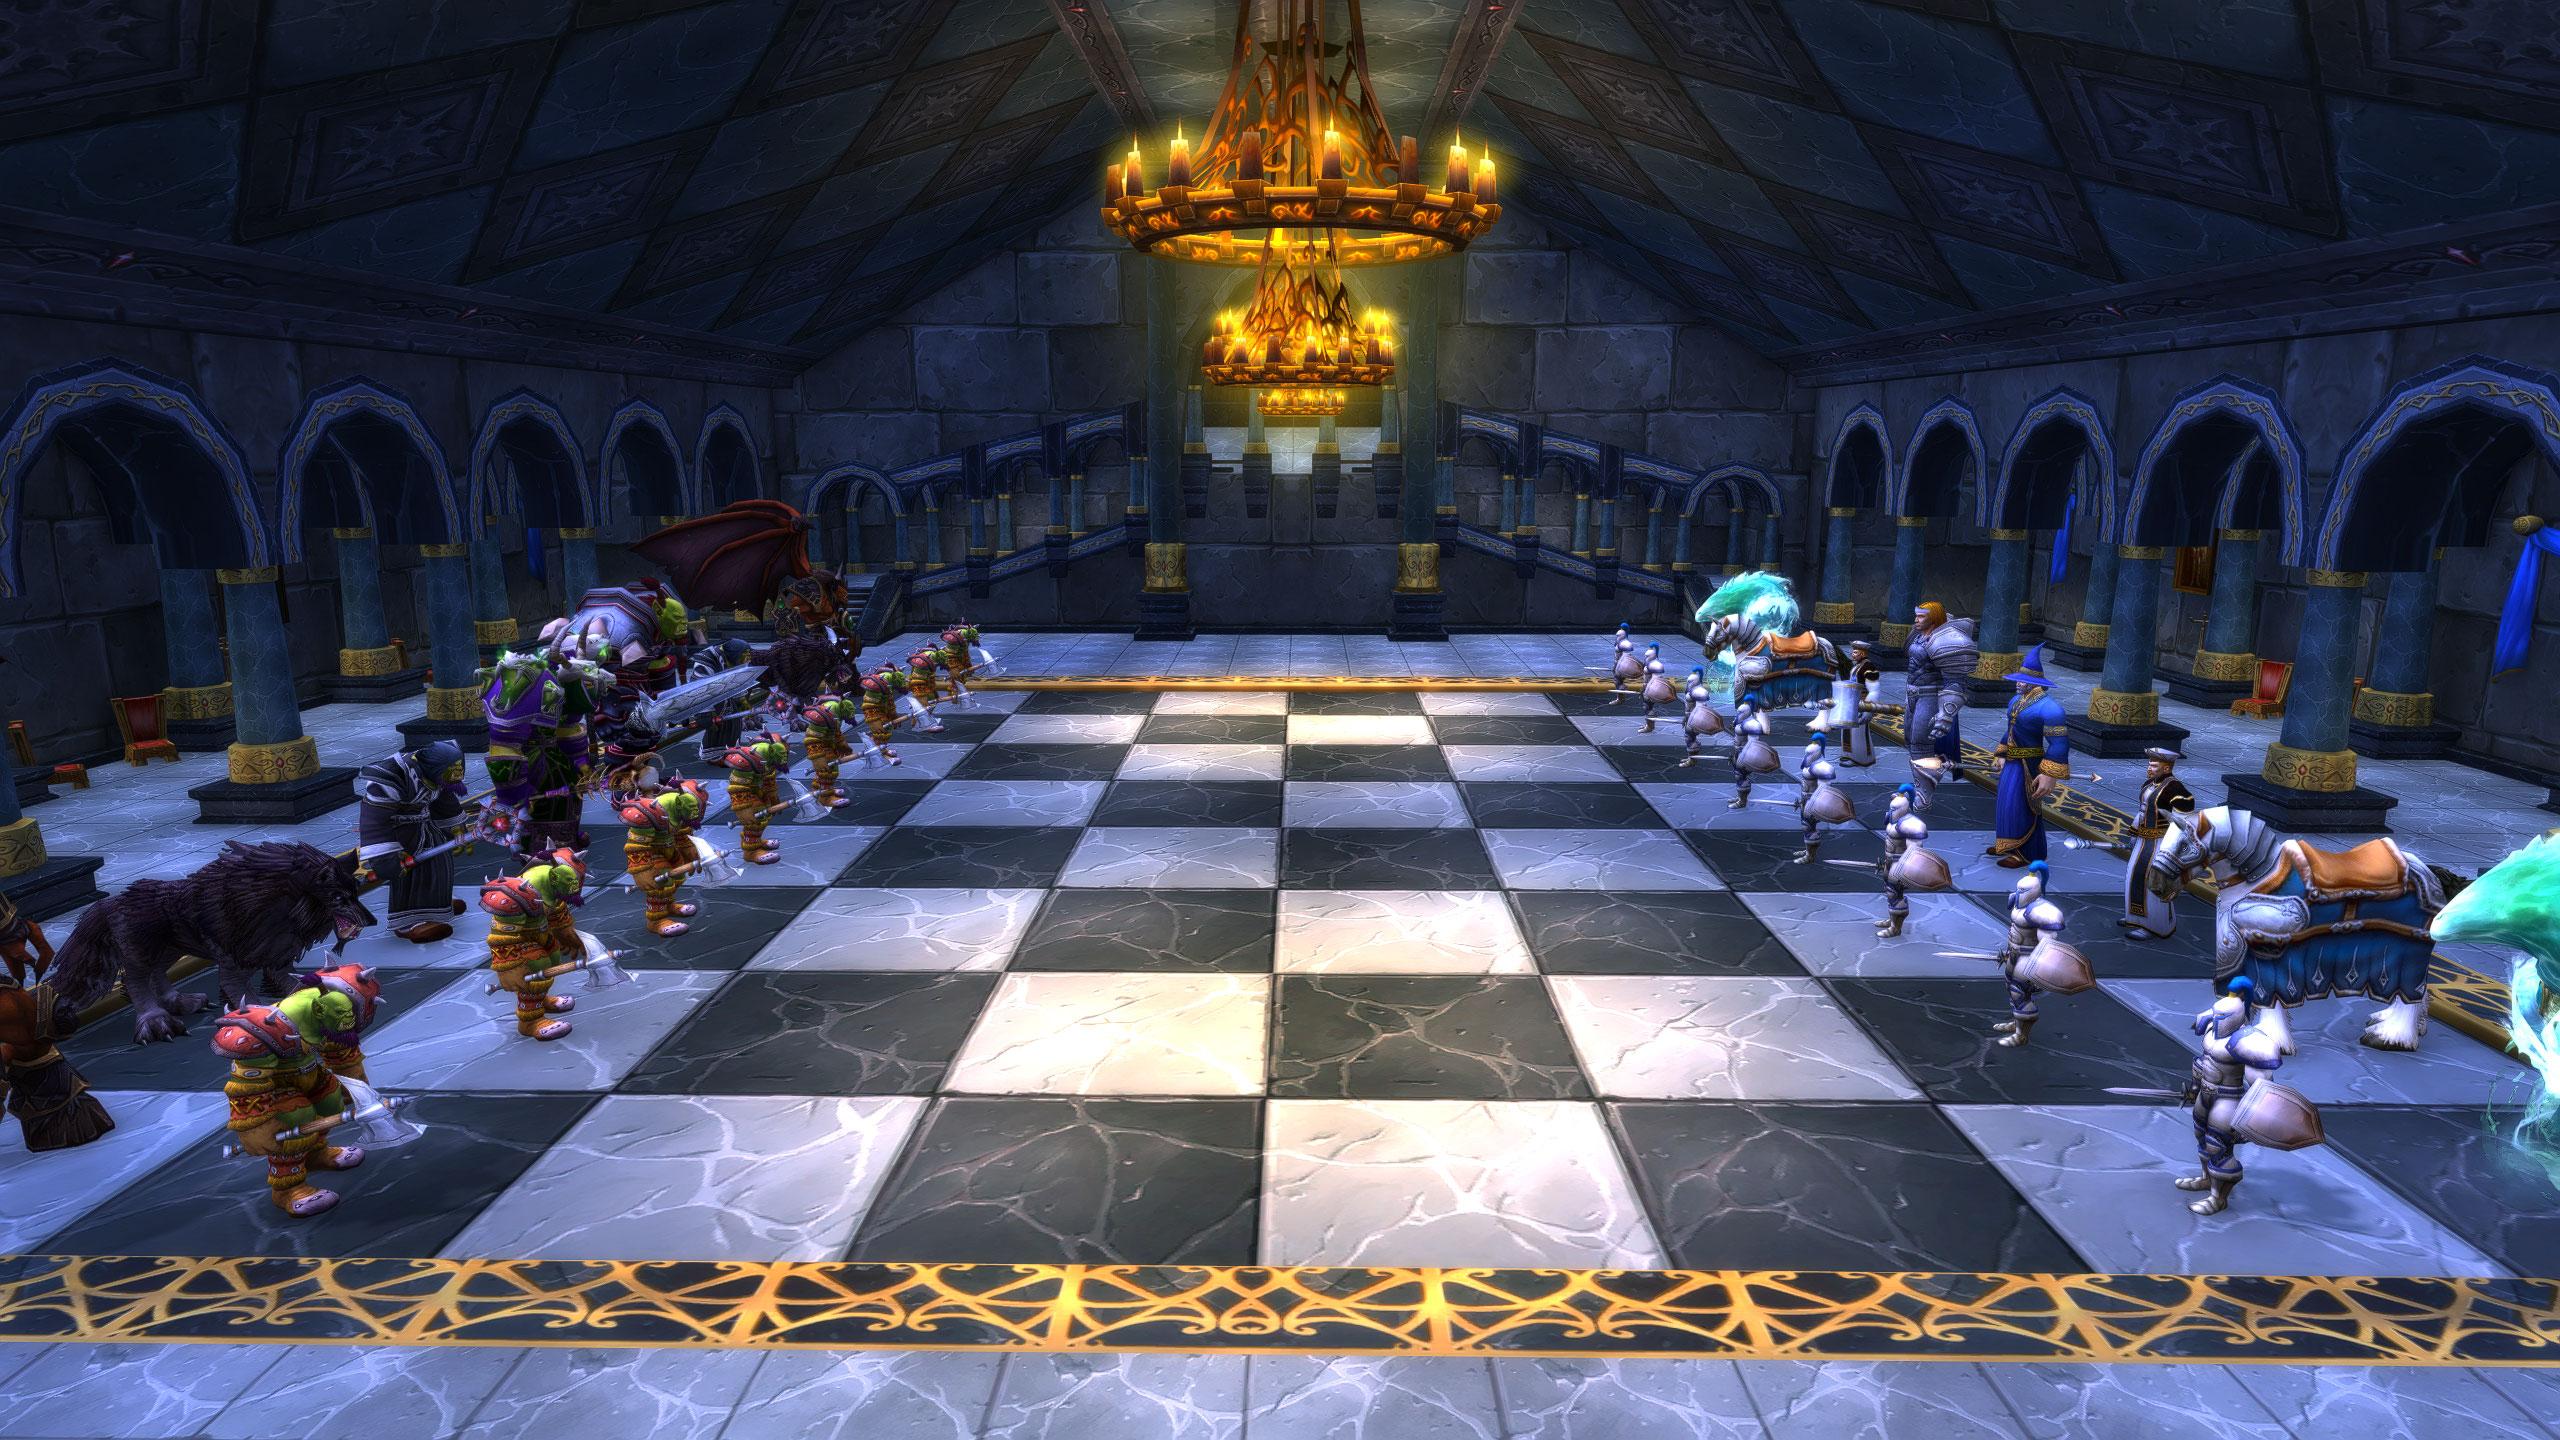
The Chess Event in TBC Classic Anniversary is a unique, non traditional encounter where you do not fight as your character. Instead, you control chess pieces with special abilities and win by defeating Medivh’s King. While it is not a standard boss fight, it can still wipe groups that ignore mechanics, stand in hazards, or fail to react to Medivh’s cheating.
How to Start the Chess Event
The event takes place in the Games Hall. To begin:
- Enter the room and speak to your faction’s King
- Once activated, your raid can start controlling chess pieces on the board
Core Strategy: Open the Board, Then Use Your Strong Pieces
A simple plan works best for most groups.
-
Move Pawns first
-
Push Pawns forward to clear lanes and create space
-
Do not clog your own board position or block stronger pieces from engaging
-
-
Transition into stronger pieces
-
Once space opens, start using high impact pieces:
-
Rooks
-
Knights
-
Bishops
-
Queen
-
-
These pieces have better abilities and deal more meaningful damage than Pawns
-
-
Primary goal
-
Focus your damage and pressure on Medivh’s King
-
The faster you control the center and activate your power pieces, the easier the win becomes
-
Abilities and Medivh Cheating Mechanics
Every chess piece has its own unique abilities, and learning a few key buttons is more important than perfect play. The real difficulty comes from Medivh cheating, which adds unpredictable pressure throughout the match.
Medivh can:
- Buff enemy pieces, making them harder to kill or more dangerous
- Deal area damage that punishes clumped pieces
- Force a berserk style effect on pieces, speeding up damage and creating sudden board swings
Practical Tips for Consistent Wins
- Prioritize controlling and protecting your strong pieces instead of wasting turns on low impact moves
- If Medivh drops hazards or AoE pressure, move your pieces out of danger immediately
- Do not tunnel one target if your board position collapses, keeping your pieces alive is often the difference between a clean win and a reset
- If a key piece gets disabled or threatened, rotate control to another strong piece rather than freezing up
With a clean opener, smart use of Rooks and the Queen, and quick reactions to Medivh’s cheating, the Chess Event becomes a reliable checkpoint on every Karazhan clear and rarely takes long once your group understands the flow.
Chess Event Loot
| Item | Type | Slot |
|---|---|---|
| Ring of Recurrence | Ring | Finger |
| Mithril Chain of Heroism | Amulet | Neck |
| Headdress of the High Potentate | Cloth Armor | Head |
| Bladed Shoulderpads of the Merciless | Leather Armor | Shoulder |
| Forestlord Striders | Leather Armor | Feet |
| Girdle of Treachery | Leather Armor | Waist |
| Fiend Slayer Boots | Mail Armor | Feet |
| Heart-Flame Leggings | Mail Armor | Legs |
| Legplates of the Innocent | Plate Armor | Legs |
| Battlescar Boots | Plate Armor | Feet |
| Triptych Shield of the Ancients | Shield | Shield |
| King’s Defender | One-Handed Sword | One-Hand |
Terestian Illhoof
The Terestian Illhoof strategy in TBC Anniversary is all about tight positioning, fast reaction to Sacrifice, and efficient AoE on the constant add pressure. If your raid keeps the fight centered and clears mechanics quickly, Illhoof becomes a controlled encounter instead of a healer nightmare.
Positioning and Tank Setup
Have your tank pull and hold Terestian Illhoof near the green circle in the room. The goal is to keep everything in the middle, which makes add control easier and prevents imps and other enemies from spreading into awkward corners.
- Tank Illhoof near the green circle
- Keep the raid grouped in a predictable area for faster swaps
- Central positioning helps AoE teams clean up imps without chasing
Kill Kilrek Early for Broken Pact
One of the biggest damage boosts in this fight comes from killing Kilrek early.
- Kill Kilrek as soon as possible
- This applies Broken Pact to Terestian Illhoof
- Broken Pact increases damage taken, so your raid gains faster boss burn and more efficient progress
Keeping Kilrek under control also reduces chaos and gives your healers breathing room.
Sacrifice: Break Chains and Save the Target
Illhoof periodically casts Sacrifice, trapping a player and putting them under heavy pressure. This mechanic must be handled immediately.
- Swap to and destroy the chains as fast as possible
- Heal the sacrificed player aggressively until freed
- If your raid is slow on chains, the target can die very quickly
Emergency removals
- Mages: Ice Block can remove Sacrifice
- Paladins: Divine Shield can remove Sacrifice
These tools are best saved for emergencies, such as when chains are slow, the target is low, or healers are feared or interrupted.
Imp Management: AoE the Portals
Two portals continuously spawn imps, and leaving them alive stacks unnecessary raid damage.
- Assign DPS to AoE down imps consistently
- Rotate AoE cooldowns if needed so imps never build up
- If your raid is undergeared, prioritize add cleanup over greedy boss damage
Terestian Illhoof Loot
| Item | Type | Slot |
|---|---|---|
| The Lightning Capacitor | Trinket | Trinket |
| Mender’s Heart-Ring | Ring | Finger |
| Gilded Thorium Cloak | Cloak | Back |
| Shadowvine Cloak of Infusion | Cloak | Back |
| Cincture of Will | Cloth Armor | Wrist |
| Malefic Girdle | Cloth Armor | Waist |
| Cord of Nature’s Sustenance | Leather Armor | Waist |
| Girdle of the Prowler | Mail Armor | Waist |
| Breastplate of the Lightbinder | Plate Armor | Chest |
| Fool’s Bane | One-Handed Mace | Main Hand |
| Xavian Stiletto | Thrown | Thrown Weapon |
| Terestian’s Stranglestaff | Staff | Two-Hand |
| Formula: Enchant Weapon – Soulfrost | Formula | Recipe |
Shade of Aran
The Shade of Aran fight in TBC Anniversary is a mechanics heavy encounter that rewards awareness more than raw gear. Aran does not follow a normal aggro table, so the raid wins by keeping spacing clean, interrupting the right spells, and reacting instantly to his signature abilities. If your group respects the movement rules, this boss becomes very consistent even on early progression.
Positioning and Interrupt Setup
To reduce disruption and keep casts manageable, start with proper spacing and a clear interrupt plan.
- Casters and healers should stand at least 10 yards apart to avoid getting caught by Counterspell effects
- Set up an interrupt rotation for:
-
Fireball
-
Frostbolt
-
- Let Arcane Missiles go through
-
-
Trying to interrupt everything creates chaos and often causes missed critical interrupts later
-
Because there is no traditional threat table, tanks are not “holding” the boss in the usual way. Instead, the raid should focus on clean mechanics and reliable interrupts.
The Three Abilities Everyone Must Respect
Every player needs to watch for Aran’s three major abilities. Most wipes happen because someone panics or moves at the wrong time.
1) Flame Wreath
- When Flame Wreath is coming, stop moving before it finishes
- Even a small adjustment can trigger the effect and punish the raid
- Call it out loudly so everyone freezes together
2) Circular Blizzard
- Avoid it by moving to the center or shifting to the opposite side of the room
- Do not drift through other players, move decisively and re spread once safe
3) Massive Magnetic Pull ➝ Arcane Explosion
- Aran will pull players in, then cast Arcane Explosion
- As soon as the pull happens, run away to create distance and avoid the blast
- Treat this as a fast reaction check, hesitating here can kill multiple players
40 Percent: Conjured Elementals
At 40% health, Shade of Aran summons 4 Conjured Elementals. These adds can overwhelm the raid if they are ignored.
- Kill them quickly if your DPS can handle it
- If not, crowd control them to stabilize the phase
- If any are uncontrolled, they need to be tanked and kept off healers and casters
Useful tools
- Warlocks can CC the Conjured Elementals, which is especially helpful when your group is still learning the fight
20 Percent Mana: Polymorph and Pyroblast
When Aran reaches 20% mana, he triggers one of the most dangerous moments in the encounter.
- Aran will Polymorph the raid and then cast Pyroblast
- This hits extremely hard and can cause deaths if healers are not ready
- Healers must react immediately with fast recovery healing as soon as the control breaks
Extra Optimization Tips
- Because Aran does not use a traditional threat system, tanks can equip DPS gear to help push the boss faster
- Still, tanks should be ready to pick up uncontrolled elementals if CC breaks or adds drift into healers
- Prioritize clean interrupts and mechanics over greedy damage, one mistake on Flame Wreath or Arcane Explosion can wipe an otherwise perfect pull
If your raid spreads properly, interrupts Fireball and Frostbolt consistently, and treats Flame Wreath as a hard stop movement rule, Shade of Aran becomes one of the most reliable Karazhan kills in TBC Anniversary.
Shade of Aran Loot
| Item | Type | Slot |
|---|---|---|
| Pendant of the Violet Eye | Trinket | Trinket |
| Shermanar Great-Ring | Ring | Finger |
| Saberclaw Talisman | Amulet | Neck |
| Drape of the Dark Reavers | Cloak | Back |
| Boots of the Incorrupt | Cloth Armor | Feet |
| Boots of the Infernal Coven | Cloth Armor | Feet |
| Mantle of the Mind Flayer | Cloth Armor | Shoulder |
| Rapscallion Boots | Leather Armor | Feet |
| Steelspine Faceguard | Mail Armor | Head |
| Pauldrons of the Justice-Seeker | Plate Armor | Shoulder |
| Aran’s Soothing Sapphire | Off-hand Frill | Held In Off-hand |
| Tirisfal Wand of Ascendancy | Wand | Ranged |
| Formula: Enchant Weapon – Sunfire | Enchanting Formula | – |
| Medivh’s Journal | Quest | – |
Netherspite
Netherspite in TBC Anniversary is a portal based coordination fight built around beam soaks, clean rotations, and disciplined movement. The encounter alternates between Portal Phases and Banish Phases, and most wipes happen when beam assignments are unclear, players miss rotations due to Nether Exhaustion, or the Blue beam soaker falls behind on healing.
Portal Phase
Each Portal Phase lasts 1 minute and spawns three colored beams:
- Red Beam
- Green Beam
- Blue Beam
Your raid needs consistent beam coverage every Portal Phase. A reliable setup is 2 tanks and 2 DPS assigned to soak beams, with healers supporting the Blue beam soaker heavily.
Nether Exhaustion
After soaking a beam, players receive Nether Exhaustion, which prevents them from soaking the same color again for 1 minute 30 seconds. This is why you must rotate who soaks each beam instead of trying to brute force it with one player.
Beam Assignments and Rotation
Red Beam (Tank #1)
- Tank #1 soaks Red in 5 stack intervals
- Step in, build to roughly 5 stacks, then step out briefly and repeat
- This controlled in and out pattern helps manage pressure while keeping the beam occupied
Green Beam (Tank #2)
- Tank #2 soaks Green continuously
- Keep it stable and do not drop it, because losing the Green soak can destabilize healing quickly
Blue Beam (DPS #1 ➝ DPS #2)
- DPS #1 soaks Blue for 20 stacks, then DPS #2 takes over
- This swap timing keeps the Blue beam manageable and avoids deaths from excessive stacking
How the Beams Affect the Fight
The beams matter because they change what happens depending on who is soaking and what Netherspite receives.
- When Netherspite is hit by Red, he gains damage reduction
- When he is hit by Blue, he gains healing
- When he is hit by Green, he gains increased spell damage
This is why correct soaking matters. A missed beam or wrong rotation can drastically change incoming damage and make the fight feel impossible.
Movement and Healing Priorities
- Everyone must avoid Void Zone at all times
- Healers should focus heavily on the Blue Beam soaker
- The Blue soaker takes increased spell damage and also receives reduced healing, so they can die extremely fast if healing is late
- Pre cast big heals and keep defensive cooldowns ready for the swap moment
If your beam team stays consistent and your healers prioritize the Blue target, Portal Phases become predictable and repeatable.
Banish Phase
Each Banish Phase lasts 30 seconds. Netherspite becomes shadowy and several mechanics change.
- Nether Burn stops
- Void Zone stops
- Netherspite casts Netherbreath on random players
What to do
- Simply move to the far back side of the room to reduce incoming damage and keep spacing clean
- Keep healing stable and avoid unnecessary movement
Aggro Reset Warning
When Banish ends, aggro resets.
- The assigned tank must pick up Netherspite immediately
- Then return to the Red Beam right away to resume the planned soak pattern
A slow pickup after the reset is one of the most common wipe causes because Netherspite can turn and delete random players before beams are controlled.
If your raid rotates beams properly, respects Nether Exhaustion timing, and treats the Blue beam soaker as the top healing priority, Netherspite becomes a clean execution fight rather than a gear check.
Netherspite Loot
| Item | Type | Slot |
|---|---|---|
| Mithril Band of the Unscarred | Ring | Finger |
| Shining Chain of the Afterworld | Amulet | Neck |
| Uni-Mind Headdress | Cloth Armor | Head |
| Pantaloons of Repentance | Cloth Armor | Legs |
| Cowl of Defiance | Leather Armor | Head |
| Skulker’s Greaves | Leather Armor | Legs |
| Earthblood Chestguard | Mail Armor | Chest |
| Rip-Flayer Leggings | Mail Armor | Legs |
| Mantle of Abrahmis | Plate Armor | Shoulder |
| Girdle of Truth | Plate Armor | Waist |
| Spiteblade | One-Handed Sword | One-Hand |
| Jewel of Infinite Possibilities | Off-hand Frill | Held In Off-hand |
Prince Malchezaar
The Prince Malchezaar strategy in TBC Anniversary is a positioning heavy fight built around avoiding knockbacks, surviving burst windows, and keeping the raid mobile as Infernals lock down parts of the room. Clean spacing and fast reactions to Shadow Nova and Enfeeble are what separate smooth kills from chaotic wipes.
Phase 1: 100% to 60%
Start by setting up safe positions for tanks, ranged, and healers before the first Infernal lands.
Tank positioning
- Tanks should fight with their backs against a wall
- This prevents Shadow Nova knockbacks from sending tanks flying and losing control of the boss
Ranged spacing
- Ranged DPS should stay 30+ yards from the boss
- This matters even more during Enfeeble, because being too close can cause dangerous overlaps and healing delays
Melee movement
- Melee should run out when Shadow Nova is being cast
- Do not try to greed extra hits, Nova can delete players and force a wipe if multiple melee eat it together
Healer dispels
- Healers should dispel Shadow Word: Pain from affected players quickly
- This reduces unnecessary ticking damage and prevents Enfeeble targets from dropping too low during pressure moments
Infernal spawns
- Every 45 seconds, an Infernal spawns in a random location and repeatedly casts Hellfire
- This forces the raid to reposition carefully and avoid standing in overlapping damage zones
- Treat each Infernal like a moving wall, you reposition around it rather than trying to heal through it
Phase 2: 60% to 30%
At 60% health, Prince enters Phase 2 and gains additional melee pressure tools. This is the tank stress phase, and it often feels harder than Phase 1 even though the room is already shrinking from Infernals.
New abilities
- Thrash
- Parry
- Sunder Armor
What changes
- Prince stops casting Shadow Word: Pain
- Enfeeble, Shadow Nova, and Infernal spawns continue as normal
How to handle it
- Tanks should communicate Sunder stacks and defensive cooldowns
- Keep the boss positioned to minimize parry issues and avoid unnecessary turning
- Ranged should maintain safe distance and stay ready to shift if an Infernal lands nearby
- Melee still need to respect Shadow Nova movement rules
Phase 3: 30% to Kill
At 30% health, Phase 3 begins. This phase ramps the chaos back up by mixing earlier mechanics with additional pressure, while the room becomes tighter.
Phase 3 features
- Returns to Phase 1 style abilities, including Amplify Damage
- Adds flying axes
- Infernal spawns become more frequent, shrinking safe space much faster
Execution tips
- Keep tank positioning disciplined, walls still matter for knockbacks
- Healers should be ready for sudden damage spikes from Amplify Damage combined with Nova timing
- Ranged must keep spacing and avoid getting cornered by Infernals
- Save big cooldowns for Phase 3 if your group struggles, this is where most kills or wipes happen
If your raid treats Infernals as hard zone control, maintains 30+ yard ranged spacing, and respects Shadow Nova movement every single cast, Prince Malchezaar becomes a controlled end boss kill instead of a chaotic last room disaster.
Prince Malchezaar Loot
| Item | Type | Slot |
|---|---|---|
| Helm of the Fallen Hero | Tier Token | Head |
| Helm of the Fallen Defender | Tier Token | Head |
| Helm of the Fallen Champion | Tier Token | Head |
| Farstrider Wildercloak | Cloak | Back |
| Ruby Drape of the Mysticant | Cloak | Back |
| Stainless Cloak of the Pure Hearted | Cloak | Back |
| Jade Ring of the Everliving | Ring | Finger |
| Ring of a Thousand Marks | Ring | Finger |
| Adornment of Stolen Souls | Amulet | Neck |
| Malchazeen | Dagger | One-Hand |
| Nathrezim Mindblade | Dagger | Main Hand |
| The Decapitator | One-Handed Axe | One-Hand |
| Light’s Justice | One-Handed Mace | Main Hand |
| Gorehowl | Two-Handed Axe | Two-Hand |
| Sunfury Bow of the Phoenix | Bow | Ranged |
Nightbane
The TBC Anniversary Nightbane strategy is a repeating cycle of Ground Phase and Air Phase, with the air transitions happening at fixed health thresholds. The fight is won by clean positioning around the dragon model, fast dispels, and disciplined add control during the airborne sections. If your raid reacts quickly to Charred Earth, keeps Distracting Ash cleared, and handles Rain of Bones spawns efficiently, Nightbane becomes a stable end of raid kill.
Ground Phase
During Ground Phase, the goal is to keep Nightbane positioned safely while the raid avoids the two most common melee deaths: frontal breath and tail effects.
Tank positioning
- The tank should keep their back against a wall
- This helps maintain control and reduces the risk of awkward movement during pressure windows
Melee positioning
- Melee DPS should stay on the sides of Nightbane
- This positioning helps avoid:
-
-
Smoldering Breath
-
Tail Sweep
-
- Do not stand directly in front or directly behind unless your raid is intentionally repositioning
Ranged positioning
- Ranged DPS should stand at maximum range to reduce the danger from Bellowing Roar
- Keep your spread clean so healers can cover everyone without excessive movement
Environmental damage
- Everyone must move out of Charred Earth immediately if it spawns under them
- Treat Charred Earth like a hard rule: step out first, then resume casting or DPS
Healer dispels
- Healers should dispel Distracting Ash immediately
- Leaving it up causes unnecessary damage over time and can snowball into deaths if multiple players carry it during other mechanics
Air Phase
Nightbane enters Air Phase at 75%, 50%, and 25% health. These transitions are predictable, so your raid can plan cooldowns and assignments ahead of time.
Add priority
- During Air Phase, DPS should focus on the skeletons spawned by Rain of Bones
- Kill them quickly to prevent them from overwhelming healers and to keep the room controlled
Healing priority
- Healers should focus the player targeted by Smoking Blast
- This target takes heavy pressure and can die fast if the raid is distracted by skeletons
Positioning rule
- Everyone should stay close to Nightbane during the airborne portion
- This minimizes fireball pressure spreading across the raid and makes healing more efficient
Landing and taunt warning
- Nightbane will land after casting Rain of Bones and Smoking Blast
- He cannot be taunted during this time, so tanks must be prepared to pick him up naturally as he returns and regain stable positioning quickly
If your raid treats Air Phase as a strict add and healing check, then returns to clean side positioning on the ground, Nightbane becomes a repeatable kill and a strong finish to a full Karazhan clear in TBC Anniversary.
Nightbane Loot
| Item | Type | Slot |
|---|---|---|
| Emberspur Talisman | Amulet | Neck |
| Robe of the Elder Scribes | Cloth Armor | Chest |
| Stonebough Jerkin | Leather Armor | Chest |
| Chestguard of the Conniver | Leather Armor | Chest |
| Scaled Breastplate of Carnage | Mail Armor | Chest |
| Ferocious Swift-Kickers | Mail Armor | Feet |
| Ironstriders of Urgency | Plate Armor | Feet |
| Panzar’Thar Breastplate | Plate Armor | Chest |
| Nightstaff of the Everliving | Staff | Two-Hand |
| Talisman of Nightbane | Off-hand Frill | Held In Off-hand |
| Dragonheart Flameshield | Shield | Shield |
| Shield of Impenetrable Darkness | Shield | Shield |
| Blazing Signet | Quest | – |
| Faint Arcane Essence | Quest | – |
TBC Anniversary Karazhan FAQ
In this TBC Anniversary Karazhan FAQ, you will find quick answers to the most common questions players ask before planning attunement, raid nights, and gearing routes.
When Will Karazhan Release in TBC Anniversary?
TBC Anniversary launches on February 5, 2026, but Karazhan itself unlocks later with the first raid wave on February 19, 2026 at 3:00 PM PST (that is February 20, 2026 at 00:00 in CET time). Karazhan is not available during the January 13 pre patch, since that period focuses on system changes and preparation rather than raid access.
Where Is Karazhan Located in TBC Anniversary?
Karazhan is located at the southern tip of Deadwind Pass at coordinates 47.1, 72.4, between Duskwood (north) and Swamp of Sorrows (south).
- Alliance route: start from Darkshire (Duskwood) and travel northeast into Deadwind Pass
- Horde route: start from Stonard (Swamp of Sorrows) and head up into Deadwind Pass
- If you have Atiesh, Greatstaff of the Guardian, you can use Portal: Karazhan to teleport directly to the raid entrance
What Tier Set Tokens Are in Karazhan in TBC Anniversary?
In TBC Anniversary Karazhan, you can loot Tier 4 tokens for Gloves and Helmets. These are your first major tier upgrades in Phase 1 and a key reason Karazhan is a weekly priority for most raid groups.