 ~16 MIN
Intro
Unlock every memory, defeat each champion, and claim your legacy.
Step into one of the most emotional and combat-focused storylines in Elden Ring: Nightreign with this complete Raider Remembrance Quest Guide. From hidden triggers to one-on-one boss battles, we’ll walk you through how to begin the questline, master each phase, and unlock the powerful relics tied to the Raider’s legacy.
💀 Want to skip the setup and dive straight into the trials? With Onlyfarms.gg, you can get full Raider Remembrance Quest Completion, including Boss Carries and Relic Unlocks, done by expert Nightreign players. Perfect for players who value time, efficiency, and 100% quest progress.
Raider’s Remembrance is more than a memory—it’s a reckoning. As you relive the Raider’s past, you’ll uncover personal rivalries, sacred combat traditions, and lost truths buried beneath stormlit coasts. Each trial is a standalone test of skill, reflexes, and identity—ending in a showdown that defines who the Raider truly is.
In this guide, we’ll cover:
- ✅ How to unlock the Raider’s Remembrance storyline
- ⚔️ Full walkthrough for each phase of the quest
- 🧿 Strategies to defeat Onestrike Gladiator, Blinding Elder Lion, and White Horn
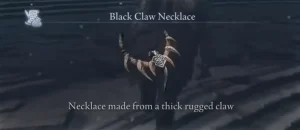
- 🎖 Rewards: Torn Braided Cord, Raider’s Chalice, and the Black Claw Necklace

1. How to Unlock Raider Remembrance
To begin Raider Remembrance in Elden Ring: Nightreign, you must first play as the Raider and complete specific conditions to unlock Chapter 2 of his journal. The questline doesn’t activate immediately, so here’s how to trigger it:
Unlock Requirements
| Condition | Details |
|---|---|
| Expedition as Raider | Complete at least one full expedition while using the Raider |
| Nightlord Defeated (Optional Boost) | Defeating a Nightlord (e.g., central stronghold boss) may unlock Chapter 2 faster |
| Mid-tier Kill Targets | Slay enemies like Crucible Knights, Trolls, or Banished Knights |
| Check After Every Run | Return to Roundtable Hold, inspect Raider’s Journal after each expedition |
Once Chapter 2 becomes available, return to the Roundtable Hold and select Begin Remembrance. You’ll be transported to a secluded garden—a symbolic battlefield where Raider’s memories begin to awaken.
Pro Tip
If Chapter 2 doesn’t unlock right away, don’t worry. Keep running expeditions and prioritize defeating mini-bosses and Nightlords. Chapter 2 usually appears within 1–3 successful expeditions depending on RNG and difficulty cleared.
2. 1st Raider Remembrance: Torn Braided Cord
Beginning the First Trial
Once you’ve unlocked Chapter 2 in Raider’s journal, the real journey begins. Selecting Begin Remembrance transports you to a secluded section of the Roundtable Hold, now cloaked in mist and silence. This isn’t just a staging ground — it’s sacred territory, where old memories take form and forgotten rivalries reignite.
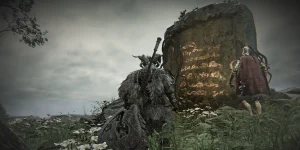
You’re greeted by the Iron Menial, a silent figure whose very presence suggests ancient duty. He recognizes you—not by name, but by aura. This NPC guides you to the Tourney Monument, a weathered stone pulsing faintly with energy. According to the Menial, this monument marks a battleground blessed by Grin, the God of War — and it remembers the ones who bled there.
The process is ceremonial. Speak with the Menial once to learn its purpose. Interact with the monument. Lightning splits the sky — the arena opens, and the first name is called:
💀 Your Opponent: Onestrike Gladiator
- 📖 Lore: A duelist who once fought undefeated in the northern arenas, known for ending battles in a single flawless strike.
- 🧭 Arena: A misty dueling ground of cracked marble and thorned ivy.
- 🎁 Reward: Torn Braided Cord, a relic tied to Raider’s earliest victories.
This is the beginning of the Tourney of the Lands Between, and you’re the challenger stepping into the ring.
3. Tactics – How to Defeat Onestrike Gladiator
The Gladiator lives up to his name — he’s fast, ruthless, and punishes indecision. Unlike larger bosses that telegraph moves with long animations, this opponent hides his intent behind poised, almost casual movements. This fight demands reaction time, positioning, and complete awareness of his spacing.
🔍 What to Expect
- Lightning-fast slashes with delayed finishers
- A signature two-handed sweeping combo that can stagger even high-poise builds
- A forward lunge that closes distance instantly
- Phase two adds a leaping slam that punishes backward rolls and late dodges
📊 Strategy Table
| Combat Element | Best Response |
|---|---|
| Opener Aggression | Bait his first move by feinting a swing, then dodge left/right |
| Combo Punish Timing | After his third swing, there’s a brief stall — use it to counter safely |
| Movement Discipline | Don’t roll backwards; this gives him initiative. Use lateral steps to stay close |
| Phase Two Slam | Roll into his landing zone, not away — he lands with slight delay |
| Relic Support | Equip items that grant counter-damage, increased stamina regen, or poise |
🧠 Pro Tips from Onlyfarms Experts
- Raider’s Charged Dash is ideal after parrying or dodging his overhead swing — this is when the Gladiator is most open.
- Use Light Attacks between dodges — heavy chains leave you vulnerable due to his high-speed retaliation.
- Stack Stamina Regen Talismans if available. This fight rewards control and pacing, not brute DPS.
- Audio cues are key: listen for his grunt before leaping or slashing. It gives you a fraction of a second to predict direction.
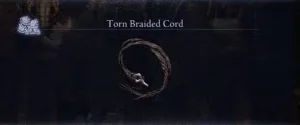
💎 Relic Reward: Torn Braided Cord
Upon victory, you’ll return to the garden — scarred, but triumphant. Speak to the Iron Menial once more, and you’ll receive the Torn Braided Cord:
“Woven from the threads of honor and violence, this relic enhances the Raider’s response when struck — increasing damage dealt on counters and reducing stamina drain during chained attacks.”
This relic empowers aggressive duelists who thrive on trading hits and punishing openings. Perfect for PvP or solo boss fights where precision is everything.
Summary – First Memory Flow
| Step | Details |
|---|---|
| Begin Chapter 2 Remembrance | At Roundtable Hold after unlocking the chapter |
| Meet Iron Menial | He introduces the Tourney Monument |
| Interact with Monument | Lightning strike triggers the first memory duel |
| Defeat Onestrike Gladiator | Fast, aggressive, and punishing fighter |
| Claim Torn Braided Cord | Increases counter damage and stamina efficiency |
| End Remembrance via Gateway | Or return to journal and select Conclude Remembrance |
4. 2nd Raider Remembrance: Raider’s Chalice
Echoes from the Coastline
Once the Onestrike Gladiator has fallen and you’ve completed the first Remembrance, a deeper part of Raider’s story awakens. His legend doesn’t stop at dueling arenas. It stretches across coastlines and storm-driven voyages — to a time when Raider sought out not just victory, but a rival worthy of ending him.
After defeating at least one Nightlord as the Raider, Chapter 4 unlocks in your journal. Return to the Roundtable Hold, and choose Begin Remembrance to continue your journey.
You’ll once again stand in the quiet garden — but now, the air feels heavier. The Iron Menial, once formal and distanced, greets you with familiarity. He speaks of old coasts, faded challenges, and a time Raider nearly died chasing glory.
He presents you with a Key Item:
📜 Iron Menial’s Scrawl — a fragmented account of an encounter on the distant cliffs of the eastern seas.
Important: Open your Key Items menu and read the Scrawl before speaking to him again. This is a required trigger for the next memory trial.
Once read, the Tourney Monument will flicker with light. Touch it — and prepare for chaos.
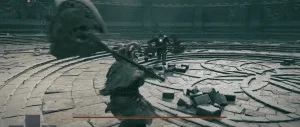
💀 Boss Memory: Blinding Elder Lion
- Location: Shattered coastline arena beneath storm-lit skies
- Theme: Chaos, reaction speed, endurance, inner strength
- Boss Type: Beast-class trial, aggressive AI with visual/audio disruption
- Reward: Raider’s Chalice, a powerful relic granting a universal (white) slot
This fight marks a major spike in challenge. You’re no longer dueling — you’re surviving. The Elder Lion doesn’t respect spacing, doesn’t telegraph like a humanoid foe, and is meant to overwhelm.
Lore: What the Lion Represents
The Blinding Elder Lion isn’t just a boss — it’s a memory of failure. A creature that bested Raider once, forcing him to adapt or perish. It represents a turning point in his legend, where brute strength gave way to controlled resolve. You’re not just fighting a beast — you’re confronting the moment Raider changed.
📜 TL;DR – Raider’s Chalice Trial Flow
| Phase | Details |
|---|---|
| Unlock Requirement | Finish 1st Remembrance + defeat 1 Nightlord as Raider |
| Key Item | Read Iron Menial’s Scrawl under Key Items |
| Activation | Speak to Menial → Touch the Monument |
| Boss | Blinding Elder Lion (2-phase fight) |
| Combat Focus | Reaction time, light movement, recovery awareness |
| Reward | Raider’s Chalice (Universal white relic slot for any build synergy) |
| Exit Point | Use Remembrance Gateway or journal after returning to garden |
🧠 Mechanics and Combat Tips – Blinding Elder Lion
Phase One
- 🐾 Lunging Pounce – Wide-range leap with claw impact
- ⚡ Radiant Flash – Bright burst of light that causes minor stun & target tracking loss
- 🔁 Spin Swipe – Fast 360° attack, typically follows a roar animation
- 💢 Roar Pulse – Staggers player within a short radius (interrupts casting)
Phase Two (~40% HP)
- 🔥 Blazing Trail Leap – Leaves burning patches on the ground
- 💣 Multi-stage Slam – Leaps into the air and hits 2–3 times in succession
- 🌪 Fury Chains – Short cooldown, high-speed multi-swipes that track movement
🧪 Strategy Table – Surviving the Trial
| Boss Mechanic | Player Response |
|---|---|
| Flash Pulse (Blind/Stun) | Roll diagonally and avoid lock-on to recover faster |
| Leaping Slam (Fire Trail) | Wait for visual windup → dash to lion’s side (not behind) |
| 3-Hit Combos (Tracking) | Bait swipe, roll once, then backpedal — don’t get greedy |
| Roar + AOE Pulse | Maintain medium distance during second phase to avoid interrupts |
| Lightweight Builds | Recommended for stamina regeneration and mobility-focused defense |
| Best Skills to Use | Raider’s Knockback Dash & Sweeping Finisher between breath windows |
| Consumables & Buffs | Equip gear with stun resistance, light resistance, or poise boosts |
🧭 From the Experts at Onlyfarms.gg
- Avoid lock-on mode when the arena lights up — switching to manual camera helps track the lion through flash sequences.
- Use stamina regen relics or lightweight armor to prioritize agility.
- If you’re struggling with the visual effects, try enabling contrast filters or adjusting bloom settings in your game settings — it helps distinguish animation tells from particle clutter.
💡 Many players fail this fight not due to damage intake, but because they panic-react during visual overload. Train your rhythm — light → roar → swipe → leap — and you’ll find the gaps to punish.
🎁 Reward Breakdown: Raider’s Chalice
After victory, the Iron Menial greets you with reverence. You’ve done what the Raider once could not — tamed the storm in the lion’s eyes.
You receive the Raider’s Chalice, one of the most flexible relics in the game:
“Forged from regret and remembrance, this relic houses a white universal slot, allowing you to attach any modifier, regardless of type or rarity.”
Why It Matters:
- Perfect for hybrid builds that blend offensive and defensive effects
- Lets you break slot-type restrictions (e.g. equipping a red relic into a blue set)
- Ideal for players who rotate gear per fight or optimize for PvP and PvE simultaneously
Memory Reflection
Where the first trial tested your discipline, the second forces you into controlled chaos. The lion teaches patience within frenzy — and that Raider’s strength isn’t just in fighting, but in evolving.
5. 3rd Raider Remembrance: Black Claw Necklace
Memory of the Abyss – The Final Trial Begins
With the first two memories completed and three Nightlords slain while playing as Raider, a heavy silence sets in across the Roundtable Hold. The garden, once sacred and serene, now feels more like a tomb. The Iron Menial stands still, solemn. He doesn’t speak of the past — he speaks of what was buried.
Attempting to touch the Tourney Monument triggers nothing. This memory cannot be summoned by tradition — it must be found.
Activating the Final Remembrance
A new map marker will appear — an unfamiliar glow along the southeastern shore of the Roundtable Hold. As you walk toward the coast, the skies dim, waves crash unnaturally loud, and a whisper appears in the center of your screen:
“Hark, the murmuring of waves…”
The screen flickers — and you’re pulled into Raider’s final battlefield, a windswept, ghost-lit stretch of jagged coastline. The sky is stormless, but the ocean roars — as if it, too, remembers what’s about to unfold.
💀 Final Boss: The White Horn
He is not a legend — he is the legend. The White Horn is the identity Raider once bore — a title, a reputation, a burden. Now, it stands before you in spectral form, wielding a ghostly glaive and ancient rage. This is not just a duel — it’s a self-confrontation.
- Arena: Cliffside battleground under moonlight
- Combat Style: Hybrid – precise glaive combat ➜ chaos-based monster form
- Symbolism: Past self vs present self
- Reward: Black Claw Necklace (Epic), Raider’s Remembrance Outfit
Phase One – Duel with the Glaive
The White Horn’s humanoid form is majestic and deadly. Each swing of his glaive is purposeful, and every pause is bait. He uses timing windows to force panic rolls — and punishes them mercilessly.
Key Abilities:
- ⚔ Echo Sweep: Wide horizontal slash, delayed to catch early dodges
- 💢 Dual Spiral Thrust: Two-step thrust that forces diagonal retreat
- 🧱 Stance Lock: If struck during his defensive stance, your stamina is drained massively
He fights like a mirror — as if the game is punishing the player for everything they’ve learned up to this point.
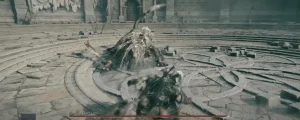
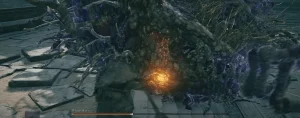
Phase Two – White Horn Revealed
At 60% HP, White Horn’s body shatters in a burst of mist, revealing a twisted Ulcerated Tree Spirit, an entity mutated from raw memory and shame. It growls not with rage — but with despair.
Now, the boss becomes wild, massive, unpredictable. Terrain is warped by fire, limbs stretch unpredictably, and visibility is constantly obscured.
Phase Two Attacks:
- 🔥 Seafire Trail: Fiery slam leaves molten embers across the arena
- 🌪 Whip Tendrils: 5–hit combo that arcs widely and follows you on delay
- 🔴 Crushing Seize: Targeted grab that triggers a throw animation and AOE burst
- 🌊 Tidal Cry: Massive roar that summons a wave-like shockwave
This is not a test of tactics — this is a test of stamina, rhythm, and recovery control.
🧠 Combat Strategy – Advanced Tactics
| Mechanic | Counter Strategy |
|---|---|
| Glaive Combo Baits | Delay your dodge until the very last frame of animation |
| Flame Trail Movement | Circle the arena clockwise to avoid stacking burns |
| Grab Avoidance | Dodge into the boss — the grab tracks away from center |
| Long Chains in Phase 2 | Break your combos into 1–2 hits to avoid trading into follow-up strikes |
| Ideal Loadout | Fire-resistant armor, poise-focused relics, and quick-recovery consumables |
| Best Skill Usage | Raider’s Knockback Finisher after Flame Trail ends — guaranteed window |
🎁 Final Reward: Black Claw Necklace
With the final blow struck, the White Horn collapses into flame and mist. You return, once more, to the Roundtable garden. The Iron Menial now kneels before the Tourney Monument — not in service, but in mourning.
The inscription has changed.
“The Black Claw defeated the White Horn to achieve victory.”
“Ye souls felled in battle, be proud of thine exploits.”
A nearby tombstone flickers into view. Interact with it to complete the final chapter.
🏅 Item: Black Claw Necklace (Epic Relic)
- 🛡 Greatly increases stagger resistance
- 🩸 Adds Bleed buildup to finishing moves
- 🏃 Increases movement speed when HP drops below 50%
- ⚔️ Ideal for builds that thrive on aggression under pressure
This relic reflects Raider’s final evolution — a warrior who embraces pain, not avoids it.
🎨 Bonus Unlock: Raider’s Remembrance Outfit
A unique cosmetic available only after defeating the White Horn. This outfit combines tourney armor plating with coastal pirate aesthetic, symbolizing the Raider’s dual nature: both spectacle and survivor.
Can be claimed from the Wardrobe tab at the Roundtable Hold.
What This Fight Means
Where the Onestrike Gladiator tested your discipline…
Where the Elder Lion tested your endurance…
The White Horn tests your soul.
This fight is Raider’s reckoning. Not a victory over an enemy — but a victory over his former self. Once complete, the memories fade — but their weight, and rewards, remain.
✅ Skip the Pain — Relive the Glory
You don’t need to wipe 15 times to unlock this legacy.
Onlyfarms.gg offers:
- 🗡 White Horn Boss Carries – full combat execution
- 🧭 Black Claw Necklace Unlock Services – delivered by elite Nightreign raiders
- 🎭 Cosmetic Completion Packages – get the full set, story, and power without the grind
6. Raider Remembrance Rewards
Completing Raider’s Remembrance isn’t just about conquering the past — it’s about emerging from it stronger, refined, and ready to forge a new legacy. Each memory trial in Elden Ring: Nightreign grants a powerful reward, and together they form a relic set built around precision, pressure, and late-game combat control.
Here’s everything you’ll earn across all three chapters:
🎁 Full Rewards Breakdown
| Reward | Source | Effect Summary |
|---|---|---|
| Torn Braided Cord | Defeat Onestrike Gladiator | Increases counter damage, reduces stamina drain on chained strikes |
| Raider’s Chalice | Defeat Blinding Elder Lion | Adds a universal (white) relic slot; allows any relic to be equipped |
| Black Claw Necklace | Defeat White Horn (Final Trial) | Grants stagger resistance, bleed buildup, +movement speed below 50% HP |
| Raider’s Outfit | Complete all 3 Remembrance arcs | Cosmetic armor set blending tourney armor + coastal raider theme |
Best Build Synergy
This relic set is perfectly designed for players who enjoy:
- PvP duels with aggressive counterplay
- Late-phase boss fighting (bonus mobility when low HP)
- Hybrid relic setups (thanks to the Chalice’s universal slot)
- Stamina-based dodging and spacing gameplay
💡 Combining Black Claw Necklace with Torn Braided Cord gives you both survivability and aggression scaling — perfect for high-risk/high-reward play.

7. Final Thoughts – Memory Complete
Raider’s Remembrance is more than a series of boss fights — it’s a battle with legacy itself. Where many questlines in Elden Ring: Nightreign reward players with power, this one rewards you with perspective. You don’t just walk away with new gear. You walk away understanding the cost of glory, the weight of memory, and the silence that follows victory.
Every encounter in the Remembrance arc serves a purpose:
- The Onestrike Gladiator teaches you the price of precision and the consequence of hesitation.
- The Blinding Elder Lion throws you into chaos, forcing discipline in the midst of fear.
- The White Horn strips away everything familiar — until only your will remains.
These trials reshape not just your character, but your understanding of what it means to fight with purpose. The Raider is not a hero because he won — he’s a legend because he chose to confront himself.
With the Torn Braided Cord, Raider’s Chalice, and Black Claw Necklace, you’re no longer just playing his story — you’ve completed it. You’ve earned his scars, inherited his strength, and claimed the right to wear his name.
This isn’t a sideline tale. This is the defining arc of Raider’s identity in Nightreign — and one of the most thematically cohesive solo experiences the game offers.
And if you want every memory unlocked, every relic claimed, and every boss defeated without the repetition, wipes, or wasted time — trust the expert raiders at Onlyfarms.gg.
We’ll carry you through each trial, unlock all three relics, and ensure your character walks away with the full legacy of the Raider, intact and complete.
Because some memories aren’t just meant to be relived — they’re meant to be mastered.