Content:
Key Takeaways
- ARC Raiders has seven raid maps plus a Practice Range: Dam Battlegrounds, Buried City, Spaceport, The Blue Gate, Riven Tides, Stella Montis and, since the Frozen Trail update of 8 October 2026, Pendola Pass.
- Maps open by rounds played, from none for Dam Battlegrounds to 25 for Pendola Pass, so your account decides which part of this list applies to you.
- Every map has its own locked rooms and keys, and five of them have a set-piece puzzle or event: Controlled Access Zone, Hidden Bunker, Locked Gate, Stacking Yard and the Fallen Emperor.
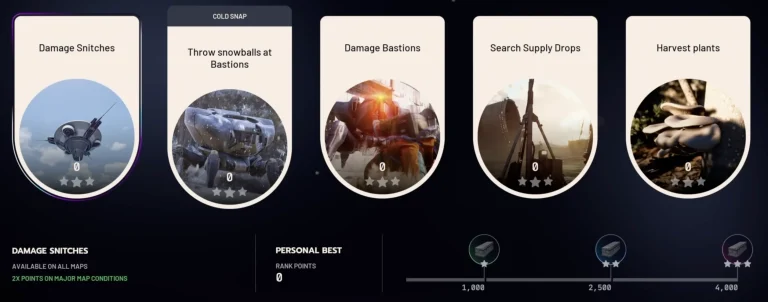
- The active map condition changes more than the map itself: Night Raid, Electromagnetic Storm and Cold Snap raise loot value, and most major conditions also close Raider Hatches and cut the number of exits.
- For learning, Dam Battlegrounds is the gentlest on the wiki scale; for high-value loot, look at major conditions, Riven Tides after its October loot boost, and the Exodus areas of Pendola Pass.
- No source ranks maps for PvP or PvE with measured data, so the picks below are our reading of opening order, difficulty and conditions.
All Raid Maps at a Glance
Compiled from the community wiki’s map table and map pages, checked against the official update posts up to 27 October 2026.
| Map | Rounds to open | Wiki difficulty | Raid length | Map-only condition or set piece |
|---|---|---|---|---|
| Dam Battlegrounds | None | 2 | 30 min | Controlled Access Zone puzzle |
| Buried City | 8 | 3 | 30 min | Bird City |
| Spaceport | 12 | 3 | 30 min, 40 during Hidden Bunker | Hidden Bunker, Launch Tower Loot |
| The Blue Gate | 18 | 4 | 30 min, 40 during Locked Gate | Locked Gate |
| Riven Tides | 20 | 5 | 30 min | Beachcombing, Stacking Yard puzzle |
| Stella Montis | 24 | 4 | 30 min | Two-level facility |
| Pendola Pass | 25 | 3 | 30 min | Fallen Emperor, Flash Freeze, Redirection |
The difficulty numbers are the community wiki’s own scale from 1 to 5, not an in-game value. The Buried City map page on the same wiki still says 6 rounds while the map table says 8, so treat the early round counts as approximate. The Practice Range opens after 4 rounds and gives you 2 hours with no raid pressure, a sensible place to try a new weapon before you risk it topside.
How Any Raid Works: Exits and Conditions
Two systems sit on top of every map, and both matter for your choice more than the scenery.
Extraction points
The wiki lists four kinds of exit: cargo elevators, metro stations, airshafts and Raider Hatches. You start an extraction at a terminal, and most terminals show a shutdown timer on the map. A Raider Hatch needs a Raider Hatch Key, stays open for roughly 10 to 15 seconds, lets one Raider through at a time and has no shutdown timer, which makes it the late exit when everything else has closed. Two details are easy to miss: a downed Raider can still use a terminal, and a terminal touched just before shutdown still lets you out after the clock hits zero. Pendola Pass adds another method, the Ballistic Gondola: you activate a transceiver, a gondola floats down, and you breach one of the red panels on its three tubes to climb in.
Minor and major conditions
Each map cycles through conditions on a schedule, and since update 1.42.0 the schedule is set per region. Minor conditions add an event or extra loot of one type, such as Lush Blooms for plants, Husk Graveyard for downed ARC or Uncovered Caches for old Raider caches. Major conditions change the whole raid: the wiki lists Night Raid, Electromagnetic Storm, Cold Snap, Hidden Bunker, Locked Gate and Hurricane, plus the ARC Operations Close Scrutiny and ARC Frigate. Night Raid, Electromagnetic Storm, Hidden Bunker and Locked Gate all come with fewer active return points and no active Raider Hatches, so plan your exit before you loot.
Conditions also move a map up the wiki’s difficulty scale. Dam Battlegrounds is a 2 on a normal day, a 4 under Night Raid or Electromagnetic Storm and a 5 under Hurricane. Buried City goes from 3 to 5 under Night Raid or Cold Snap.
Map by Map: Locations, Keys and Set Pieces
Key names come from the wiki’s map pages and tell you where the locked rooms are. Named loot spots are attributed to the guide that lists them; the game does not publish loot tables per room.
Dam Battlegrounds
The first map, built around the Alcantara Power Plant: a crumbling dam across swamps and forest. Its five keys open the Staff Room, Surveillance, Testing Annex, Controlled Access Zone and Control Tower, the last one at epic rarity. The Controlled Access Zone, added in update 1.17.0, is a three-step puzzle: carry a Fuel Cell up and insert it to power a locked room, press four switches at almost the same time (three players can do it, with a Snap Hook for the last switch), then deposit items into a panel; the wiki says the requested items change every match. KeenGamer names the upper floors of the Testing Annex, the Research and Administration building and the Power Generation Complex among its blueprint spots. Conditions the wiki records for this map include Harvester, Matriarch, Night Raid, Electromagnetic Storm, Cold Snap, Hurricane and the Frigate.
Buried City
A desert city half under sand, with narrow streets, villas and rooftops that the wiki describes as made for traversal, which also means sight lines from above. Keys: JKV Employee Access Card, Residential Master Key, Hospital Key and the epic Town Hall Key. Frozen Trail made the Hospital Roof climbable. KeenGamer lists Space Travel, the Hospital, Plaza Rosa and the Library among its blueprint spots. The map-only condition Bird City puts trinkets in rooftop chimneys and adds deployable ziplines, with more ARC drones in the air.
Spaceport
Acerra Spaceport, where the Exodus shuttles launched, now a large ARC-guarded site. Keys: Warehouse, Trench Tower, Container Storage and Control Tower. Two conditions exist only here. Hidden Bunker asks the lobby to activate four rooftop antennas near the centre of the map (each needs two interactions, and the first calls in Wasps and Hornets); then the bunker southwest of the Departure Building opens, with eight data terminals inside, two Bastions and a Bombardier at the entrances, and a 40-minute raid. Launch Tower Loot locks the tower ziplines until you power a generator at their base with a fuel cell. KeenGamer names the Departure Building, Arrival Building, Control Tower A6 and Launch Tower as blueprint spots.
The Blue Gate
A mountain valley with abandoned towns, orchards and an underground complex. Keys: Village, Cellar, Communication Tower and the epic Confiscation Room Key. Under Locked Gate the tunnel entrance is shut and you need four security codes from Raider’s Refuge, Pilgrim’s Peak, Reinforced Reception and Ancient Fort, entered in the Gate Control Room; mines surround each code location and two Rocketeers guard Pilgrim’s Peak. KeenGamer points to the Confiscation Room at Reinforced Reception as its best blueprint room on the map. Frozen Trail changed lighting and fixed stuck spots here, with no drop-rate change. For the key details, see our Blue Gate key FAQ.
Riven Tides
The sixth map, a twice-abandoned harbour resort. Its wiki page lists more keys than any other map: seven common hotel keycards, Classified Records and Crane House keycards, and the epic Secure Storage Keycard. The Stacking Yard puzzle opens one loot room after four hidden buttons, then a second once you repair a lift with a battery and wires and carry the battery back. Beachcombing buries trinkets in the sand for a Dockmaster’s Detector to find. Frozen Trail raised overall loot value on this map by about 15%.
Stella Montis
A research facility in snowy peaks north of the Rust Belt, mapped on two levels. Keys: Assembly Admin, Medical Storage, Security Checkpoint and the epic Archives Key. Night Raid was added here in update 1.4.0. KeenGamer lists the Assembly Workshops, Loading Bay and Cultural Archives among its blueprint spots. Our Stella Montis guide covers the map in depth.
Pendola Pass
The Frozen Trail map: an old Italian village and Exodus transport hub beyond the peaks, with a supermarket, a town square, an observatory and a buried train depot, and a fallen Emperor at its centre. AltChar lists nine areas (Fallen Emperor, Old Town, Loading Platforms, Railyard, Commissary Supermarket, Almatera Station, Railroad Junction, Cielo Sereno Observatory and Deep Space Telescope) and says it has the most Exodus-marked areas of any map. Keys: Old Town, Railyard, Train Station, the epic Observatory Key and the legendary Emperor Gateway Conduit. Flash Freeze is a harsher built-in version of Cold Snap that sends you looking for shelter. Pendola Pass is also the only map with the Dynamic Loot Zone test, which the developer describes as areas keeping their loot type while their value changes from raid to raid.
Conditions That Change a Map
Our summary of the wiki’s condition and map pages; the map column shows where the wiki records each condition.
| Condition | Maps | What it changes |
|---|---|---|
| Night Raid | All seven | Higher loot value, more keys behind locked doors, more ARC; free loadouts disabled since 1.33.0 |
| Electromagnetic Storm | Dam, Spaceport, Blue Gate | Telegraphed lightning that damages and stuns Raiders and ARC, more crashed Probes and Couriers, Fossilized Lightning |
| Cold Snap | Dam, Buried City, Spaceport, Blue Gate | Damaging cold, higher loot value, ripe Candleberry bushes |
| Hidden Bunker | Spaceport | Bunker with eight terminals, 40-minute raid |
| Locked Gate | The Blue Gate | Four security codes open the tunnels, 40-minute raid |
| Harvester | Dam, Spaceport, Blue Gate | Queen-guarded structure; the puzzle drops 1 to 3 Equalizer or Jupiter blueprints |
| ARC Frigate | Dam, Buried City, Spaceport, Blue Gate, Pendola Pass | 35-minute raid, no locked doors, no Raider Hatches, lower overall loot value, Frigate Cargo as the prize |
| Redirection | Pendola Pass | Emperor Beacons you deploy to pull payloads to your position |
The Frigate needs a team: the wiki describes six sections, Hydra turrets on the top deck and 18 power cores to break before you even reach the interior, with more inside before the cargo drops. Patch 2.3.0 also opened six top blueprints (Equalizer, Jupiter, Bobcat, Tempest, Vulcano and Dolabra) to every major condition, so a Harvester or a Hidden Bunker is no longer the only route to them. Our blueprint route guide turns this into a run plan.
Which Map Fits Your Goal
| Goal | Map to try | Why (our reading) |
|---|---|---|
| Learning extraction basics | Dam Battlegrounds on a normal day | Open from the start, wiki difficulty 2, five keyed rooms to learn on |
| Rooftop routes and close fights | Buried City | Opens early; tight streets with high ground, so fights often come from above |
| Event loot with a group | Spaceport under Hidden Bunker, Blue Gate under Locked Gate | Lobby-wide objectives and 40-minute raids, contested by design |
| Blueprints | Any map under a major condition | Since 2.3.0 the six top blueprints drop in any major condition |
| Quiet solo looting | Spots from our low-risk route | Short exposure on familiar ground |
| Higher loot value per raid | Riven Tides | About 15% more loot value since Frozen Trail, but the highest wiki difficulty |
| Exodus-grade loot | Pendola Pass | Most Exodus-marked areas, but loot values shift from raid to raid |
| Squad PvE challenge | A map with the ARC Frigate | Six sections of Hydras and power cores, built for teams |
For coin farming on these maps, our money-making guide picks up where this one ends. If you would rather have the early raids played for you, the ARC Raiders leveling services are an option, and for gear to bring along there is the items section and the coins section.
What Changed in the Autumn 2026 Updates
The Frozen Trail 2.0 update on 8 October 2026 added Pendola Pass, the Frigate and Redirection conditions, the enemies Bully, Skulker and Hydra, the weapons Bantam and Stiletto, and a skill tree rework. For the existing maps it raised Riven Tides loot value by about 15%, reworked Blue Gate lighting and fixed stuck spots there without touching drop rates, and made the Buried City Hospital Roof climbable. Solo vs. Squads was removed from matchmaking, and the stash can now reach 328 slots without Expedition or Nomadic Envoy bonuses.
Live update 2.3.0 on 27 October fixed collision around the fallen Emperor and the gondola extraction on Pendola Pass, stuck spots on Spaceport and Stella Montis, and Frigate memory crashes, and widened the top blueprint pool to every major condition. The developer said it would return to fixes every three weeks with weekly store updates. Any map guide written before October misses Pendola Pass and these changes, and launch-era guides miss Riven Tides as well.
Map Choice Mistakes to Avoid
- Choosing a map from an old list. Launch-era rankings cover five maps; the game now has seven.
- Ignoring the condition. The same map can mean a longer raid, closed hatches or a different loot pool.
- Counting on a Raider Hatch in a major condition. Night Raid, Electromagnetic Storm, Hidden Bunker, Locked Gate and the Frigate disable them.
- Rushing a late map. Riven Tides has the highest wiki difficulty; build experience on earlier maps first.
- Taking your best kit to the Frigate solo. It is a team objective with Hydras on open decks.
- Treating a difficulty number as official. The wiki scale is community-made.
FAQ
Which ARC Raiders map is best for beginners?
Dam Battlegrounds on a normal day: it is open from the start and has the lowest wiki difficulty.
How many maps does ARC Raiders have?
Seven raid maps and a Practice Range, since Pendola Pass was added on 8 October 2026.
Which map is hardest?
The wiki gives Riven Tides the highest base rating, 5; under Hurricane or Night Raid several other maps reach 5 too.
When does Pendola Pass open?
After 25 rounds played, according to the wiki.
Do conditions change loot?
Yes. The wiki lists higher loot value for Night Raid, Electromagnetic Storm and Cold Snap, while the Frigate condition lowers overall loot value in exchange for its cargo.
Which map is best for PvP?
No measured data exists. Buried City’s rooftops and the lobby-wide events on Spaceport and the Blue Gate pull players together, so expect more fights there.
How do I extract on Pendola Pass?
Besides the usual exits, activate a transceiver to call a Ballistic Gondola, breach one of its red panels and get in.