 ~9 MIN
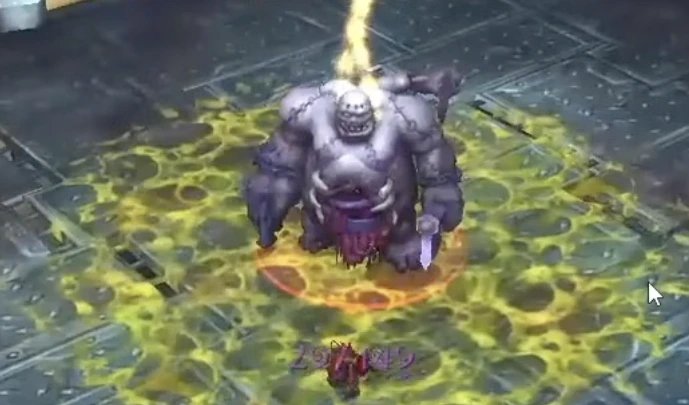
Intro
The Brawler’s Guild is back in The War Within, and it’s still one of the most fun solo challenges in World of Warcraft. You queue up alone, face increasingly difficult bosses in a 1v1 arena, and unlock cosmetics, toys, achievements, and a mount if you make it all the way to Rank 8.
This guide walks you through:
- How the Brawler’s Guild works in TWW
- How to start and queue
- Challenge modifiers (for Brawl Star & achievement hunters)
- All bosses from Rank 1 to Rank 8 and how to beat them
- The hardest encounters and small tricks that make them much easier
If you’re coming back for TWW or starting fresh and want to get a character ready for Brawler’s Guild quickly, you can speed up the early grind with a TWW Leveling Boost and jump straight into solo content instead of crawling through the leveling curve.

How to Start the Brawler’s Guild in TWW
Inside the Brawler’s Guild hub you’ll find:
- Bouncers – queue you for ranked fights or random brawls
- Challenge Broker Senna – lets you activate modifiers for special achievements
- Vendors & Potion Dispensers – sell cosmetic rewards, potions, and utility items
- Spectator Console – lets you watch other players’ fights from above
You queue at the bouncer, wait your turn, then get pulled into the arena when your name is called. As you win, you rank up. Reaching Rank 8 unlocks pretty much everything the mode has to offer.
Gearing up makes a huge difference here. If you want to get raid- and dungeon-ready while you work on ranks, you can combine this with a Mythic+ Bundle or a Manaforge Omega Heroic/Normal Bundle to boost your ilvl and make enrage timers much more comfortable.
Challenge Modifiers and the Brawl Star Achievement
Challenge Broker Senna offers optional modifiers you can apply before a fight, for example:
- Make Me a Giant
- Set Me on Fire
- Win Without a Scratch
- Don’t Get Hit
These are required for Brawl Star and other achievement runs. You can technically apply them to any rank, but realistically you want to do them on Rank 1–3 bosses where mechanics are simpler and fights are shorter.
Brawler’s Guild Rewards in TWW
Clearing ranks and completing challenges rewards:
- Brawler’s currency & satchels
- Cosmetics (tabard, gloves, banners, toys)
- A themed mount
- VIP room unlocks & temporary buffs
- Potions that significantly boost DPS or survivability during fights
Those potions from the dispenser are very strong. If you’re stuck on a tight DPS check, make sure you’re using them.
And of course, having enough gold to buy potions, enchants, and consumables helps a lot. If you’re short on gold on your main region, you can stock up with WoW Gold EU or WoW Gold US depending on where you play.
Rank-by-Rank Boss Guide
Below is a quick, practical breakdown of each boss and what you actually need to do to win.
Rank 1 Bosses
Sunny
- Kill the little sprouting adds during Germinate.
- Interrupt Sunblast when possible.
- Don’t stand in obvious bad. Beat the soft enrage.
Doomflipper
- Avoid the ground markers where he’s going to land.
- Move out of circles; otherwise the fight is simple.
Goredome
- Sidestep his charge and frontal slam indicators.
- Straightforward tank-and-spank once you dodge correctly.
Rank 2 Bosses
Dippy
- Dippy gets interrupted by pushback – any knockback or push effect resets him.
- If you get cornered against a wall, kite him back to the center and keep knocking him around.
Bruce
- Don’t stand in front of him. His Chomp stacks an armor-reducing debuff.
- Always try to stay behind his model and keep moving when he turns.
Build-a-Janis
- Small broom adds keep spawning and rushing bombs.
- Kill the bomb brooms first, then clean up the others with AoE.
- If too many reach the bombs, the arena becomes chaos.
Rank 3 Bosses
Oso
- Avoid his roar cone.
- When he leaps, don’t be in the marked landing zone.
- Pretty easy once you learn his two animations.
The Quacken
- Don’t stand in purple slime.
- When you get turned into a duck, spam your special run button and reposition quickly.
- Low HP fight; kill him before you get overwhelmed.
Razorgrin
- Stay behind him and avoid the frontal attacks.
- Minimal mechanics, just keep up DPS.
Rank 4 Bosses
Blat
- Splits into multiple slimes.
- Use cleave / AoE; don’t get cornered.
- Melee should kite if necessary; tank specs can mostly stand and cleave.
Ulis
- Ulis just wants to touch you. If he does, you die.
- Movement speed is king here – use sprints, blinks, or freedom effects to stay ahead.
King Klonka
- Applies a stacking debuff when near you.
- Back off to reset stacks, then go in again.
- Think “hit → run out → hit → run out” on repeat.
If you’re primarily a PvP-oriented player, a lot of these fights feel like extended duels with PvE rules. Learning to kite, position, and plan defensives here translates well into arenas and battlegrounds. If you want to refine that side of your gameplay, you can also lean on PvP Coaching while you practice high-pressure mechanics like these.
Rank 5 Bosses
Meatball
- Collect the swirling purple/blue orbs – they’re good, not bad.
- Each orb stacks a buff that massively increases your damage.
- The fight is about soaking orbs fast, not dodging everything.
Ash Ketchum (Pokémon parody fight)
- He summons waves of pets that move in patterns.
- Focus on staying between lanes of pets.
- There’s a tight timer — cooldowns and potions help a lot here.
Crush
- He charges in a straight line after a brief pause.
- Wait for him to lock position, then sidestep and resume DPS.
- Repeat until he dies.
Rank 6 Bosses
Glorp
- Dropped slime zones will quickly fill the arena if you stand in them.
- Step out of pools and watch for his Gloopsy path so you don’t get run over.
Clunk
- Constantly pulls you toward him.
- He gets more dangerous the longer the fight goes on.
- Dodge his big frontal slam after Clunk finishes casting.
Stitches
- Applies a stacking slime debuff — at 10 stacks you die instantly.
- Move out of slime and manage stacks carefully.
- Hooks slow you; don’t let him pin you in a bad corner.
Rank 7 Bosses
Tops
- Charges and applies Dino Dazed.
- When dazed ends, get away from his back leg to avoid the tail swipe.
- He moves faster over time, so plan movement early.
Carl
- Covers the arena in spreading fire.
- Any fire hitting another patch causes it to spread more.
- Treat the fight as a soft enrage—kill him fast before there’s nowhere safe left.
The Leper Gnomes
- Each one has a frontal vomit that stacks a DoT.
- Stay mobile, rotate around the pack, and don’t be in front of them.
- AoE works great once you’ve thinned a few out.
Rank 8 Bosses
Mecha Bruce
- His stasis beam will stun you—try to be far away so you have room afterwards.
- As soon as the beam ends, he casts Chomp; sidestep fast or use a movement ability.
- Regularly rotate around the arena to keep things manageable.
GG Engineering (Bo & Max)
- They hide behind generators; avoid killing generators you don’t need to.
- Cleave both bosses when possible.
- Only kill a generator if both are hiding on it and you have no other way to damage them.
- Max’s bombs hurt them too — bait them smartly.
Doppie & Dippy Duo
- Knock back Dippy just like the earlier version.
- Watch for Doppie’s slower, more telegraphed peck and dodge it.
- Manage both fronts calmly; don’t tunnel on one.
Plunderstorm Boss – Renegade Swabby
A fun Plunderstorm-themed fight:
- Searing Axe – don’t stand in front.
- Repel – don’t get bounced into the storm.
- At one stage, he protects himself using a tower — focus the tower down to stop his healing.
It’s more about handling mechanics than raw DPS.
Hard Mode – Overwatch Tribute Trio
A three-phase encounter based on Overwatch heroes:
Hudson (Winston)
- Interrupt Tesla Cannon; if you let it channel too long, it ramps quickly.
Dole Dastardly (McCree)
- His High Noon will end your run if you let it finish.
- You can stun or kill him before the cast completes.
- Barrier Projector can be interrupted; stunning here is ideal.
Soul Shrew (Junkrat)
- During Maniacal Laugh, avoid him and stay mobile.
- Movement and awareness beat this encounter.
This is arguably the hardest overall “normal” fight in the Brawler’s Guild and often where people slam into a wall if they’re undergeared.
Final Boss – Epicus Maximus
The last boss is a multi-character encounter sharing one HP pool:
- Dodge swirlies and ground effects.
- Interrupt Blue Crush — it’s the most dangerous cast.
- Keep moving to avoid the tracking laser.
- Use burst cooldowns and damage potions if you’re close to the timer.
Once Epicus Maximus goes down, you complete Rank 8 and unlock the full reward set.
If you’re also planning to push higher-end group content like Mythic+ and raids alongside Brawler’s Guild, bundling your goals with a Mythic+ Bundle and a Manaforge Omega Heroic/Normal Bundle is a very efficient way to keep both your solo and group progression moving at the same time.
Final Thoughts
The Brawler’s Guild in The War Within is a perfect mix of:
- Short, intense solo fights
- Mechanical skill checks
- Humorous bosses & references
- A very clear sense of progression (Rank 1 → Rank 8)
You don’t need cutting-edge gear to clear it, but a well-prepared character, good keybinds, and some practice on mechanics will make the journey much smoother.
If you want to focus more on the fun fights and less on grinding your way up:
- Use a TWW Leveling Boost to get characters ready.
- Secure consumables, enchants, and QoL gold with WoW Gold EU or WoW Gold US.
- Improve your overall PvP-style awareness and reaction timing with PvP Coaching.
- Sync your solo challenge goals with group progression via Mythic+ and Manaforge Omega raid bundles.