 ~5 MIN
Intro
There are good farms in Where Winds Meet, and then there are absurd farms — the kind you use immediately because the developers are almost guaranteed to nerf them once word spreads. This guide breaks down one of the strongest, fastest, and most repeatable farming methods currently in the game.
If you’re looking to speed up your progression by gathering region collectibles faster, unlocking weapons, or leveling your martial arts styles, you can also pair this strategy with services like Collectibles Farming or Weapon & Martial Arts Leveling to accelerate your build even further.
Let’s walk through exactly how this outpost farm works — step by step.
What Makes This Farm So Good?
This method lets you:
- Generate huge amounts of gold
- Farm upgrade materials, ointments, Echo J, money bags, and more
- Reset enemies instantly without using Outpost Energy
- Repeat the cycle infinitely
- Farm without triggering Outpost cooldowns
It’s easily one of the fastest ways to obtain materials for upgrading weapons or martial arts — especially when combined with power spikes from Weapons Unlock Boosts.
Requirements Before You Start
You need a few things unlocked to run this farm properly:
✔ Access to the Kayfang Region
Specifically, you must be able to enter and operate in the Kayfang outpost used for this method.
✔ Lightness Skill (Movement Skill) — Level 4 Kayfang
You must have the Flight Medallion unlocked and be able to use one of the following:
- Meteor Flight
- Thousand-Mile Flight
These let you vertically reset the outpost.
✔ Dragon’s Breath (Mystic Skill)
This is essential — it detonates the explosive barrel through walls.
✔ Construction Mode Unlocked
You only need the basics:
- Place floors
- Build walls
- Add ceilings
This is what traps the enemies and protects you from taking unnecessary damage when triggering the barrel.
If you’re still progressing through exploration or unlocking martial arts, you can fast-track your account with Hourly Driving to reach Kayfang much quicker.
Finding the Outpost Setup
The farm relies on a very specific setup:
- A barrel placed near 4–5 clustered enemies
- A safe spot from which you can trigger both skills
- A structure that forces enemies not to notice you
cMost players use the Kayfang outpost in the video, but the trick can be adapted to other locations if you find the right configuration.
Your goal:
Identify any outpost that has an explosive barrel surrounded by multiple enemies. Once you find it, you can copy this method exactly.
Clearing the Area (But Not Too Much)
Before the loop starts:
- Clear nearby enemies manually.
- Do NOT kill every enemy in the outpost.
Killing all 7 enemies triggers outpost completion
Outpost completion → cooldown prevents farming for 24 hours
Leave at least one enemy alive in another part of the outpost to avoid triggering the cooldown logic.
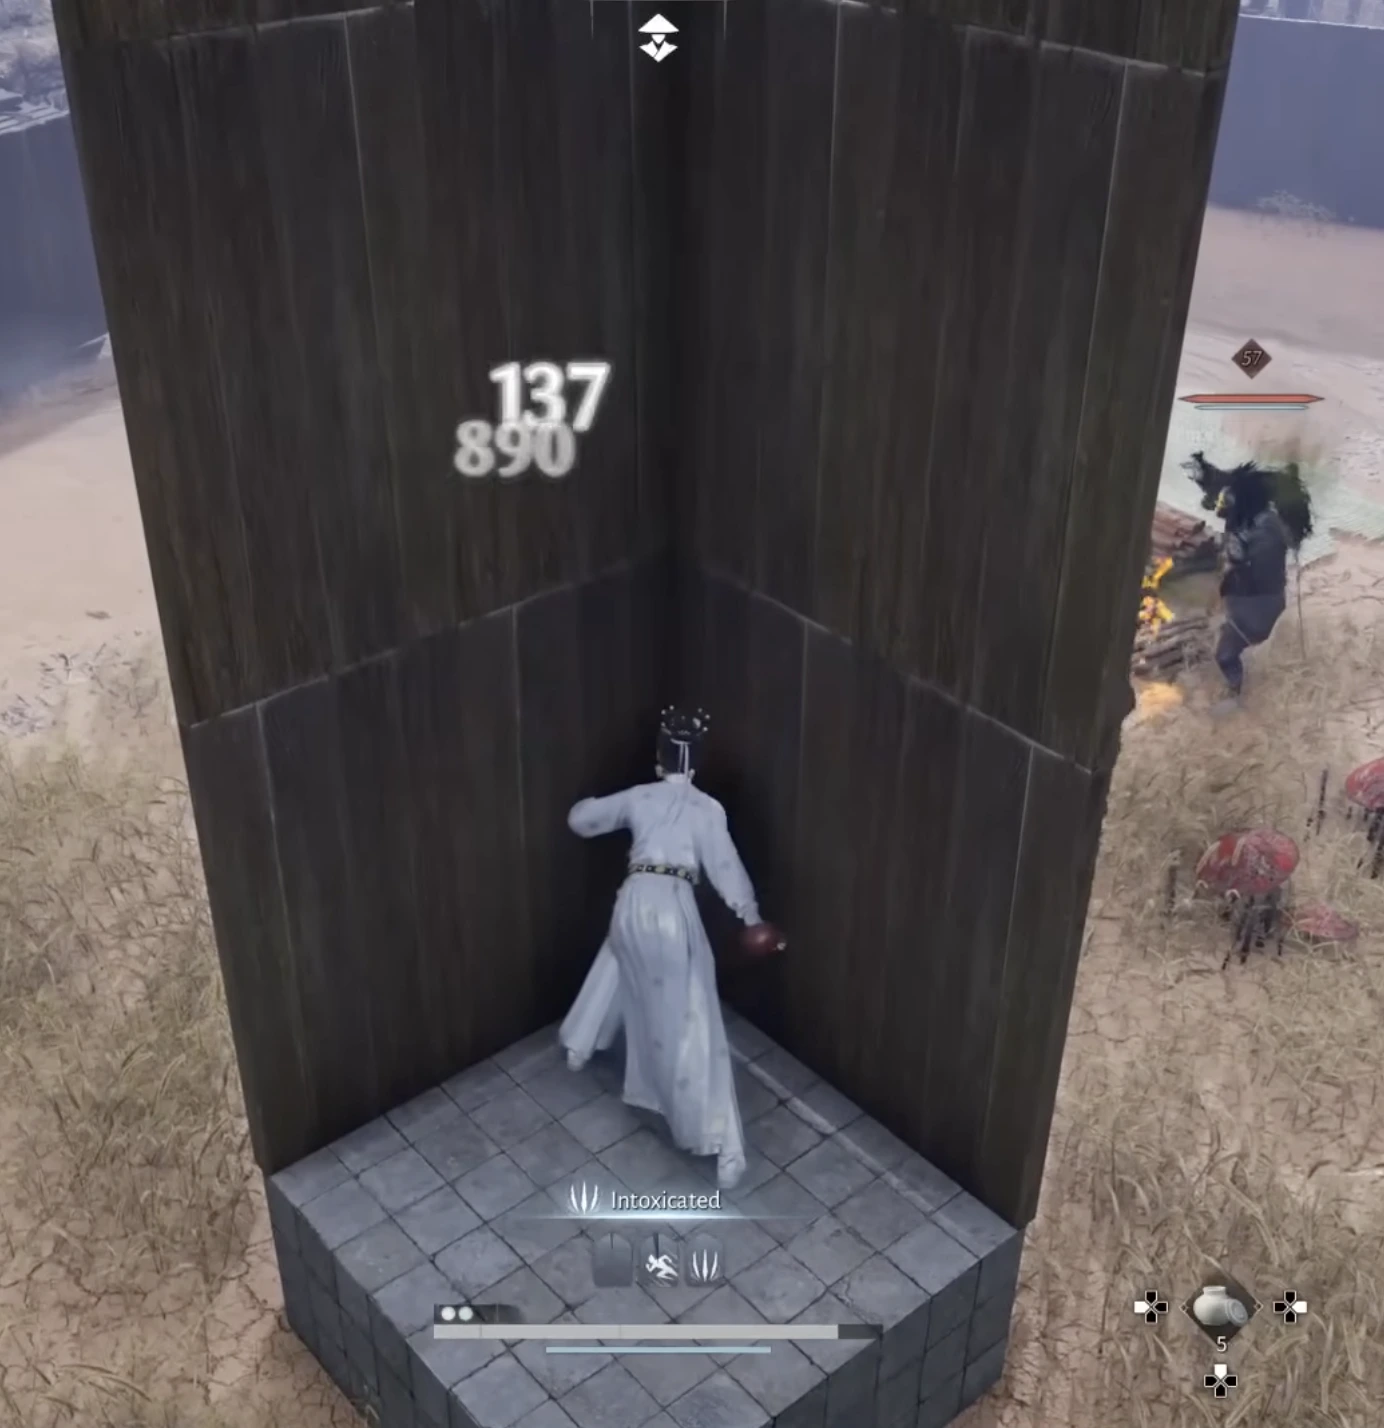
Building the Farming Structure
Now comes the setup:
Step-by-step construction
- Stand southwest of the target barrel.
- Place a stone slab floor far enough to avoid blast damage.
- Build two walls next to each other with no gaps.
- Build 26 more walls stacked upward (total 26–27 height, this gives you a consistent landing point when using your lightness skill.)
- Add a ceiling at the top to catch your character after the vertical leap.
- Block nearby doorways and patrol routes to stop guards from reaching you.
This isolates the area so enemies cannot see you — which means you can reset the outpost using your lightness skill even when enemies exist below.
How the Infinite Reset Loop Works
Here’s the magic:
1. Use your Lightness skill
Push up against your wall → rise into the ceiling → slam down.
This respawns all local enemies instantly.
2. Use Dragon’s Breath
Aim at the barrel → it explodes → kills all 4–5 enemies in one shot.
3. Loot everything
Upgrade mats, gold, ointments, Echo J, money bags, and more drop every cycle.
4. Repeat
Step back to the corner → use Lightness again → enemies respawn → Dragon’s Breath → loot → reset.
Each cycle takes roughly 5–8 seconds depending on your movement speed and looting pace.
This repeats infinitely without cost, without energy consumption, and without cooldowns.
If you’re also collecting regional sets or rare drops, you can combine this with Collectibles Farming to complete your region logs faster.
Tips for Maximum Efficiency
- Do not build too close to the barrel
Even behind walls, the AoE can chip your health if you’re too close. - Stand slightly further back when detonating
Prevents knockback and chip damage. - Make sure guards cannot see you
If any outpost guard detects you, you cannot use Lightness to reset enemies. - Your structure remains permanently
You can return anytime to resume the farm. - If you misplace a wall, rebuild — structure matters
Incorrect construction may cause enemies not to respawn properly.
This is one of those rare setups where precision pays off.
Why You Should Use This Before It’s Patched
This kind of farm doesn’t survive long in MMO-like environments. Anything that:
- Spawns enemies infinitely
- Avoids intended stamina/energy costs
- Generates gold & mats at extreme speed
…often gets nerfed quickly.
Use this method while it lasts — especially if you’re preparing to upgrade your martial arts, unlock hidden weapons, or stockpile gold for endgame builds. For faster account progression beyond farming, Weapons Unlock Boosts can help unlock additional combat paths.
Final Thoughts — Abuse It While You Can
This is easily one of the strongest farms in Where Winds Meet, giving players a reliable, infinite loop of gold and materials without any cooldown mechanic. Once your setup is built, you can farm for minutes or hours with nearly no downtime.
If you want to take this farm even further, you can combine it with:
- Collectibles Farming to finish regions faster
- Hourly Driving for account progress and exploration
- Weapon & Martial Arts Leveling for stronger builds
- Weapons Unlock Boost to expand your toolkit
Use this method early — odds are it won’t stay this strong forever.