

Content:
What Is Black Temple?
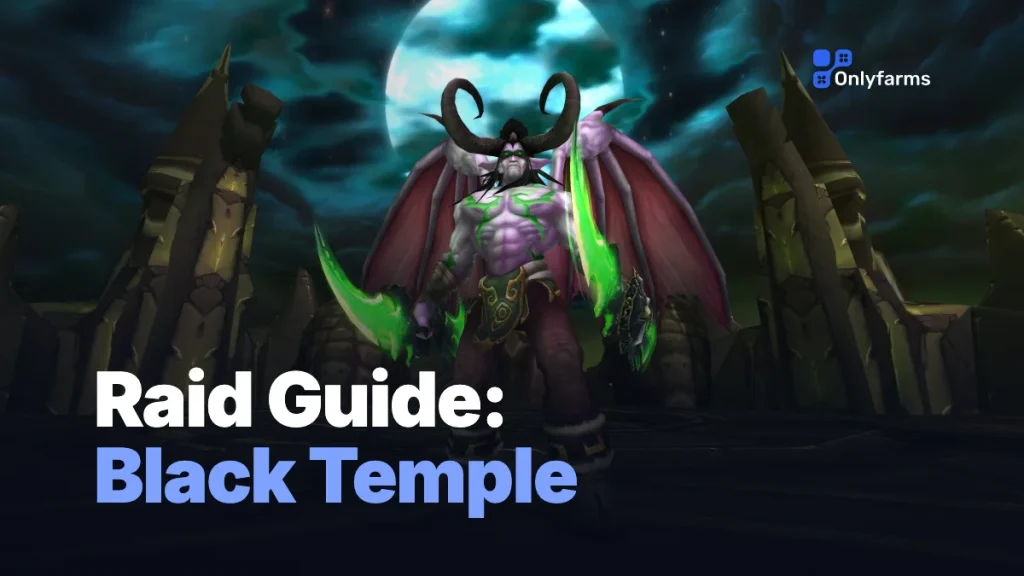
Illidan Stormrage‘s fortress is finally open for business, and if you’ve been grinding away on the TBC Anniversary realms waiting for the expansion’s signature raid, this is your moment. Black Temple is the flagship instance of Phase 3 — a sprawling, 25-player fortress buried in the twisted heart of Shadowmoon Valley, packed with nine bosses that culminate in a showdown with the Betrayer himself. It’s the raid the whole first half of TBC was quietly building toward, and clearing it is basically your victory lap for everything that came before.
What you’re walking into is a proper tier raid. The nine encounters run from a straightforward gear check at the front door all the way to one of the most demanding, multi-phase fights the game had shipped at that point. The difficulty curve is genuinely well designed: the opener tells you whether your raid is ready, the middle bosses each drill a specific skill into you, and the finale asks you to prove you learned every one of them at once. Loot sits in the ilvl 141 to 154 range for the bulk of the roster, with the final boss dropping higher rewards plus the legendary Warglaives that every melee player secretly (or not so secretly) wants. This is also your primary source of Tier 6, so basically every raiding main has a reason to be here week after week.
Here’s the quick version before we get into the weeds:
| Detail | Info |
|---|---|
| Location | Shadowmoon Valley (Outland) |
| Raid size | 25 players |
| Bosses | 9 (ending with Illidan Stormrage) |
| Item level | 141–154 (Illidan drops higher) |
| Player level | 70 |
| Content phase | TBC Classic Phase 3 |
| Attunement | Not required since 22 October 2026 (was account-wide) |
| Lockout | Weekly reset |
Note: As of 22 October 2026, The Black Temple and The Battle for Mount Hyjal no longer require attunement, so you can enter without the Akama questline. The same patch launches Zul’Aman, a 10-player level 70 raid in the Ghostlands with no attunement, and lets Badges of Justice drop from more raids.

Black Temple Release Date
Black Temple went live on August 27, 2026 at 3:00 PM PDT, dropping alongside the rest of the TBC Anniversary Phase 3 content. It didn’t arrive alone, either — the same patch flung open the doors to the Battle for Mount Hyjal, so you got two full raids to chew through on day one.
Phase 3 is a heavy content drop beyond just the raids. You’ve also got the Netherwing grind (yes, the drakes), Epic Gems entering the loot pool to push your gear optimization further, and Arena Season 3 kicking off for the PvP crowd. If you want the full breakdown of everything landing in this patch and how to prioritize it, check our companion Phase 3 Overview — it maps out the whole content wave so you know what to hit first.
The practical takeaway: don’t sleep on prep. Since 22 October 2026 the attunement is no longer required, so the only things between your raid and Naj’entus are gear, consumables and a full roster. Before that change, the attunement ran long enough that a guild that started early was often a full week of progression ahead of one that didn’t.
Where to Find Black Temple
Black Temple sits in eastern Shadowmoon Valley, the shadow-scorched zone in the far reaches of Outland. The raid entrance isn’t the grand front gate you might picture — you actually slip in through the Karabor Sewers, tucked along the western side of the temple complex. Point yourself toward roughly /way 71, 46 and look for the sewer entrance at the base of the structure.
Getting there the first time means flying out to Shadowmoon Valley, which can be a bit of a trek if your guild is staging from Shattrath City. The good news: if you completed the attunement chain, the Medallion of Karabor you earned during it doubles as a teleport straight to the instance, so you’re not repeating that flight every single week. It’s one of those quality-of-life rewards that made the long questline feel a lot more worth it.
If you’re the one organizing the raid, have everyone confirm they can reach the meeting stone before pull time. Nothing kills launch-night momentum like sitting around for ten minutes while two stragglers figure out where the sewer entrance actually is.
Black Temple Attunement
Let’s be upfront: until 22 October 2026 the Black Temple attunement was one of the longer chains in the game, and it is no longer required. You needed to be level 70, you’d bounce between Aldor and Scryer questgivers depending on your allegiance, and the chain dragged you back through Arcatraz, Serpentshrine Cavern, Tempest Keep, and Mount Hyjal. Several steps also required that you’d already completed the earlier raid attunements for those instances, which made this a genuine capstone piece of progression rather than a quick errand. The chain is kept below for reference.
The one huge mercy on the Anniversary realms: attunement was account-wide. You ground it once on your main and every character on the account got access. That single change took a lot of the sting out of the process compared to how it worked back in the original TBC.
Here’s the chain as it worked, start to finish:
- Pick up the opener from Anchorite Ceyla (Aldor) or Arcanist Thelis (Scryer) out in Shadowmoon Valley.
- Collect 12 Baa’ri Tablet Fragments and kill Oronu the Elder.
- Kill four named NPCs, then interrogate Sanoru at the Warden’s Cage.
- Defeat Zandras and speak with Akama, which opens up the Ashtongue Deathsworn questlines.
- Head into Arcatraz and find Seer Udalo.
- Grab a group of five, clear the Ata’mal Terrace, and kill Shadowlord Deathwail for the Heart of Fury.
- Return the Medallion of Karabor to A’dal in Shattrath City.
- Defeat Fathom-Lord Karathress in Serpentshrine Cavern, then speak with Seer Olum.
- Defeat Al’ar in The Eye while wearing the Ashtongue Cowl disguise.
- Defeat Rage Winterchill in the Battle for Mount Hyjal for the Time-Phased Phylactery.
- Finish the final Shadowmoon Valley questline — the Akama and Xi’ri event.
Because so many steps gated behind raid bosses, most guilds knocked the bulk of this out during Phase 2. With the requirement gone, nobody has to repeat it. If your roster is short on time — or you’ve got alts you want raid-ready — a professional attunement and carry service can take the grind off your plate so you show up ready to actually raid.
Black Temple Loot Overview
Black Temple is where your gear takes a serious jump. The bulk of the raid drops items in the ilvl 141 to 154 band, which is a clean step above what Serpentshrine Cavern and Tempest Keep were handing out. Every boss has a themed loot table, so there’s rarely a wasted kill for any given armor class — someone in your raid is walking away happy from almost every chest.
Two things make BT the loot destination of the phase. First, it’s the primary source of Tier 6: the Shoulder, Leg, and Chest tokens all live here (more on exactly who drops what further down). Second, Illidan himself drops higher-item-level rewards than the rest of the instance, headlined by the twin Warglaives of Azzinoth, the melee weapons that turn heads in any capital city. On top of that there’s a pile of off-set jewelry, trinkets, and weapons scattered across the roster that plenty of specs will chase for weeks.
If you’re trying to close a gear gap fast so you’re not the weak link on a Shahraz Shadow Resistance check or a Reliquary DPS race, a WoW gear boost can fast-track the pieces you’re missing before your guild’s first serious progression night.
High Warlord Naj'entus
High Warlord Naj’entus is the gatekeeper of Black Temple, and he’s exactly the kind of first boss you want — mechanically simple, but an honest gear and coordination check. If your raid can’t clean up Naj’entus in a reasonable number of pulls, that’s useful information about whether you’re ready for what’s deeper in the instance. He hits for a solid chunk (think 8,500 to 10,000 on the tank per swing at this gear level), so your healers need to be awake from the very first second.
Pull him with a Hunter Misdirection to lock threat onto the main tank immediately, and face the boss away from the raid. Melee should spread to roughly six yards apart so you’re not all bunched up eating the same splash. The signature mechanic is Impaling Spine: Naj’entus periodically impales a random player, pinning them in place and dealing damage over time. When that happens, someone needs to grab the Naj’entus Spine that drops on the ground and use it to free the impaled player before the damage stacks out of control.
Those spines do double duty. Every so often Naj’entus wraps himself in Tidal Shield, which halts your damage and, if left alone, unleashes a massive raid-wide nuke. To break the shield you throw the looted spines at him — so coordinate to keep a few spines banked and ready to pop the shield the moment it goes up. Fumble that and the pulse can wipe you outright. Rounding out his kit is Needle Spine, a chunk of raid damage your healers simply need to keep ahead of. The nice part: Naj’entus has no hard enrage, so there’s no burn timer breathing down your neck. Nail the spine management and this one folds quickly.
As a role note: your designated spine-runners — usually a couple of ranged players or an off-healer — should have the spine keybound and a clear callout in voice comms, because a slow reaction to a Tidal Shield is the single most common cause of a Naj’entus wipe. Everyone else just plays clean, avoids the frontal, and keeps the damage steady. There’s no real gear wall here beyond having enough throughput to break each shield in time, which is exactly why he makes such a clean readiness test for the rest of the instance.
| Item | Type / Slot |
|---|---|
| Ring of Calming Waves | Ring |
| Ring of Captured Storms | Ring |
| Slippers of the Seacaller | Cloth Feet |
| Guise of the Tidal Lurker | Leather Head |
| Mantle of Darkness | Leather Shoulder |
| Helm of Soothing Currents | Mail Head |
| Fists of Mukoa | Mail Hands |
| Boots of Oceanic Fury | Mail Feet |
| Eternium Shell Bracers | Plate Wrist |
| Pearl Inlaid Boots | Plate Feet |
| Tide-Stomper’s Greaves | Plate Feet |
| Rising Tide | 1H Axe |
| The Maelstrom’s Fury | Dagger |
| Halberd of Desolation | Polearm |
Supremus
Supremus is the big abyssal brute patrolling the courtyard past Naj’entus, and he’s your first real movement fight. He’s a two-tank encounter: one tank simply holds threat and eats his regular melee, while a second tank stands by to soak his Hateful Strike — a nasty hit that lands on whichever nearby target has the most current health, so your off-tank needs to stay topped up and in range to absorb it and spare the squishier melee.
Throughout the fight, Supremus spits out Molten Flame, laying down trails of fire across the ground. Don’t stand in them — simple rule, but the trails snake around and it’s easy to get lazy and clip one while you’re focused on your rotation. He also periodically shifts behavior. In his second phase he stops tanking normally and instead fixates on a random player, chasing them relentlessly at a fixed speed. Whoever gets fixated needs to kite him, keeping around 30 yards of distance and leading him in a wide loop while the rest of the raid keeps the damage flowing. During this phase he also drops Volcanic Geyser beneath players — these are essentially lethal, so watch your feet and move the instant you see one forming under you.
A couple of practical tips: have everyone carry a Master Healthstone for the geyser damage and general chip, and be careful not to let Supremus get parked against the pillars in the room. Bad positioning there can body-block your kiter and get people cornered with nowhere to run. Keep him moving through open space and this is a clean, satisfying kill.
One more thing worth knowing: the swaps between his tanking phase and his fixate phase run on a timer rather than a health percentage, so your kiter should always be pre-positioned near open ground before the switch. If your fixated player panics and bolts into a wall or a fire trail, that’s usually where things go wrong. Calm, wide loops win this fight, and a Master Healthstone plus a personal cooldown will comfortably cover the chip damage while the raid burns him down.
| Item | Type / Slot |
|---|---|
| Band of the Abyssal Lord | Ring |
| Choker of Endless Nightmares | Neck |
| Idol of the White Stag | Relic |
| Waistwrap of Infinity | Cloth Waist |
| Nether Shadow Tunic | Leather Chest |
| Naturalist’s Preserving Cinch | Mail Waist |
| Bands of the Coming Storm | Mail Wrist |
| Wraps of Precise Flight | Mail Wrist |
| Pauldrons of Abyssal Fury | Plate Shoulder |
| The Brutalizer | 1H Axe |
| Syphon of the Nathrezim | 1H Mace |
| Legionkiller | Crossbow |
| Felstone Bulwark | Shield |
Shade of Akama
Shade of Akama is widely considered the easiest boss in Black Temple, and it’s really more of an add-management event than a traditional boss fight. The encounter kicks off when your raid talks to Akama, which triggers waves of Ashtongue Channelers to spawn and begin channeling on the Shade. Your entire job in phase one is crowd control and target priority.
Prioritize burning the Ashtongue Channelers first, then the Sorcerers. Meanwhile, your tanks pick up the Defenders and hold them in the center, and your interrupters need to stay glued to the Elementalists, kicking their casts before they get dangerous. It sounds like a lot, but with assigned roles it settles into a rhythm quickly — the key is making sure nothing runs loose to free-cast on your healers. Sort the assignments before you start talking to Akama and this phase mostly runs itself.
Once the adds are handled, Akama breaks free and the Shade becomes attackable. Phase two is a roughly one-minute burn — just tunnel the Shade down. The one thing to respect: if Shadow of Death lands on you, run to a corner of the room before the debuff expires. When it ends you die and spawn a Vengeful Spirit, and you want that happening off in a corner rather than in the middle of your raid. Handle that one detail and Shade is basically a free chest.
Because it’s so forgiving, Shade is a great boss to farm early each lockout and an easy source of gear for alts and fresh level 70s you’re trying to bring up to raid standard. Just make sure your interrupt assignments are actually being honored — the only way this fight ever goes sideways is when the Elementalists get to free-cast and your healers start dropping under pressure they shouldn’t be feeling.
| Item | Type / Slot |
|---|---|
| Ring of Deceitful Intent | Ring |
| Amice of Brilliant Light | Cloth Shoulder |
| Focused Mana Bindings | Cloth Wrist |
| Kilt of Immortal Nature | Leather Legs |
| Shadow-Walker’s Cord | Leather Waist |
| Shoulders of the Hidden Predator | Mail Shoulder |
| Spiritwalker Gauntlets | Mail Hands |
| Flashfire Girdle | Mail Waist |
| Myrmidon’s Treads | Plate Feet |
| Grips of Silent Justice | Plate Hands |
| Praetorian’s Legguards | Plate Legs |
| The Seeker’s Wristguards | Plate Wrist |
| Blind-Seer’s Icon | Off-hand |
Teron Gorefiend
Teron Gorefiend is a single-phase DPS race with a twist that tests whether your raid can follow instructions under pressure. Before you even engage, clear out the Hand of Gorefiend trash around him — the last thing you want is adds crashing the party mid-fight.
The defining mechanic is Shadow of Death. Every 30 seconds Teron slaps it on a random player, and after 55 seconds that player dies, with no way to heal through it. Here’s the twist: dying to Shadow of Death isn’t game over — it is the mechanic. The moment you get the debuff, have someone Soulstone you so you’re not permanently down. When you die you become a Vengeful Spirit with a special action bar, and your job as a ghost is to kill the Shadowy Constructs that spawn near your body. Clear your constructs and you get resurrected via the Soulstone and rejoin the fight. Ignore them and they’ll rampage straight into your raid.
This is the part that wipes pugs: players who panic when they get the debuff, don’t use their ghost abilities, or fling their spirit attacks into the wrong targets. Assign your Soulstones ahead of time, make sure everyone actually knows the ghost rotation, and stay calm — it’s a scripted death, not a real one. On top of all that, keep an eye out for Incinerate and dispel it promptly. Manage the deaths cleanly and Teron goes down before his damage ever spirals.
Quick note for the ghost phase: your spirit gets a short, punchy ability set, and the fastest recoveries come from players who instantly target the nearest construct and burn it rather than fumbling through their new action bar. Casters and melee handle it exactly the same way, so a single practice pull to let everyone feel out the ghost controls pays for itself many times over. Treat it as a coordination fight, not a gear fight, and it clicks fast.
| Item | Type / Slot |
|---|---|
| Shadowmoon Destroyer’s Drape | Cloak |
| Totem of Ancestral Guidance | Relic |
| Cowl of Benevolence | Cloth Head |
| Robe of the Shadow Council | Cloth Chest |
| Botanist’s Gloves of Growth | Leather Hands |
| Insidious Bands | Leather Wrist |
| Softstep Boots of Tracking | Mail Feet |
| Gauntlets of Enforcement | Plate Hands |
| Girdle of Lordaeron’s Fallen | Plate Waist |
| Soul Cleaver | 2H Axe |
| Rifle of the Stoic Guardian | Gun |
| Twisted Blades of Zarak | Thrown |
Gurtogg Bloodboil
Gurtogg Bloodboil is a healing and threat check dressed up as a big fel orc. The fight alternates between two phases, and getting your raid positioning right for each is what separates a smooth kill from a frustrating string of wipes.
During the normal phase, Gurtogg casts Bloodboil, which hits the players closest to him. To spread that damage out, split your ranged and healers into three groups of roughly five people each and rotate which group is nearest — that way no single set of players eats every Bloodboil back to back, and your healers can actually keep up. Assign those groups before you pull and have people practice rotating in on the first attempt, because scrambling to sort it live is how you lose pulls.
The second phase is where it gets spicy. Gurtogg casts Fel Rage on a random player, and while it’s active he fixates entirely on that person and hits like a truck. Your healers need to funnel everything into keeping the Fel Rage target alive — this is the make-or-break moment of the fight, and one missed cooldown here is a dead player. Helpfully, the same phase brings Insignificance, which grants the raid a window of threat immunity, so your DPS can unload without yanking aggro. Nail the group rotations and the Fel Rage heals, and Gurtogg becomes very manageable.
Be aware that Gurtogg is a fairly long fight for what it is, so mana management on your healers matters — don’t blow every cooldown in the first phase. Pace yourselves through the Bloodboil rotations and save your big external cooldowns for the Fel Rage windows, where a single well-timed guardian ability can rescue a target that would otherwise be a guaranteed death. Steady, patient healing beats a panicky burst approach here every time.
| Item | Type / Slot |
|---|---|
| Unstoppable Aggressor’s Ring | Ring |
| Shroud of Forgiveness | Cloak |
| Blood-Cursed Shoulderpads | Cloth Shoulder |
| Garments of Temperance | Cloth Chest |
| Belt of Primal Majesty | Leather Waist |
| Vest of Mounting Assault | Mail Chest |
| Leggings of Divine Retribution | Plate Legs |
| Girdle of Mighty Resolve | Plate Waist |
| Girdle of Stability | Plate Waist |
| Messenger of Fate | Dagger |
| Staff of Immaculate Recovery | Staff |
| Wand of Prismatic Focus | Wand |
| Shadowmoon Insignia | Trinket |
Reliquary of Souls
The Reliquary of Souls is a three-in-one fight — a single encounter broken into three consecutive essence phases, each with its own personality and its own way to kill you. There’s a short breather between phases, but no full reset, so your raid’s endurance and adaptability both get tested here.
Phase 1 — Essence of Suffering. The first essence shuts off healing almost entirely, which means you tank it with an avoidance tank: someone stacked on dodge and parry who can survive without heals landing. The key mechanic is Soul Drain, which you need to dispel promptly. Since healing is basically off the table, this phase lives or dies on your tank’s mitigation and your dispellers being on the ball.
Phase 2 — Essence of Desire. Now healing comes back, but the Essence of Desire punishes self-damage — mechanics reflect harm back onto the raid, so people need to stop hurting themselves and play clean. This phase is more about discipline and awareness than raw output; the players who overpull threat or stand in things are the ones who cause problems.
Phase 3 — Essence of Anger. The Essence of Anger is the hardest stretch and a genuine DPS race. Your off-tank needs to be ready to taunt on cue to manage its aggro swaps, and the whole raid has to push damage while staying alive. The saving grace across the whole encounter is the Enslaved Souls — killing them gives your raid a heal break, a brief window to top everyone off before the pressure resumes. Use those windows well and you’ll grind the Reliquary down phase by phase.
It’s a fan-favorite encounter for good reason: three genuinely distinct mini-fights back to back, each rewarding a different part of your raid’s skill set. If your group can stay composed through the healing-off opener and then flip into a disciplined, high-output finish on the Essence of Anger, you’ve basically proven you’re ready for the back half of the instance. Keep your dispellers assigned and your off-tank alert to the taunt timings, and the Reliquary rewards clean play more than raw gear.
| Item | Type / Slot |
|---|---|
| Translucent Spellthread Necklace | Neck |
| Gloves of Unfailing Faith | Cloth Hands |
| Grips of Damnation | Leather Hands |
| The Wavemender’s Mantle | Mail Shoulder |
| Dreadboots of the Legion | Plate Feet |
| Crown of Empowered Fate | Plate Head |
| Naaru-Blessed Life Rod | Wand |
| Touch of Inspiration | Off-hand |
| Torch of the Damned | 2H Mace |
Mother Shahraz
Mother Shahraz is the raid’s big Shadow Resistance check, and it’s the fight that sends unprepared guilds straight back to the auction house. You want your raid sitting around 244 total Shadow Resistance — roughly 174 from gear plus another 70 from Shadow Protection buffs (Priest aura, potions, whatever you can stack). Skimp on this and her damage will simply overwhelm your healers no matter how good they are.
Shahraz is a three-tank fight because of Saber Lash, an attack that splits its damage among nearby tanks — you need three of them stacked to share the hit, or a single tank just gets deleted. Beyond that, the fight is a movement and awareness dance. Avoid Silencing Shriek, which will lock out your casters at the worst possible times, and watch for the rotating Beams she fires across the room. Each beam applies a different debuff, so you’re constantly repositioning to slide out of them.
The signature mechanic is Fatal Attraction, which teleports three random players together and punishes them for being near each other — the instant you’re ported, sprint apart in different directions or you’ll melt. She also cycles Prismatic Shield, rotating which magic school she resists, which matters for your casters’ output and target-swapping. Finally, she enrages at 10%, so your raid needs enough throughput to close out that last chunk quickly. Bring the resistance gear, keep moving, and separate fast on Fatal Attraction — that’s the whole fight in a sentence.
On building the resist set: most of your Shadow Resistance comes from crafted and dungeon pieces plus a resistance enchant or two, and you only need to reach the threshold, not overcap it — every point past the cap is just wasted stats you could have spent on throughput. Assemble the set during the week, keep it stashed in your bags, and swap it in only for this pull so you’re not dragging dead stats onto every other boss in the instance.
| Item | Type / Slot |
|---|---|
| Pauldrons of the Forgotten Conqueror | Tier 6 Shoulder (Token) |
| Pauldrons of the Forgotten Vanquisher | Tier 6 Shoulder (Token) |
| Pauldrons of the Forgotten Protector | Tier 6 Shoulder (Token) |
| Nadina’s Pendant of Purity | Neck |
| Tome of the Lightbringer | Relic |
| Leggings of Devastation | Cloth Legs |
| Shadowmaster’s Boots | Leather Feet |
| Blade of Savagery | 1H Sword |
| Heartshatter Breastplate | Plate Chest |
The Illidari Council
The Illidari Council is the most coordination-heavy fight in Black Temple before Illidan himself. It’s four bosses — Gathios the Shatterer, High Nethermancer Zerevor, Veras Darkshadow, and Lady Malande — who share health in the sense that they have to die within moments of each other, but each runs independent mechanics you have to juggle at the same time. Everybody in the raid has a job here, and one person sleeping at the wheel can unravel the whole thing.
Gathios the Shatterer is a paladin-type. Tank him away from the rest of the raid and, crucially, out of his Consecration — that ground AoE chews up anyone standing in it. High Nethermancer Zerevor is best handled by a mage-tank: a mage can Spellsteal his Dampen Magic and generally manage him, and everyone needs to dodge his Arcane Explosion. Veras Darkshadow is a rogue who periodically Vanishes — his tank has to be ready to re-establish threat the instant he reappears, or he’ll gut a clothie. Lady Malande is the group’s healer, and her Circle of Healing must be interrupted or she’ll erase your progress; if your interrupt rotation slips, fall back on Mind-Numbing Poison or Curse of Tongues to slow her casts.
Because threat is split across four targets, Misdirection management matters a lot here. The standard priority for your Hunter’s Misdirects is Zerevor > Malande > Gathios > Veras, keeping the most threat-sensitive targets locked down early. Get your tank assignments, interrupt rotation, and Misdirect priority sorted before you pull, and the Council turns into a matter of execution rather than pure chaos.
When it’s time to finish, remember the goal is to bring all four down close together. If one dies far ahead of the others, the survivors ramp up and can overwhelm a raid that let its guard down, so coordinate a soft kill order and push the last member hard the instant the rest are low. This is the fight where clear leadership and voice callouts earn their keep more than on any boss before Illidan.
| Item | Type / Slot |
|---|---|
| Leggings of the Forgotten Conqueror | Tier 6 Legs (Token) |
| Leggings of the Forgotten Vanquisher | Tier 6 Legs (Token) |
| Leggings of the Forgotten Protector | Tier 6 Legs (Token) |
| Cloak of the Illidari Council | Cloak |
| Belt of Divine Guidance | Cloth Waist |
| Forest Prowler’s Helm | Mail Head |
| Helm of the Illidari Shatterer | Plate Head |
| Madness of the Betrayer | Trinket |
| Veil of Turning Leaves | Leather Shoulder |
Illidan Stormrage
Illidan Stormrage, the Betrayer himself, is the final boss of Black Temple and one of the most iconic encounters TBC ever shipped. This is a five-phase marathon that demands three or more tanks — including two with Fire Resistance gear for the flame phase — and it will ruthlessly expose any weak link in your raid. If your guild has been counting down to one fight all expansion, this is it.
Phase 1. Straight tank-and-spank with one wrinkle: Parasitic Shadowfiend, a debuff that jumps between nearby players and spawns adds. Spread out enough that it doesn’t chain through your whole raid, and clean up the little parasites as they appear.
Phase 2 — the Flames. At 65% health, Illidan takes to the air and hurls his Warglaives to the ground, each spawning a Flame of Azzinoth. This is where your two Fire Resistance tanks earn their keep, each grabbing one Flame. The absolute, non-negotiable rule: keep each tank within 25 yards of their Flame at all times. Stray too far and the Flame casts Uncaged Wrath, a raid-wiping nuke. Kill both Flames and Illidan lands to resume the fight.
Phase 3. Back on the ground, Illidan adds Agonizing Flames to his kit — a spreading fire mechanic, so your raid needs to stay spaced out to avoid chaining it through the group. Otherwise you’re pushing damage and holding threat as before.
Phase 4 — Demon Form. Around a minute into phase three, Illidan shifts into his Demon Form for roughly 60 seconds. Now you need a Shadow Resistance tank on him, and the whole raid must stay at least 20 yards away to avoid Shadow Blast, which splashes brutal damage around its target. During this phase he also spawns Shadow Demons that will lock down and kill players if ignored — assign a dedicated group to kill the Shadow Demons the instant they appear.
Phase 5. At 30% health, Maiev Shadowsong shows up to help and starts dropping Cage Traps on the ground. Here’s the clutch play: if you can walk Illidan onto a Cage Trap right as he’s about to transform, you skip a Demon Form phase entirely — a huge damage and safety swing in your favor. From here it’s a straight race to the finish, because Illidan has a 25-minute hard enrage. If you’re still fighting him at that mark, the fight is over, and it isn’t ending in your favor.
Illidan is the culmination of everything Black Temple spent eight bosses teaching you — resistance gear, tank swaps, add control, spacing, and raw execution under a timer. When he finally drops and those Warglaives hit the loot window, you’ll understand exactly why this fight is remembered the way it is.
| Item | Type / Slot |
|---|---|
| Chestguard of the Forgotten Conqueror | Tier 6 Chest (Token) |
| Chestguard of the Forgotten Vanquisher | Tier 6 Chest (Token) |
| Chestguard of the Forgotten Protector | Tier 6 Chest (Token) |
| Warglaive of Azzinoth (Main Hand) | 1H Sword |
| Warglaive of Azzinoth (Off Hand) | 1H Sword |
| Shard of Azzinoth | Dagger |
| Crystal Spire of Karabor | 1H Mace |
| Zhar’doom, Greatstaff of the Devourer | Staff |
| Shroud of the Highborne | Cloak |
| Stormrage Signet Ring | Ring |
| Cowl of the Illidari High Lord | Cloth Head |
| Cursed Vision of Sargeras | Leather Head |
| Faceplate of the Impenetrable | Plate Head |
| Black Bow of the Betrayer | Bow |
| Bulwark of Azzinoth | Shield |
| Memento of Tyrande | Trinket |
| The Skull of Gul’dan | Trinket |
Tier 6 Sets in Black Temple
Black Temple is the backbone of your Tier 6 set, dropping three of the five slots. Here’s who hands out what:
- Shoulders — Mother Shahraz
- Legs — The Illidari Council
- Chest — Illidan Stormrage
The remaining two T6 slots, Head and Gloves, come from the Battle for Mount Hyjal — yet another reason to run both Phase 3 raids if you want your set completed.
Like all TBC tier gear, these drop as class-grouped tokens rather than finished armor pieces. There are three token groups, each shared by three classes:
| Token | Classes |
|---|---|
| Forgotten Protector | Warrior, Hunter, Shaman |
| Forgotten Vanquisher | Rogue, Mage, Druid |
| Forgotten Conqueror | Paladin, Priest, Warlock |
Once you’ve got the token, you turn it in to Tydormu, who hangs out near the Hyjal Summit raid entrance, to receive the actual set piece for your class and spec. The Tier 6 set bonuses are a meaningful DPS and survivability upgrade, so getting your two- and four-piece online is a real progression goal worth steering your loot rolls around.
Black Temple Trash Loot
Don’t tune out during the trash pulls — Black Temple’s trash mobs drop a handful of genuinely good items, including several rings and a couple of pieces that some specs will run as best-in-slot. Keep an eye out for these:
| Item | Type / Slot |
|---|---|
| Band of Devastation | Ring |
| Ring of Ancient Knowledge | Ring |
| Blessed Band of Karabor | Ring |
| Girdle of the Lightbearer | Plate Waist |
| Pillager’s Gauntlets | Plate Hands |
| Treads of the Den Mother | Leather Feet |
| Illidari Runeshield | Shield |
| Shroud of the Final Stand | Cloak |
How to Prepare for Black Temple
Showing up to Black Temple ready means handling a few things before your raid night, not scrambling during it.
No attunement needed. As covered above, the attunement chain was long and gated behind other raids, but since 22 October 2026 it is no longer required. Your number-one priority is a full roster and the gear to get through the door.
Shadow Resistance for Shahraz. This is the prep item people forget until they wipe. Mother Shahraz demands roughly 244 total Shadow Resistance per player — around 174 from gear plus 70 from Shadow Protection. Build that resistance set ahead of time, because farming those pieces mid-progression is a miserable way to stall your raid for a week. A couple of your tanks will also want a Fire Resistance set (for Illidan’s Flames) and a Shadow Resistance set (for Demon Form), so coordinate that with your tank crew early rather than discovering the gap on pull night.
Consumables. Standard raid loadout: flasks or the right battle and guardian elixirs for your role, food buffs, weapon oils or sharpening stones, and healthstones plus mana potions. On the tougher fights, the difference between a wipe at 3% and a clean kill is often just whether everyone actually remembered to pop their consumables.
Roster and roles. Black Temple leans on having enough tanks — you’ll want at least three or four capable bodies for Shahraz and Illidan — a couple of reliable interrupters for the Council, and Hunters for Misdirection across several fights. Build your raid with those roles in mind rather than just stacking your highest parsers, and the whole instance gets noticeably smoother. A balanced comp with the right utility beats a glass-cannon roster that can’t cover the mechanics.
If your gear isn’t quite where it needs to be for the resistance checks and DPS races — or you’d rather skip the grind and get raid-ready fast — a WoW Classic Anniversary boost can close the gap on gear and gold for consumables so you walk in prepared instead of playing catch-up.
Black Temple FAQ
What is Black Temple?
Black Temple is the flagship 25-player raid of TBC Classic Phase 3, located in Shadowmoon Valley. It features nine bosses and ends with a showdown against Illidan Stormrage, and it’s the primary source of Tier 6 gear.
When does Black Temple release?
It launched on August 27, 2026 at 3:00 PM PDT alongside the rest of Phase 3, which also opened the Battle for Mount Hyjal, Netherwing, Epic Gems, and Arena Season 3.
Where is Black Temple located?
In eastern Shadowmoon Valley, entered through the Karabor Sewers at roughly /way 71, 46. If you completed the attunement chain, your Medallion of Karabor teleports you straight to the entrance.
How many bosses does Black Temple have?
Nine: High Warlord Naj’entus, Supremus, Shade of Akama, Teron Gorefiend, Gurtogg Bloodboil, Reliquary of Souls, Mother Shahraz, the Illidari Council, and Illidan Stormrage.
How long is the Black Temple attunement?
It is no longer required: since 22 October 2026 the Black Temple needs no attunement. Before that it was one of the longer chains in the game — eleven major steps that sent you through Arcatraz, Serpentshrine Cavern, Tempest Keep, and Mount Hyjal, and it required those raids’ own attunements. On the Anniversary realms it was account-wide, so you only ground it once per account.
What loot does Black Temple drop?
Gear in the ilvl 141–154 range across the roster, with Illidan dropping higher-item-level rewards plus the legendary Warglaives of Azzinoth. It’s also the main source of Tier 6.
Which Tier 6 pieces come from Black Temple?
Three of the five: Shoulders (Mother Shahraz), Legs (the Illidari Council), and Chest (Illidan). The Head and Gloves tokens come from the Battle for Mount Hyjal.
Final Thoughts
Black Temple is the payoff TBC has been building toward — a long, dramatic instance that asks your raid to bring resistance gear, tight tank coordination, clean add control, and the discipline to execute mechanics under real pressure. The difficulty curve is genuinely well designed: Naj’entus tells you whether you’re ready, the middle bosses each teach a specific skill, and Illidan asks you to prove you learned all of them at once.
Take it boss by boss. Build those resistance sets before you actually need them, and don’t be shy about assigning roles ahead of the pull — the fights that look chaotic (Teron, the Council, Illidan) are almost always just an assignments problem in disguise. Do that, and you’ll be watching those Warglaives drop before you know it.
Good luck in the temple. The Betrayer’s waiting.